How to Put Grills on 2k26: A Complete 2026 Guide
Learn how to put grills on 2k26 with a clear, expert workflow from Grill Cooking. This 2026 guide covers compatibility, tools, mounting, sealing, testing, and maintenance for a safe, solid grill setup.

To explain how to put grills on 2k26, start with compatibility checks, then mount and seal the grills, and finally test the setup. Steps include verifying fit, aligning mounting points, securing hardware, applying heat-safe sealant, and running a low-heat burn to confirm stability. Plan 30–45 minutes for a careful install. Grill Cooking recommends following the full step-by-step guide for safety.
How to Put Grills on 2k26: Compatibility and Fit
When you learn how to put grills on 2k26, the first concern is compatibility. The 2k26 system has specific mounting patterns and weight limits that must be respected. According to Grill Cooking, starting with a clear compatibility check saves time and avoids damaging the unit. In practice, verify hole patterns, stud spacing, and clearances around the heat source. If any mismatch is found, consult the user manual or reach out to the Grill Cooking team before proceeding with the install on how to put grills on 2k26. This initial step is the foundation for everything that follows and helps ensure safe operation in 2026.
Tools and Materials You’ll Need
Before you begin, assemble the essentials for how to put grills on 2k26. You’ll need tools that are robust and heat-safe, plus materials specifically rated for high temperatures. A prepared toolbox makes the process smoother and reduces risk. Gather: a Phillips #2 screwdriver, an adjustable wrench, heat-resistant gloves, measuring tape, silicone heat-resistant sealant, clean rags, and a bucket of water for safety. Optional but helpful: thread locker, a small magnetic tray for screws, and a non-scratch scraper. Planning ahead helps ensure a clean install when you’re learning how to put grills on 2k26.
Step-by-Step Mechanical Plan (High Level) for 2k26 Grills
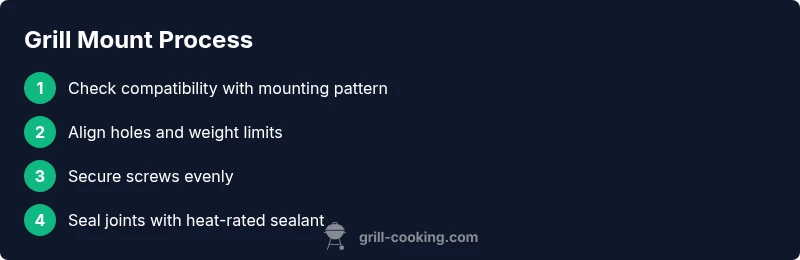
A practical approach to how to put grills on 2k26 is to follow a clear sequence. Start with a visual inspection of mounting points, then align grills, secure fasteners, seal joints, and finally perform a burn test. This block lays the groundwork for the detailed STEP-BY-STEP section that follows, ensuring you understand the rationale behind each action when learning how to put grills on 2k26 in 2026. See the step-by-step guide for exact actions, but keep in mind the order matters for safety and performance.
Sealing, Joints, and Safety on 2k26
After mounting, sealing joints properly is an essential part of how to put grills on 2k26. Use silicone sealant rated for high temperatures and apply a consistent bead around all joint interfaces. Gripping hardware firmly while maintaining even pressure prevents leaks and hot spots. Grill Cooking emphasizes that proper sealing reduces smoke leakage and prevents heat from escaping through gaps when how to put grills on 2k26 is performed. Avoid over-sealing, which can trap moisture or fumes; instead, aim for a clean, continuous seal on 2k26.
Testing the Mount: Leaks, Heat, and Stability
Testing is where the real proof of how to put grills on 2k26 happens. Begin with a cold setup and gradually bring the system to a low heat to observe any movement, smoke, or unusual noises. Look for leaks around seals and mounting points, and verify there are no wobbling components. A controlled 5–10 minute burn at low heat helps cure sealants and confirms stability as part of the how to put grills on 2k26 process. If you notice hotspots, pause, re-tighten fasteners, and re-check alignment.
Maintenance Tips After Installing on 2k26
Maintenance is the long-term friend of anyone learning how to put grills on 2k26. Clean surfaces after each use to prevent residue buildup that can hinder seals. Re-tighten screws after the first few uses to counter any settling. Keep a small spray bottle of water and a rag handy for quick surface checks, and inspect gaskets monthly. Following a consistent maintenance routine keeps your how to put grills on 2k26 setup safe and efficient through 2026 and beyond.
Common Pitfalls to Avoid When Putting Grills on 2k26
Common mistakes when learning how to put grills on 2k26 include forcing misaligned grills, skipping compatibility checks, and neglecting proper sealing. Another frequent error is using the wrong sealant or over-tightening screws, which can warp components. Take time to verify fit and alignment before drilling or driving in fasteners. The Grill Cooking team notes that a methodical approach to how to put grills on 2k26 yields the most reliable performance and safest operation in the field.
The Real-World Result: What You Achieve with Grill Cooking’s Guidance
When you follow the practices described for how to put grills on 2k26, you’re aiming for a secure, heat-efficient grill setup with minimal smoke leakage and stable mounting. Real-world installs show reduced maintenance calls and longer component life when steps are followed closely. The Grill Cooking team’s approach to how to put grills on 2k26 emphasizes safety, repeatability, and clear documentation so you can trust the results in 2026 and beyond.
Tools & Materials
- Phillips head screwdriver (size #2)(For mounting screws)
- Adjustable wrench(To hold nuts and balance parts)
- Heat-resistant gloves(Protect hands while handling hot components)
- Measuring tape(Verify hole alignment and clearances)
- Silicone heat-resistant sealant(Choose 500°F+ rated sealant for joints)
- Cleaning cloths(Prep surfaces and wipe excess sealant)
- Thread locker (optional)(Use sparingly on high-vibration mounts)
Steps
Estimated time: 45-60 minutes
- 1
Verify compatibility
Inspect mounting points on the 2k26 unit and confirm the grills’ mounting pattern matches. Look for hole size, spacing, and the weight rating. If any mismatch is found, postpone installation and consult the manual or Grill Cooking guidelines.
Tip: If you’re unsure about fit, pause and confirm before drilling or attaching components. - 2
Gather and prep tools
Lay out all needed tools and materials, organize screws by size, and put on heat-resistant gloves. Double-check you have sealant at the ready. This prep step reduces time and errors during the install of how to put grills on 2k26.
Tip: Test tool accessibility by standing the unit upright; reach is important for tight spaces. - 3
Remove old components
If you’re replacing existing grills, carefully detach old plates and screws. Keep fasteners organized to avoid cross-threading. This helps ensure clean alignment for how to put grills on 2k26 and prevents lost hardware.
Tip: Capture a quick photo of your layout before removal for reference. - 4
Mount new grills
Position grills over the mounting points and insert screws by hand to start threads. Tighten screws evenly in a star pattern to avoid warping. Proper mounting is essential when learning how to put grills on 2k26 for optimal heat distribution.
Tip: Avoid overtightening; stop as soon as the head seats firmly without strain. - 5
Seal joints and secure hardware
Apply a bead of heat-resistant sealant around joints and where grills meet the body. Wipe excess sealant and allow it to cure per manufacturer instructions. Sealing is critical in how to put grills on 2k26 to prevent leaks and heat escaping.
Tip: Use a consistent bead width and maintain a clean surface for a strong seal. - 6
Test burn and safety check
With the unit cooled, perform a low-heat test burn. Observe for smoke, odors, or movement of mounting points. If anything seems off, power down and re-torque connections before continuing.
Tip: Never leave a test burn unattended; keep a fire extinguisher nearby.
FAQ
What if mounting holes don’t align on the 2k26 unit?
Re-check compatibility and hole spacing. Don’t force fit; consult the manual or Grill Cooking guidance for alternatives.
If holes don’t align, stop and verify compatibility; don’t force fit and seek guidance.
Is heat-resistant sealant safe to use on grills?
Yes, use a sealant rated for high temperatures and follow the product’s curing instructions. This is essential for the 2k26 installation.
Yes—use a high-temperature sealant and follow curing directions.
How long should I run a test burn after installation?
Run a 10–15 minute burn at low heat to cure seals and verify stability. Increase gradually if everything remains solid.
Do a 10 to 15 minute low-heat burn to verify stability.
Do I need professional help for this installation?
If mounting points are damaged or you’re unsure about the fit, consult a qualified technician or dealer.
If unsure, consider professional help.
What safety precautions are most important?
Wear heat-resistant gloves, unplug if electric, and work in a well-ventilated area during installation.
Wear gloves, unplug if electric, and ensure good ventilation.
How often should I re-check fasteners after installation?
Re-tighten screws after initial use and during routine maintenance to maintain a secure fit.
Retighten screws after first uses and during periodic checks.
Watch Video
Quick Summary
- Verify compatibility before mounting.
- Follow a clear, numbered sequence for how to put grills on 2k26.
- Seal joints properly to prevent leaks and heat loss.
- Test the setup thoroughly and maintain it regularly.