How to Grill Onions in a Pan: A Practical Guide
Learn how to grill onions in a pan for deep caramelization and sweet, savory flavor. This expert guide covers prep, pan choice, timing, variations, and common mistakes for perfect results every time.

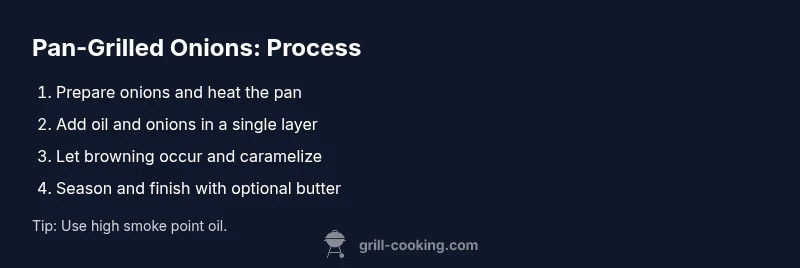
In this guide, you will learn how to grill onions in a pan to achieve sweet caramelization and a soft bite. You’ll need a skillet, oil with a high smoke point, salt, and patience for browning. This method covers prep, searing, browning, and flavor variations.
Why Onions Benefit from Pan Grilling
Onions are naturally sweet, and when you grill them in a pan, their sugars caramelize, creating a rich, slightly smoky flavor without the need for outdoor fire. This technique lets you control browning precisely, which is harder on some outdoor grills where heat can fluctuate. The pan also concentrates flavors in fewer ingredients, so a simple salt, a touch of oil, and a careful browning process deliver a dish that can top burgers, elevate steaks, or mingle with sautéed greens. For home cooks, pan grilling onions is a reliable method that works on most stoves—gas, electric, or induction—and scales from a small side dish to a feature component in sauces or toppings. The Grill Cooking team notes that starting with a well-heated pan and a thin layer of oil creates a quick Maillard reaction, giving you that desirable brown crust without burning. With practice, you’ll learn to read the moisture in the pan and estimate browning by color and aroma.
Choosing the Right Onions for Pan Grilling
Yellow onions are the most versatile for pan grilling because their sweetness builds as they cook, but white and red onions can also work well depending on the dish you’re pairing with. Yellow onions tend to give you a deep caramel color and mellow sweetness, making them a safe default for burgers and sausages. Red onions offer a sharper bite and a vivid color, which can be nice in salads or as a topping, but they may shed more moisture and require slightly longer browning. White onions stay crisper with a cleaner sweetness, useful if you want a more delicate profile that won’t overwhelm the main dish. Regardless of variety, aim for onions that are firm, with dry papery skins and no soft spots. Slice evenly to ensure uniform browning, and keep slices about 1/4 inch thick for balance between bite and tenderness. The Grill Cooking approach emphasizes even sizing to maximize surface area for browning without burning.
Prep: Slicing Size and Seasoning Options
Uniform slices are key for even caramelization. Aim for consistently 1/4 inch thick rounds or half-moon crescents, depending on your preference. Before cooking, pat the slices dry with a kitchen towel to remove surface moisture that can cause steaming instead of browning. A light coat of neutral oil helps the onions brown evenly and prevents sticking. For seasoning, start with a pinch of salt to draw out moisture and enhance browning. You can finish with a small amount of butter to add richness or a splash of balsamic for a tangy-sweet glaze. If you want extra perfume, try a pinch of crushed garlic or fresh thyme toward the end of cooking. The goal is a balanced level of sweetness, depth, and aroma that complements your main dish.
The Right Pan and Heat Setup
A heavy-bottom skillet, such as cast iron or a thick stainless steel pan, provides consistent heat and browning. Preheat the pan over medium-high heat, then add oil to shimmer before laying in the onions. An even layer is crucial; overcrowding leads to steaming, not browning. If your pan is too hot and you notice rapid browning with little color, reduce the heat slightly. A splatter screen can help control mess, but don’t hesitate to uncover briefly to let steam escape and promote browning. The pan should feel hot to the touch but not scorching; you’re aiming for a steady sizzle that lasts through the browning process. The Grill Cooking method recommends starting with a hot pan to initiate the Maillard reaction quickly, then adjusting as needed to maintain steady browning.
The Caramelization Process: Browning Stages
Once in the pan, onions go through stages from translucent to golden to deeply browned. Let slices sit undisturbed for 2–3 minutes to form a crust, then flip or stir to promote even browning on all sides. Continue cooking with occasional stirring every 2–3 minutes, allowing natural sugars to caramelize without burning. If the pan dries out, add a small splash of oil or a touch of water to deglaze and lift browned bits from the bottom. Keep an eye on color; aim for a rich amber-brown rather than an almost black surface. The goal is deeply developed flavor with a tender bite, not a burnt edge. This process typically takes 8–12 minutes total, depending on onion thickness and pan heat. For added depth, finish with a small knob of butter just before removing from heat for a glossy, savory sheen.
Flavor Variations You Can Try
Butter finish: swap a portion of oil for butter in the final minutes to add a velvety, rich sensation. Balsamic glaze: whisk a teaspoon of balsamic into the onions off heat for a sweet-tinish tang that brightens roasted or grilled meats. Herb accents: toss in fresh thyme, rosemary, or a pinch of cracked black pepper toward the end of cooking. Garlic lift: add minced garlic only after the onions have softened to avoid burning. For a smoky note, a tiny pinch of smoked paprika can imitate grill-char flavors without leaving the pan. Each variation changes the aroma and finish, so start with small amounts and adjust to taste.
Common Mistakes and How to Fix Them
Mistake: overcrowding the pan leading to steaming rather than browning. Fix: cook in batches or use a larger pan. Mistake: too high heat causing scorching. Fix: lower heat and move onions around to distribute heat. Mistake: under-seasoning, resulting in bland onions. Fix: add salt gradually during browning and finish with a touch of salt at the end. Mistake: browning unevenly. Fix: stir less at first to form crust, then turn to promote even color. The key is patience; browning is a slow process of controlled heat and moisture management. The Grill Cooking team emphasizes reading color and aroma as you go, not just time on the clock.
Serving Ideas and Pairings
Pan-grilled onions pair wonderfully with burgers, steak, grilled chicken, or roasted vegetables. They can top sandwiches, be folded into quesadillas, or mixed into sauces for a deeper onion note. For a simple plate, serve onions alongside a seared chop or a piece of fish and a squeeze of lemon to brighten sweetness. They also work nicely in fajitas or atop flatbreads with a sprinkle of fresh herbs. Finally, consider cooling and using them as a savory addition to cold salads or grain bowls for texture and flavor contrast.
Timing, Temperature, and Tips for Consistency
A reliable guide is to start with medium-high heat for searing and then reduce to medium to finish browning. Expect 5–7 minutes to develop initial color, then 5–7 more minutes for deeper caramelization, depending on onion size and pan. Consistency comes from even slices, adequate oil, and maintaining a steady sizzle. If you see moisture pooling, it means the onions are releasing water; give them space and avoid constant stirring. Wipe the pan if needed to keep a clear surface for browning. The Grill Cooking approach keeps browning predictable by controlling heat and pan preparation, which reduces variability between stoves.
Storing and Reheating Leftovers
Store cooled onions in an airtight container in the refrigerator for up to 3–4 days. Reheat gently in a skillet over low heat, adding a small splash of oil or water if they start to dry out. If you intend to freeze, spread in a thin layer on a tray to freeze individually before bagging to prevent clumping. When thawed, reheat slowly to preserve texture; microwave reheating can make them soggy, so a skillet is preferred for best texture. Leftover pan-grilled onions can be blended into a sauce or used as a base for caramelized onion dips.
Authority Sources and Further Reading
- https://www.usda.gov
- https://extension.illinois.edu/
- https://www.nih.gov
Tools & Materials
- Heavy-bottom skillet (cast iron or thick stainless steel)(10-12 inch, preheated before onions enter the pan)
- Oil with high smoke point (canola, grapeseed, or avocado oil)(2-3 tablespoons for a standard pan)
- Onions (yellow, white, or red)(2-3 medium onions, sliced 1/4 inch thick)
- Salt(To taste after browning begins)
- Butter (optional)(Finishing richness in the last minute)
- Spatula or silicone turner(For turning slices and scraping fond)
- Tongs(Useful for handling individual slices during sear)
- Pepper (optional)(Freshly ground, to finish)
- Lid or splatter guard(Helps manage splatter and moisture)
Steps
Estimated time: 15-25 minutes
- 1
Preheat the pan and oil
Place the pan on medium-high heat and swirl in oil until it shimmers. This sets the stage for quick browning and prevents sticking. You are aiming for a surface hot enough to initiate the Maillard reaction as soon as the onions hit the pan.
Tip: A shimmering oil surface ensures even browning; avoid overcrowding the pan at this stage. - 2
Arrange onions in a single layer
Add the sliced onions in a single, even layer. Crowding leads to steaming instead of browning, which impedes caramelization. If necessary, work in batches for the best crust.
Tip: Give each slice space to contact the pan; contact with bare metal is what creates the crust. - 3
Let onions sear to color
Allow the onions to sit undisturbed for 2–3 minutes until the edges start to brown. Flip or stir to promote even browning on all sides. You’re not trying to cook them through yet, just to develop color.
Tip: Avoid constant stirring; the initial crust is what builds depth of flavor. - 4
Reduce heat to continue browning
Lower the heat to medium and continue cooking, stirring every 2–3 minutes to prevent sticking and uneven coloring. The goal is gradual caramelization rather than rapid burning.
Tip: If the pan seems dry, add a tiny splash of oil or water to lift stuck bits and reheat evenly. - 5
Season with salt during browning
Sprinkle a pinch of salt as browning progresses to draw out moisture and intensify flavor. Salt should be added gradually, not dumped all at once.
Tip: Taste as you go; the onions should finish with a balanced sweetness and savory depth. - 6
Deglaze to lift fond
If you see browned bits sticking to the bottom, splash in a teaspoon or two of water, stock, or wine to deglaze. This lifts the fond and evaporates, concentrating flavor into the onions.
Tip: Deglazing helps you capture the most flavor from the pan. - 7
Finish with butter or glaze option
If using, add a small knob of butter in the last minute, swirl to coat, and remove from heat for a glossy finish. For a balsamic glaze variation, drizzle a teaspoon off heat and toss to coat.
Tip: Butter adds richness but can mask onion flavor if used too early. - 8
Taste and adjust seasonings
Taste the onions, adjusting salt or finishing flavors as needed. You want a balanced savory-sweet profile that complements your main dish.
Tip: Remember that onions will mellow slightly as they rest off heat. - 9
Remove from heat and rest briefly
Take the pan off the heat and let the onions rest for a minute or two. They will finish caramelizing from residual heat, developing deeper color and aroma.
Tip: Resting helps the texture set; serving hot will feel firmer and more flavorful. - 10
Serve or hold for later use
Serve immediately as a topping, or cool and store for later use in dishes like burgers, steaks, or sautés. They store well in the fridge for a few days and reheat nicely.
Tip: Cool onions quickly to avoid continued softening if you’re storing them. - 11
Clean up and reseason cookware
While onions rest, wipe the pan to remove residue and lightly oil before storing. This keeps your skillet ready for next use and prevents flavor carryover.
Tip: A quick wipe with a paper towel reduces sticking and helps maintain seasoning on cast iron.
FAQ
Can I use red onions for pan grilling?
Yes, red onions work but they’ll turn sweeter and milder. They may require slightly longer browning to reach the same depth of color as yellow onions. Adjust the heat as needed to prevent burning.
Red onions work, but their color and sweetness shift with pan grilling. Watch browning closely and adjust heat to prevent burning.
How do I prevent onions from burning in a hot pan?
Monitor the heat and give onions space in the pan. If you see rapid darkening, reduce the heat and stir less frequently at first to form a crust, then distribute heat evenly as browning continues.
Lower the heat if they’re browning too quickly. Give them space to form a crust before stirring.
Can I add garlic when pan grilling onions?
You can add garlic, but only toward the end of cooking to avoid burning. Garlic burns quickly and can impart bitterness if overcooked.
Garlic should be added near the end so it doesn’t burn and ruin the onions’ flavor.
Should I cover the pan while cooking the onions?
Covering traps moisture and steams the onions, which slows browning. Use a lid only if you need to soften very thick slices or finish with gentle steam.
Usually keep it uncovered to promote browning, only cover if you need to soften thick slices.
How long do pan-grilled onions last in the fridge?
Pan-grilled onions store well in an airtight container in the fridge for 3–4 days. Reheat gently in a pan with a small amount of oil or water.
They keep for a few days in the fridge and reheat nicely on the stove.
Can I freeze pan-grilled onions?
You can freeze, but note texture changes. Freeze in a thin layer or well-portioned portions for later use in sauces or toppings after thawing and reheating.
Freezing is possible, but may affect texture; reheat slowly after thawing.
Watch Video
Quick Summary
- Season onions evenly to encourage browning.
- Avoid overcrowding to prevent steaming.
- Preheat pan for quick, even caramelization.
- Deglaze to collect fond and deepen flavor.
- Finish with a butter or glaze for richness.