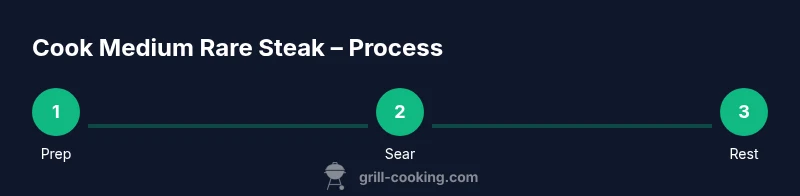
How to Cook for Medium Rare Steak
Master the art of medium-rare steak with precise searing, temperatures, and resting techniques. Learn cut selection, heat methods, thermometer usage, and troubleshooting from Grill Cooking for juicy, perfectly pink centers.

You can cook a perfect medium-rare steak by selecting a thick cut, patting dry, and searing hot on a skillet or grill. Use a thermometer to hit 125–135°F (52–57°C) internal, then rest 5–10 minutes before slicing. Start with a fast sear, then finish with controlled heat as needed.
Why medium-rare steak matters
According to Grill Cooking, doneness is more than a preference—it's a balance of moisture, flavor, and texture. Medium rare is widely favored because the center stays warm and rosy while the edges develop a deeply caramelized crust. The technique hinges on maximizing Maillard browning without overcooking the interior. When you cook to 125–135°F (52–57°C), you allow collagen to begin breaking down and fat to render, delivering a tender bite and lush mouthfeel. This section sets the stage for consistent results, regardless of whether you’re grilling outdoors or searing in a pan. Keep in mind that thickness, resting, and heat management are the three levers you’ll adjust to dial in your preferred crust and juiciness. As you practice, you’ll recognize the visual cues of a good crust forming and learn to trust your thermometer for repeatable outcomes.
Choosing the right cut for medium-rare
Not all steaks cook the same, and thickness matters more than you might expect when aiming for a rosy center. For best results, start with a cut that has good intramuscular fat and at least 1 to 1.5 inches of thickness. Ribeye, New York strip, and filet mignon are among the most reliable options for medium-rare, because their fat distribution and muscle structure respond well to high-heat searing. Thinner cuts tend to overcook on the outside before the center reaches target temperature, while very thick steaks require more precise heat control or a two-stage cook. When you shop, look for firm texture, bright red color, and a light sheen of moisture on the surface. A dry surface is essential for a strong crust, so pat the steak dry before seasoning and cooking, even if it’s at room temperature for a short period.
Temperature targets and doneness explained
Temperature is the most trustworthy guide to doneness. For medium rare, target an internal temperature of about 125–135°F (52–57°C) after resting, with the center still pink and juicy. The exact number you settle on depends on thickness and personal preference. A common practice is to pull the steak from heat at 120–125°F (49–52°C) and let carryover cooking finish to the 125–135°F range during the resting period. Don’t rely on color alone; color can be deceptive due to how the meat conducts heat. A fast, accurate thermometer is worth the investment, and maintaining consistent heat during the sear helps stabilize the final temperature. Grill Cooking analysis shows that small temperature variances can significantly affect juiciness, so thermometer use is a crucial habit for home cooks.
Tools and prep for reliable results
Having the right tools and prep routine reduces guesswork and improves crust quality. Start with a heavy skillet (cast iron preferred) or a clean, hot grill that can reach high heat. You’ll need tongs for flipping, and an instant-read thermometer to monitor doneness. A neutral oil with a high smoke point helps achieve an even crust without burning fat. Seasonings should be simple: kosher salt and freshly ground black pepper are enough for most cuts. Optional extras include a knob of butter, smashed garlic, and fresh herbs for finishing. Preheat the pan or grill to a steady, high heat before the steak goes on. Keep the surface dry and clean, as moisture is the enemy of browning. If you’re using a grill, establish a two-zone setup to finish the steak with indirect heat if needed.
The classic sear: pan vs grill
Searing is the secret to a crust that locks in juices. On a stovetop, a dry, hot cast-iron skillet with a light coating of high-smoke-point oil creates a deep crust in 2–3 minutes per side for a 1-inch steak. On a grill, start with direct high heat to form the crust, then move the steak to a cooler zone to finish gently if needed. For thicker steaks, consider a two-stage approach: a strong sear over hot direct heat, followed by a short rest and a finish over indirect heat until you hit the target temperature. Regardless of method, resist the impulse to move the steak too often; frequent turning disrupts crust formation. A quick baste with butter during the second-side sear can add flavor, but do it sparingly to avoid smoking or burning the butter.
Finishing techniques: butter, baste, and aromatics
Finishing with a touch of butter and aromatics can elevate a medium-rare steak, provided you time it carefully. Add a small knob of butter to the pan late in the cook, along with crushed garlic and fresh thyme or rosemary. Tilt the pan slightly to pool the butter and spoon it over the steak (basting) for 30–60 seconds. This technique enhances the crust and adds a silky sheen, but avoid letting the butter burn by removing the steak briefly if the heat is too high. If you’re using a grill, you can baste with herb butter using a safety brush after moving the steak to indirect heat.
Resting and slicing for juiciness
Resting is essential to redistribute juices and finish carryover cooking. After you remove the steak from the heat, tent it loosely with foil and allow it to rest for 5–10 minutes. The resting period lets the juices rebalance and the proteins reabsorb moisture, yielding a juicier bite. When slicing, cut against the grain to maximize tenderness and maintain the rosy center’s appeal. For a uniform texture, slice in even, deliberate slices rather than jagged cuts. A sharp knife will help you preserve clean edges and present a professional-looking plate.
Troubleshooting common issues
Even experienced home cooks encounter a few hiccups when aiming for medium-rare. If the crust browns too quickly and the interior remains underdone, lower the heat slightly and move the steak to indirect heat to finish gently. If the steak overcooks on the exterior before reaching the target temp, sear for shorter intervals and maintain steady heat. Excess moisture on the surface can ruin browning; ensure the steak is thoroughly dry and the pan is hot before contact. If the center seems gray and dry, you may have cooked at too low a heat or for too long; next time, start with a hotter sear and monitor with a thermometer.
Grill Cooking's verdict: best practices for home cooks
As Grill Cooking emphasizes, precision beats guesswork. Start with a good cut, bring it to room temperature, pat dry, and season well. Use a thermometer to track doneness rather than relying on color alone, and practice the two-zone heat method for thick steaks. Rest adequately to preserve juiciness, slice against the grain, and don’t rush the process. With consistent technique, you’ll achieve reliable medium-rare results that are juicy, flavorful, and beautifully crusted every time.
Tools & Materials
- Cast-iron skillet (10-12 inch)(Preheat to smoking hot for a deep crust)
- Grill (gas or charcoal)(Two-zone setup recommended for thick steaks)
- Tongs (slotted or non-slip)(For controlled flipping without piercing the meat)
- Instant-read thermometer(Target 125–135°F (52–57°C) after resting)
- Oil with high smoke point(Canola, avocado, or grapeseed; 1–2 tablespoons)
- Kosher salt and freshly ground black pepper(Season generously; salt ahead for best results)
- Butter (optional) and aromatics(Finish with butter, garlic, and thyme if desired)
- Paper towels(Dry surface thoroughly before searing)
Steps
Estimated time: 40-60 minutes total
- 1
Bring steak to room temperature
Take the steak out of the fridge and let it rest for 20–40 minutes. This helps ensure even heat distribution and reduces the risk of a cold center after the sear.
Tip: Pro tip: Use a timer to ensure you don’t over-wait; aim for 20–40 minutes depending on thickness. - 2
Pat dry completely
Thoroughly pat the surface dry with paper towels. Moisture on the surface steams the meat, preventing a crisp crust. A dry surface is essential for a golden sear.
Tip: Pro tip: Even a thin moisture layer can ruin a crust; dry surfaces yield a better crust in less time. - 3
Season generously with salt and pepper
Season just before cooking for the best crust, using kosher salt and fresh pepper. If you salt in advance, blot off excess moisture just before searing to avoid soggy crust.
Tip: Pro tip: For thicker steaks, you can salt 20–40 minutes ahead, then pat dry again for crisp crust. - 4
Preheat your cooking surface to high heat
Heat your skillet or grill until a drop of water sizzles and evaporates on contact. A hot surface is essential to form a crust in minutes.
Tip: Pro tip: If using a grill, set up direct heat for the initial sear and have a cooler zone ready for finishing if needed. - 5
Sear the first side
Place the steak on the hot surface and resist the urge to move it for 2–3 minutes. A good crust should form before you flip. When ready, flip once to sear the other side.
Tip: Pro tip: Don’t poke or prod the meat; flipping once helps form a uniform crust. - 6
Sear the opposite side and start checking temperature
Flip and sear the other side for 2–3 minutes. Use the thermometer to check progress and determine if you need to finish with indirect heat.
Tip: Pro tip: If you’re using a thick cut, consider a brief rotation to promote even browning. - 7
Finish to target temperature
If the interior is not yet at 125–135°F, move steak to indirect heat or lower the flame and continue cooking in small increments, checking frequently. If using butter, add near the end and baste briefly.
Tip: Pro tip: Pull the steak at 120–125°F and allow carryover heat to finish to 125–135°F during resting. - 8
Rest the steak
Remove from heat and rest on a warm plate for 5–10 minutes. Resting redistributes juices and completes carryover cooking, ensuring a juicy bite.
Tip: Pro tip: Loosely tent with foil to retain heat without steaming the crust. - 9
Slice and serve
Slice against the grain into even portions. Serve immediately to preserve the rosy center and juiciness.
Tip: Pro tip: Present slices with a light sprinkle of flaky salt for a finishing touch.
FAQ
What is the ideal internal temperature for a medium-rare steak?
Aim for 125–135°F (52–57°C) after resting. Carryover cooking should bring it to the target in most cases.
Aim for about 125 to 135 degrees Fahrenheit, then rest to let carryover cooking finish.
Should I salt the steak before cooking?
Season just before cooking with kosher salt and pepper. For thicker cuts, salting 20–40 minutes ahead can improve flavor, but pat dry again before searing.
Salt right before cooking, or salt 20 to 40 minutes ahead for thicker cuts and pat dry before searing.
Is butter finishing necessary?
Not strictly necessary, but finishing with a small amount of butter and aromatics can add richness if done carefully.
Butter finishing is optional but can add richness if used near the end.
What thickness is best for medium rare?
1 to 1.5 inches thick works best for reliable medium-rare results with a good crust.
A thickness of 1 to 1.5 inches is ideal for even cooking and crust.
Can I cook from frozen?
Defrost first for even cooking; cooking from frozen leads to uneven doneness and poor crust.
Best to thaw before cooking.
How long should I rest the steak?
Rest for 5–10 minutes after cooking to let juices redistribute and finish carrying over.
Rest for 5 to 10 minutes for juicier steak.
Watch Video
Quick Summary
- Season and pat dry for a crisp crust.
- Preheat thoroughly to ensure fast, even searing.
- Use a thermometer to target 125–135°F after resting.
- Rest 5–10 minutes before slicing for juiciness.
- Slice against the grain for tenderness.