When Grilling Chicken: A Practical How-To
Learn how to grill chicken safely and deliciously with practical steps, heat management, timing, and tips to avoid dryness. Perfect for home cooks and grill enthusiasts seeking juicy, flavorful results.

This guide teaches you to grill chicken evenly, safely, and flavorful. You’ll choose the right cuts, preheat the grill, sear over direct heat, finish over indirect heat, and reach 165°F internal temperature. Rest before serving. Expect about 25–40 minutes total, depending on thickness, marination, and grill type. This article also explains how to avoid dryness and overcooking through precise timing.
The basics of timing when grilling chicken
Timing is the bridge between safety and juiciness on the grill. When grilling chicken, you must balance heat management, cut thickness, and resting periods. Start with a plan for direct-heat searing, then move to indirect heat to finish through without drying out. Understanding carryover cooking helps you land juicy results even if you pull the meat a few degrees early. This approach, championed by Grill Cooking, minimizes guesswork and improves consistency across cuts such as breasts, thighs, and drumsticks.
Choosing the right cuts and prep methods
Chicken comes in many forms. Boneless, skinless breasts cook quickly but risk drying if overcooked, while thighs tolerate heat better and deliver deeper flavor. Bone-in pieces benefit from longer, lower-heat cooking. Prepping with patting dry, light oil, and seasoning or marination ensures better sear and flavor adhesion. Marinating can add moisture and reduce surface moisture loss; dry rubs enhance crust formation. For best results, allow seasonings to rest on the surface for 15–30 minutes before grilling.
Heat management: direct vs indirect heat on chicken
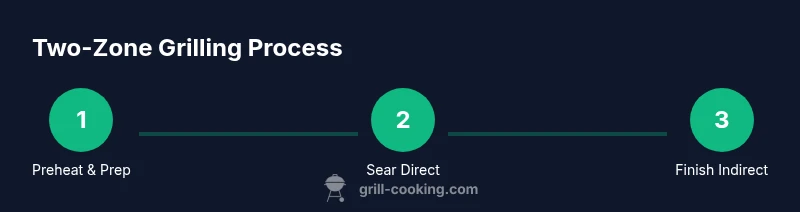
Direct heat provides a fast sear, creating a flavorful crust. Indirect heat finishes cooking without charring and helps maintain moistness. A common method is searing each side over direct heat for 2–3 minutes, then transferring to a cooler area of the grill to finish. The total cooking time varies with thickness; use a thermometer to confirm doneness instead of relying on time alone.
Preheating and grill setup for even cooking
Preheat the grill to a high heat for searing, then adjust to a medium or two-zone setup. If using charcoal, bank coals on one side; with gas grills, use two zones by leaving one burner off. Clean the grates, oil them lightly, and avoid placing cold chicken directly on a hot surface to prevent sticking. A properly heated grate reduces tearing and improves crust formation.
Internal temperature, rest, and safety thresholds
The USDA-standard target internal temperature for chicken is 165°F (74°C). Use an instant-read thermometer inserted into the thickest part without touching bone. After reaching 165°F, remove the pieces from heat and let rest for 3–5 minutes. Resting allows juices to redistribute, resulting in juicier slices. Carryover cooking may raise the temp slightly, so check a few degrees shy if you prefer more pinkness.
Flavor building: marinades, rubs, and sauces
A simple marinade with oil, acid (lemon juice or vinegar), and seasoning adds moisture and flavor. Dry rubs promote a crisp crust without adding moisture, while basting with a light sauce near the end can build glaze. Apply rubs or marinade evenly and avoid adding sticky sauces too early as sugars can burn. Let marination occur in fridge for 30 minutes to several hours depending on cut.
Common mistakes and how to avoid them
Common issues include overcooking breasts, under-seasoning thighs, and drying out meat from heat that is too aggressive. Avoid repeatedly flipping pieces; flip once or twice to build even crust. Do not cut into meat immediately after cooking; let rest. If your grill is very hot, move the chicken to indirect heat sooner to prevent charring.
Finishing touches and serving ideas
Let the grilled chicken rest, then slice against the grain. Pair with lemon wedges, herbs, or a fresh salsa. For bone-in pieces, offer extra sauce and sides such as grilled vegetables. Clean up promptly after cooking to maintain grill health and safety.
Tools & Materials
- Meat thermometer (instant-read)(Probe should read accurately; insert into thickest part)
- Long-handled tongs(For safe turning without burns)
- Grill brush(Clean grates before cooking)
- Oil spray or high-heat oil(Lightly oil grates to prevent sticking)
- Cutting board and sharp knife(For prep and resting slices)
- Heat-resistant gloves(Optional protection when handling hot grates)
- Food-safe gloves(If you prefer extra hygiene during handling)
Steps
Estimated time: 30-45 minutes
- 1
Prepare the chicken
Pat dry, trim excess fat, and season or marinate as desired. Let sit 15–30 minutes to let flavors cling and surface moisture evaporate for better searing.
Tip: Patting dry helps achieve a crisp crust and even browning. - 2
Preheat and set up the grill
Heat the grill for direct-and-indirect zones. If charcoal, bank coals to one side; if gas, turn one burner off to create two zones. This setup enables searing and finishing with controlled heat.
Tip: Two-zone setup prevents overcooking and reduces charring. - 3
Sear over direct heat
Place chicken on direct heat and sear 2–3 minutes per side until a crust forms and the surface releases easily from the grate.
Tip: Avoid moving the meat too soon; let crust form for easy release. - 4
Finish with indirect heat
Move pieces to indirect heat and close the lid, cooking until the thickest part reaches 165°F internal temperature. Time depends on thickness.
Tip: Check with thermometer starting at the lower end to avoid overcooking. - 5
Check temperature and rest
Insert thermometer into thickest part away from bone. Remove at 165°F and rest 3–5 minutes to redistribute juices.
Tip: Rest is essential for juiciness; slice after resting. - 6
Serve and pair
Slice against the grain and serve with fresh sides; add a squeeze of lemon for brightness.
Tip: Cut against the grain for tender slices.
FAQ
What is the best internal temperature for grilled chicken?
165°F (74°C) is the standard safe internal temperature for chicken, measured in the thickest part away from bone.
Grill chicken to 165°F, then rest.
Should I marinate chicken before grilling?
Marinating can add moisture and flavor; marinate in fridge for 30 minutes to several hours.
Marinade adds flavor; keep it cold.
How long does it take to grill chicken breasts?
Boneless breasts typically require 6-8 minutes total over medium heat, turning once, but thickness matters.
Breast pieces usually take around 6-8 minutes.
Is bone-in chicken better for grilling?
Bone-in pieces stay juicier on the grill and cook more evenly; boneless cook faster but can dry out.
Bone-in tends to stay juicier.
How can I prevent sticking to the grill?
Oil the grates lightly and pat the chicken dry; avoid placing wet meat on hot grates.
Oil the grates; pat dry.
What safety steps should I follow when handling raw chicken?
Keep raw chicken separate, wash hands and surfaces, avoid cross-contamination.
Keep things clean and separate.
Watch Video
Quick Summary
- Preheat two-zone grill before cooking.
- Sear with direct heat, finish with indirect heat.
- Cook to 165°F and rest before serving.
- Choose cuts that match your grill and cook method.