Grill Pork Loin Chops: A Step-by-Step Guide for Juicy Results
Learn to grill pork loin chops to juicy perfection with two-zone heat, timing, resting, and practical tips. Includes tools, doneness targets, and common mistakes to avoid for consistently excellent results.

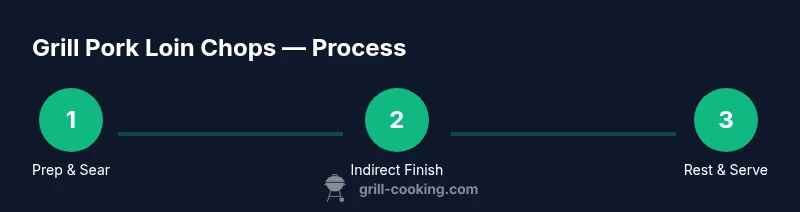
You will learn how to grill pork loin chops to juicy, evenly cooked perfection. The guide covers prep, seasoning, searing, indirect finishing, resting, and proper serving. It also outlines required tools, safe temperatures, and common mistakes to avoid so you can grill pork loin chops with confidence on any grill.
The Basics of Grill Pork Loin Chops
According to Grill Cooking, mastering grill pork loin chops starts with choosing the right cut, handling it properly, and controlling heat across two zones. Whether you prefer bone-in for extra flavor or boneless for leaner portions, thickness matters. Most home cooks find 1 inch to 1.25 inches thick to be ideal for a balance of sear and finish. This guide emphasizes safe handling, seasonal seasoning, and a plan for achieving a crusty exterior with a juicy interior. You’ll learn how to use direct heat for crust formation and indirect heat for gentle cooking to the target doneness. We’ll also cover marinade vs rub, how to trim fat, and how to avoid common mistakes that dull texture. With the right approach, you can grill pork loin chops that stay moist even after resting.
Choosing the Right Cut and Prep
Pork loin chops come bone-in or boneless, and thickness changes cooking time a lot. For grilling, aim for chops that are about 1 inch to 1.25 inches thick and uniform in size so they cook evenly. If you’re starting with a thicker chop, you can butterfly or pound them gently to 1 inch. Dry the surface with paper towels to promote a better sear, then season generously with salt, pepper, and aromatics like garlic, smoked paprika, or a touch of brown sugar to help caramelization. Whether you’re using a simple salt-and-pepper rub or a more complex blend, let the seasoning sit for 15-20 minutes before cooking to enhance flavor.
Flavor Foundations: Marinades, Rubs, and Brines
While a dry rub is perfectly adequate, a quick marinade or a light brine can add depth and juiciness. For marination, keep it simple: oil, acid (like lemon juice or vinegar), herbs, and spices. If you go this route, limit marinating to 30-60 minutes for 1-inch chops to avoid textural changes. For rubs, consider a balance of salt, sugar, paprika for color, garlic powder, and black pepper. A short rest after applying rub helps the surface proteins absorb flavor and improves crust formation during searing. Always pat dry again before hitting the grill to avoid steaming the surface.
Preheating, Fire Management, and Equipment Setup
Two-zone grilling gives you control: preheat the grill for direct high-heat searing and establish a cooler indirect zone for finishing. If you’re using charcoal, bank the coals to one side and keep the other side empty. For gas grills, turn on one burner to high for sear and leave another on medium for indirect cooking. Clean the grates and oil them lightly to prevent sticking. Have a reliable thermometer ready so you can confirm the final internal temperature without guessing. A sturdy pair of tongs and a heat-safe plate for rest are essential.
Searing vs. Indirect Cooking: Techniques for Juicy Chops
Start with a hot sear to develop color and crust, about 1-2 minutes per side depending on thickness. Once both sides have a nice crust, move the chops to the indirect zone and cook with the lid down until they reach the target doneness. If you notice flare-ups, briefly lift the lid to cool the flames or move the chops away from the hottest spots. Don’t crowd the grill; give each chop room for heat to circulate. This combination of direct and indirect heat keeps the interior tender while the exterior remains flavorful.
Temperature Control and Doneness Guide
Pork loin chops should reach a safe internal temperature but still stay juicy. The recommended final temperature for pork is around 145°F, followed by a 3-minute rest. Some cooks prefer to pull at 140°F for extra juiciness, accepting a short rest to finish cooking. Use an instant-read thermometer inserted into the thickest part of the chop, not touching bone. If you’re cooking with a thermometer probe, monitor gently, avoiding frequent opening of the grill to minimize heat loss.
Resting, Slicing, and Serving: Maximize Juiciness
Resting allows carryover cooking and juices to redistribute, resulting in moister meat and a cleaner slice. After removing from heat, tent chops loosely with foil for 3-5 minutes. Slice against the grain for tenderness and plating. Serve with a simple pan sauce or a bright salsa to complement the pork’s natural flavor. Grasp a light citrus finish on top and pair with grilled vegetables or a starch like potatoes to complete the plate. According to Grill Cooking analysis, resting chops improves juiciness and texture by allowing juices to redistribute without overcooking.
Authority Sources and Practical References
For best practices, consult trusted sources that cover pork safety, cooking temperatures, and grilling techniques. The following references provide foundational guidance you can rely on while planning and executing the grill pork loin chops workflow.
Common Mistakes and Troubleshooting
Common mistakes include cooking too hot and fast, not patting dry before searing, and relying on time alone instead of a thermometer. Overcrowding the grill slows heat and leads to uneven doneness. If you see excessive flare-ups, move chops off direct flame and use indirect heat. Always test doneness with a probe, and don’t skip resting, which helps juiciness and slice quality.
Tools & Materials
- Grill (gas or charcoal)(Preheat to direct high heat for searing and indirect heat for finishing)
- Long-handled tongs(Grip chops securely and manage flare-ups)
- Instant-read thermometer(Target final 145°F; verify in thickest part)
- Wire rack or heat-safe plate(Rest chops after cooking to re-distribute juices)
- Paper towels(Pat dry surfaces to improve sear)
- Oil spray or light cooking oil(Lightly oil grates or chops to prevent sticking)
- Seasoning rubs or marinade ingredients(Salt, pepper, paprika, garlic, herbs)
Steps
Estimated time: 30-40 minutes
- 1
Preheat two-zone grill
Prepare a hot direct zone for searing and a cooler indirect zone for finishing. If using charcoal, bank the coals to one side. If using gas, set up two burners at different intensities. The goal is quick crust formation plus controlled finish.
Tip: Keep grill lid closed as you establish zones to avoid temperature swings. - 2
Pat dry chops and prepare
Pat the pork loin chops dry to remove surface moisture, which helps achieve a crust. Trim any excess fat if desired to reduce flare-ups. Apply a light coating of oil to both the meat surface and the grates.
Tip: Dry surface plus oil promotes better Maillard reaction for crust. - 3
Season generously
Season the chops evenly with salt and your chosen rub or marinade. Let sit 15-20 minutes before cooking to enhance flavor uptake. For boneless chops, ensure even coverage to avoid under-seasoned spots.
Tip: Salt helps draw surface moisture and improves crust; don’t skip the rest period. - 4
Oil the grates
Lightly oil the grill grates to prevent sticking. An oiled paper towel tucked with tongs works well. This step reduces tearing and keeps meat intact during flipping.
Tip: Only apply a light coat; heavy oil can cause flare-ups. - 5
Sear chops on direct heat
Place chops over direct heat and sear about 1-2 minutes per side until a golden crust forms. Resist the urge to flip frequently; single, deliberate turns build a better crust.
Tip: If a flare-up occurs, move chops to indirect zone briefly. - 6
Finish on indirect heat
Move chops to the indirect zone and cook with the lid down until the internal temperature approaches the target. Avoid overcooking by checking with a thermometer near the end.
Tip: Use a probe or instant-read to minimize grill opening and heat loss. - 7
Check doneness with a thermometer
Insert thermometer into the thickest part, away from bone. Target 145°F with a 3-minute rest. If you pull at 140°F, be ready for a brief carryover rise.
Tip: Don’t rely on time alone; temperatures vary with chop thickness. - 8
Rest before slicing
Remove chops from heat and rest on a rack or plate, loosely tented with foil for 3-5 minutes. Resting redistributes juices and improves slice quality.
Tip: Rest is essential; slicing too early drains juiciness. - 9
Serve and enjoy
Slice against the grain for tenderness and serve with a simple sauce or side dish. A light citrus zest or herb finish can brighten flavors.
Tip: Pair with roasted vegetables or mashed potatoes for balance.
FAQ
What thickness is best for grilling pork loin chops?
Aim for 1 inch to 1.25 inches for an even cook and good crust. Thicker chops require longer indirect cooking and may dry if overcooked.
Aim for 1 to 1.25 inches for even cooking and crust. Thicker chops need careful indirect cooking to avoid drying.
Should I marinate pork loin chops before grilling?
Marinating is optional. A light marinade or quick rub adds flavor and can improve juiciness, but a simple salt-and-pepper seasoning also works well.
Marinating is optional; a quick rub also works well for flavor and moisture.
What is the safe internal temperature for pork loin chops?
Pork loin chops are safely cooked at 145°F with a 3-minute rest. This temperature yields juiciness while ensuring food safety.
Cook to 145°F and rest for 3 minutes to stay juicy and safe.
Is bone-in or boneless better for grilling chops?
Bone-in chops tend to stay juicier and carry more flavor; boneless cook a bit faster and are easier to portion. Choose based on preference and time.
Bone-in gives more flavor and moisture; boneless cook quicker and are easier to portion.
How long should pork loin chops rest after grilling?
Rest for 3-5 minutes after grilling to redistribute juices. Longer rest can cool the meat too much, so keep it brief.
Rest for 3-5 minutes to keep juices in the meat.
What should I do if my chops taste bland?
Increase flavor with a more robust rub or a finishing sauce. Ensure adequate salting and allow time for seasoning to penetrate before cooking.
Boost flavor with a stronger rub and proper salting; let it sit briefly before cooking.
Watch Video
Quick Summary
- Choose evenly thick chops for uniform cooks
- Use two-zone heat for sear and finish
- Sear then finish on indirect heat for juiciness
- Check internal temperature with a thermometer
- Rest before slicing to maximize juiciness