Corn Grill Mastery: How to Grill Corn on the Cob Perfectly
Learn the art of corn grilling with a practical, step-by-step guide. From selecting ears to finishing with butter and herbs—perfect char, tender kernels, and mouthwatering flavor for every backyard cook.

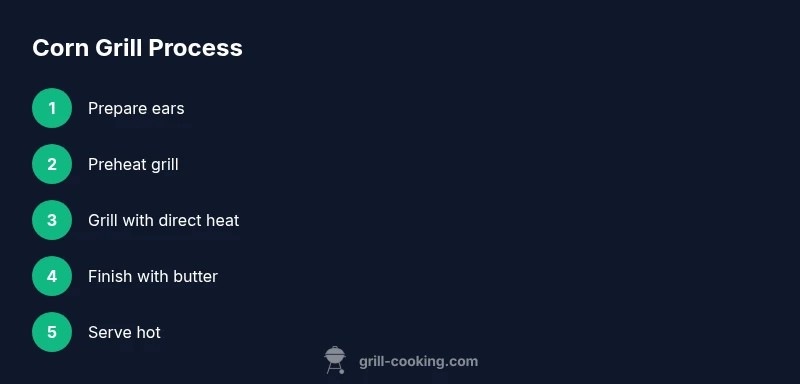
This guide helps home cooks master corn grilling from selecting ears to serving hot, juicy ears with charred sweetness. You’ll learn how to prep corn, manage direct heat, apply butter and seasonings, and troubleshoot common issues like uneven charring. Follow these steps for consistently delicious corn grill results. Whether you’re new to grilling or upgrading your technique, this concise recipe-focused guide will speed up your success.
corn grill fundamentals
Corn grill is the art of cooking ears of corn on a grill to achieve a bright, blistered surface with a smoky sweetness. The term encompasses both grilling ears with their husks on for steam-assisted cooking and peeling the husks away for maximum direct contact and charring. The sweet sugars in the kernels caramelize when exposed to high heat, creating a flavorful crust while the interior remains tender. Successful corn grilling hinges on three things: heat control, consistent turning, and finishing with a savory boost like butter or herbs. In this guide, we’ll walk through practical methods for typical home grills—gas or charcoal—and show how to adapt to your equipment. For the corn grill, plan for roughly a 25-35 minute window from prep to plate. According to Grill Cooking, the key to corn grill success is heat management and thoughtful finishing techniques for optimal flavor.
Why this matters for home cooks
Grilled corn adds texture and sweetness that complements proteins like burgers, steaks, and grilled chicken. The technique is forgiving but rewarding when you balance quick high heat with gentle movement to prevent scorching. By focusing on direct heat with occasional indirect heat zones, you’ll like what you see and taste: kernels that blister with a light char, a juicy bite, and a hint of smokiness that isn’t overwhelmed by butter or toppings.
Selecting the right ears and prepping them
Choose ears with bright, plump kernels and minimal blemishes. Fresh corn should smell sweet and have green, tight husks if you’re keeping the husks on. If you peel the husks back, remove silk fibers completely for even cooking. If you like, you can trim the ends to create a flat surface for resting on the grill grates. Whether you cook with husks on or off, prep matters: dry ears grill more evenly, and any excess moisture can steam rather than char. Always have your toppings ready, so you can finish right after removal from the hot grate.
Pre-grill prep: butter, oil, and seasonings
Coating the corn with a light layer of oil or melted butter helps prevent sticking and encourages browning. Simple seasonings like salt, pepper, and a pinch of paprika or chili powder add flavor without masking sweetness. If you’re using lime zest, cilantro, cotija, or grated parmesan, apply after cooking to preserve aroma. For a richer finish, toss corn in herb butter or a citrus–garlic butter right off the grill. The goal is to enhance flavor while keeping kernels vibrant and juicy.
Grilling methods: direct heat and zone management
A two-zone setup (hot direct heat and cooler indirect heat) provides control for corn grill. Place ears directly over the hottest area to blister and char, then move to a cooler zone to finish cooking through without burning. Typical times on a hot grill are 8-12 minutes total, turning every 2-3 minutes for even charring. If you’re starting with husks on, cover the corn for a couple of minutes to trap steam and promote tenderness. If you peeled the husks, monitor more closely to prevent scorching while achieving even browning.
Finish flavors: toppings and serving ideas
Butter, salt, and a squeeze of lime are classic finishing touches. For a Mexican-inspired profile, crumble cotija cheese and dust with chili powder, cilantro, and a touch of lime juice. For a bright, herbaceous note, whisk olive oil with chopped parsley and garlic and drizzle over hot corn. Serve immediately to preserve the warm, blistered texture. Grilled corn pairs beautifully with burgers, grilled peppers, and skewered meats, turning simple sides into crowd-pleasing accompaniments.
Troubleshooting and timing tips
If kernels are undercooked inside, give the corn a bit longer on the indirect heat zone and rotate more frequently to ensure even cooking. If you notice excessive charring or a bitter taste, back off the direct heat slightly and keep a closer eye on grill temps. Dry kernels indicate the corn wasn’t thoroughly prepped or there wasn’t enough fat on the surface to aid browning. Always pat the ears dry before grilling and avoid piling cold ears onto the grate. Practice makes perfect, and small adjustments in heat and timing yield consistent results.
Serving ideas and pairings
Serve corn grill with a squeeze of lime, a pat of herb butter, and a light sprinkle of sea salt. Pair with grilled corn salad, avocado salsa, or chili-lime crema for extra depth. It also makes a great side for grilled steaks, chicken, or pork ribs. To keep things bright, offer a few dipping options: lime crema, chipotle mayo, or a simple herb oil. A chilled beverage such as a lemon-lime sparkling drink complements the sweetness and enhances overall balance.
Tools & Materials
- Barbecue grill (gas or charcoal)(Preheated to high heat for corn grill)
- Tongs(Long enough to flip ears safely)
- Basting brush or spoon(For applying butter or oil)
- Sharp knife and cutting board(For trimming ends and removing silk if needed)
- Butter or oil for coating(Keeps kernels from sticking and adds flavor)
- Salt and pepper(Basic seasoning; adjust to taste)
- Aluminum foil or grill mat(Optional for extra protection or indirect cooking)
- Corn holders (optional)(Helpful for family-style service)
Steps
Estimated time: 25-35 minutes
- 1
Choose and prep corn
Select fresh ears with plump kernels and minimal blemishes. Decide whether to grill with the husks on or off. If using husks, peel them back gently or remove silk completely for direct heat, and pat the ears dry.
Tip: Pro tip: Dry ears thoroughly to improve browning and prevent steaming. - 2
Preheat the grill
Ignite your grill and bring it to a high heat for direct cooking. If using two-zone setup, establish a hot zone and a cooler zone, so you can manage charring and doneness.
Tip: Pro tip: Preheat for at least 10 minutes to stabilize temperature. - 3
Oil or butter the ears
Lightly coat the corn with oil or melted butter. This helps color the kernels and prevents sticking. You can season lightly with salt at this stage for even flavor distribution.
Tip: Pro tip: Add oil before grilling rather than after to improve browning. - 4
Grill over direct heat
Place ears on the hot side and cook for 2-3 minutes per side, turning every 2-3 minutes. Watch for blistering and light charring without burning.
Tip: Pro tip: If using husks, you may need slightly longer on indirect heat to finish cooking inside. - 5
Move to indirect heat if needed
If kernels aren’t tender after initial charring, shift ears to the cooler zone and cook a bit longer, rotating regularly.
Tip: Pro tip: Aim for tender kernels with a slight bite, not mushy interiors. - 6
Finish with butter and seasonings
Remove from grill and apply butter or oil while hot. Finish with salt, pepper, and any desired toppings like lime, cilantro, or cheese.
Tip: Pro tip: Add fresh toppings after cooking to preserve aroma and texture. - 7
Test for doneness
Kernels should be tender but still have a bite; avoid overcooking which dries kernels and masks sweetness.
Tip: Pro tip: If unsure, cut a tiny kernel from a middle ear and taste-test. - 8
Serve immediately
Serve hot straight from the grill. Slice kernels off the cob if desired and present with a variety of toppings to suit guests.
Tip: Pro tip: Keep warm covered briefly with foil while other sides finish. - 9
Clean up and inspect
Turn off the grill, let it cool, and clean grates to prevent flavor transfer. Store any leftovers safely.
Tip: Pro tip: Wipe grates while still warm for easier cleaning.
FAQ
What heat level is best for corn grill?
Use high direct heat, around 425-450°F, to blister the kernels quickly without drying them out. Regulate heat by adjusting airflow or moving ears to a cooler zone as needed.
Aim for high direct heat, roughly four hundred twenty-five to four hundred fifty degrees, and adjust as you cook to prevent burning.
Should I grill corn with husks on or off?
Both methods work. Husks trap steam for tender corn, while peeled corn browns faster and shows more char. Start with husks on if you want gentle cooking, then finish with husks off for color.
Husks can help soft-cook the corn, but peeling them gives you more char and flavor. Pick a method based on your texture preference.
How long does corn grill take?
Typical grill time is 8-12 minutes on direct heat, turning every 2-3 minutes. If your ears are peeled, you may need a bit longer on the cooler side to finish.
Most corn takes around ten minutes on the grill, with occasional turns for even charring.
Can I add butter during grilling?
Butter can burn on high heat. Apply butter or oil after removal from the grill or in the final seconds of cooking to preserve flavor and prevent scorching.
Better to add butter after taking the corn off the grill to avoid burning.
What toppings pair well with grilled corn?
Classic options include butter and salt; for added flair, use lime juice, cilantro, chili powder, cotija, or grated cheese.
Try butter with lime and cilantro, or cotija for a Mexican-inspired finish.
My corn is not tender inside. What now?
Extend cooking with indirect heat and rotate more often. If needed, briefly par-cook or wrap in foil to finish evenly without burning.
If the inside stays firm, move the corn to a cooler zone and cook longer until tender.
Watch Video
Quick Summary
- Select fresh ears for best sweetness.
- Use two-zone heat to balance charring and doneness.
- Finish with butter and toppings off the heat.
- Rotate ears regularly to prevent hotspots.
- Serve hot for optimal texture and flavor.