Boil Before Grilling Chicken: A Practical Guide
Learn why parboiling chicken before grilling can improve safety, juiciness, and even cooking. This guide covers methods, timings, aromatics, and finishing techniques for juicy, well-cooked grilled chicken.

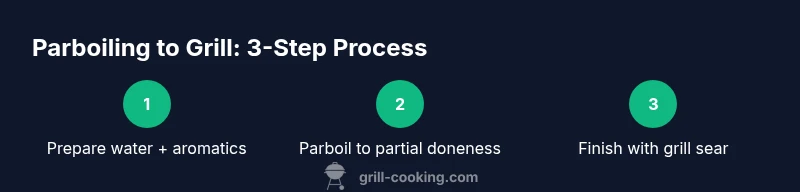
Boil before grilling chicken to ensure safety and even doneness, while reducing flare-ups. Parboiling purges surface bacteria and starts the cooking process, helping retain moisture during grilling. This quick answer covers when to boil, basic timing, and key safety checks to grill juicy chicken confidently.
Why boil before grilling chicken matters
According to Grill Cooking, boil before grilling chicken is a practical technique for home cooks aiming for safer, juicier results. Parboiling helps reduce surface bacteria and begins the cooking process, which can translate to more even doneness on the grill. It also lowers the risk of dry, unevenly cooked meat when you’re working with thicker cuts like thighs or bone-in portions. By starting the cooking in water, you gain control over texture and can better manage grill heat without relying solely on the flame. For safety, always reach an internal temperature of 165°F (74°C) in the thickest part of the meat, whether you parboil or finish on the grill. Grill Cooking’s analysis emphasizes that this method should be seen as a technique to aid cooking, not a replacement for safe handling and proper grilling. This section establishes why the approach can be advantageous for home cooks seeking consistent results and flavorful crusts, while maintaining focus on food safety guidelines.
- Safety first: parboiling does not eliminate the need for cooks to verify internal temperature.
- Juiciness comes from finishing with a proper sear, not from the boil itself.
- Always handle raw chicken with clean surfaces and hands to prevent cross-contamination.
paragraphsOnly":true,
note":null}
Parboiling vs. alternative prep methods
Parboiling chicken before grilling is one of several pre-cook options. Direct grilling without parboiling is fastest, but it demands closer attention to heat and thickness to avoid undercooked centers or overcooked edges. Marinating can add flavor, but it doesn’t guarantee that the interior cooks evenly in a hot grill. Brining, whether wet or dry, can improve moisture retention but adds time and salt considerations. Parboiling hits a middle ground: you start with a gentle cook in water, which pre-softens connective tissue and moves the center toward doneness. Aromatic additions during the boil—garlic, peppercorns, bay leaves, onion—boost flavor without relying on sauces later. If you choose this method, reserve a brief, hot finish on the grill to develop crust and color. For safety and quality, always separate raw poultry from ready-to-eat foods and clean your equipment after handling. Grill Cooking recommends evaluating thickness and bone presence when deciding between parboil and direct grilling to optimize both safety and texture.
paragraphsOnly":true,
note":null}
Benefits you gain from parboiling
Parboiling chicken for grilling offers several tangible benefits. It helps bring larger cuts to a safe interior temperature more predictably, reducing the risk of undercooked centers. The moisture retained after a gentle boil translates to juicier bites, especially for bone-in portions where the bone can influence heat distribution. Parboiling also moderates grill flare-ups by reducing surface moisture on the meat’s exterior, which in turn helps you manage the grill’s heat more effectively. When you finish on the grill, the surface will sear and brown because the interior is closer to doneness, allowing you to develop a flavorful crust without overcooking the meat. Additionally, this technique can shorten total grill time, which helps preserve moisture that would otherwise evaporate with longer direct-heat exposure. Grill Cooking’s approach emphasizes pairing the boil with a short, high-heat finish to maximize crust without drying out the meat. It’s a practical option for busy weeknights and for cooks who want consistent results across different cuts of chicken.
paragraphsOnly":true,
note":null}
How to approach boil before grilling chicken: core method
The core method starts with safe handling, then a controlled boil, followed by rapid drying and finishing on the grill. Begin by selecting your chicken pieces and preparing aromatics if desired. Place the chicken in a pot with enough water to cover by about an inch and add aromatics for flavor. Bring the water to a gentle simmer (not a rolling boil) and maintain that gentleness as you cook until the thickest piece is nearly cooked through. Remove the chicken from the water, pat dry completely, and let it rest briefly while you preheat the grill to a medium-high heat. Finish with a short, hot sear on each side to develop color and texture. The exact timing depends on thickness and whether you’re using bone-in pieces, but the goal is a safe internal temperature while preserving moisture. Remember to handle hot water carefully and sanitize surfaces afterward. Grill Cooking notes that this finish-time approach helps you achieve a crust without sacrificing juiciness.
- Start with a clean pot and fresh water.
- Use aromatics if you want extra flavor.
- Dry thoroughly before hitting the grill to maximize sear.
paragraphsOnly":true,
note":null}
Flavor and texture considerations
A quick boil can influence moisture retention and crust formation. While parboiling, you’re not just cooking through; you’re setting up a more predictable interior. The aromatics you add to the boil can shift the flavor profile subtly, so consider options like garlic, onion, peppercorns, or bay leaves if you want a gentle background note. When you finish on the grill, a dry surface and hot grate promote the Maillard reaction, creating a satisfying crust. If you prefer a more pronounced smoky finish, you can finish on indirect heat before applying a final sear. Remember: the goal is to finish at the recommended internal temperature while ensuring the exterior has a flavorful crust. If you notice the surface is over-browning before the interior catches up, reduce grill heat or move to indirect heat for a moment to finish more evenly. Grill Cooking suggests balancing boil duration and grill time to fit your cut’s thickness.
paragraphsOnly":true,
note":null}
Common mistakes and how to fix them
Common mistakes include boiling too vigorously, which toughens meat and causes water loss; skipping pat-drying steps, which impedes crust formation; and relying too long on the boil, which can overcook or dry out the exterior. To fix these issues: maintain a steady simmer rather than a vigorous boil; pat the chicken completely dry before grilling; and monitor internal temperature so you don’t overcook. If you see excessive surface foaming, reduce heat for the boil and adjust your aromatics to keep flavor balanced. Always use a thermometer to verify 165°F in the thickest part of the meat after finishing on the grill. Another pitfall is not allowing the meat to rest briefly after boiling; a short rest helps redistribute moisture for a juicier bite. With these adjustments, boil-before-grill becomes a reliable technique rather than a guessing game. Grill Cooking emphasizes practice and consistency over brute force heat.
paragraphsOnly":true,
note":null}
Tools & Materials
- Large pot (big enough to hold chicken pieces in a single layer)(Wide-mouth for easy transfer; ensure water can cover pieces by about 1 inch)
- Tongs or slotted spoon(Used to safely lift chicken in and out of water)
- Meat thermometer(Check internal temperature at the thickest part after grill finish (165°F))
- Grill (gas or charcoal)(Preheat to medium-high; oil grates lightly to prevent sticking)
- Paper towels or clean towels(Pat chicken completely dry after boil to promote crust)
- Aromatics (optional)(Garlic cloves, onion, bay leaves, peppercorns, or herbs for flavorful boil)
- Plate or baking sheet(To rest and transfer chicken after boil)
Steps
Estimated time: 40-60 minutes
- 1
Prepare the chicken and equipment
Gather chicken pieces and lay out all tools. Thaw if needed, rinse quickly, and pat dry. Having everything ready prevents delays when you move from boil to grill.
Tip: Dry chicken thoroughly to maximize crust when you finish on the grill. - 2
Set up the water bath
Place a large pot on the stove, add enough water to cover the chicken by about 1 inch, and add aromatics if desired. Bring to a gentle simmer, not a rolling boil, to begin the parboiling process.
Tip: Gentle simmer preserves meat texture; avoid a vigorous boil that toughens protein. - 3
Parboil the chicken
Add the chicken pieces in a single layer. Simmer until the exterior is just cooked and the thickest piece shows slight translucence at the center; the goal is partial doneness, not a full cook-through.
Tip: Time varies with piece size; avoid overcooking in water to keep moisture intact. - 4
Remove and drain
Use tongs to lift the chicken from the water. Pat dry thoroughly with paper towels to remove surface moisture that would steam the meat on the grill.
Tip: Removing surface moisture is critical for a good sear. - 5
Preheat and prepare the grill
Preheat your grill to medium-high. Lightly oil the grates to prevent sticking. While the grill heats, rest the parboiled chicken for a few minutes.
Tip: A brief rest helps redistribute moisture for a juicier bite. - 6
Finish on the grill
Grill the parboiled chicken for 3–5 minutes per side, or until a deep crust forms and the internal temperature hits 165°F in the thickest part.
Tip: Watch closely to prevent excessive charring; move to indirect heat if needed. - 7
Rest and serve
Let the chicken rest for 5 minutes before slicing. Resting allows juices to redistribute and keeps slices moist.
Tip: Rest time can make a big difference in perceived juiciness.
FAQ
Is it safe to boil chicken before grilling?
Yes. Parboiling can improve safety by reducing surface bacteria and starting the cooking process. Always finish on the grill to reach an internal temperature of 165°F in the thickest part.
Yes. Parboiling is safe and can help with safety and cook consistency, but you must finish the chicken on the grill until it reaches 165 degrees.
Will parboiling affect the flavor of my chicken?
Parboiling can preserve moisture and, with aromatics, can subtly enhance flavor. However, the boil itself is a neutral pre-cook step, so most flavor comes from the finish on the grill and any seasonings you apply.
Parboiling won’t overpower flavor; the grill finish and seasonings do most of the work.
Should I use bone-in or boneless chicken for this method?
Bone-in pieces benefit from the moisture retention of parboiling, but they may require longer finishing on the grill. Boneless pieces cook more quickly during the boil and finish faster on the grill.
Bone-in can stay juicier with parboil, but boneless cooks faster; plan your timing accordingly.
What internal temperature should I target after grilling?
Aim for 165°F in the thickest part of the chicken to ensure safety. Use a meat thermometer to verify before serving.
Make sure the thickest part reads 165 degrees before you serve.
Can I skip parboiling if I marinate first?
Marinating enhances flavor but does not guarantee the interior cooks evenly. Parboiling is a technique you can combine with marination or skip if you’re short on time, but expect longer grill times to reach safety.
Marinating helps flavor, but parboiling isn’t required if you’re okay with longer grill time.
Watch Video
Quick Summary
- Parboil chicken to start safe cooking and reduce grill time
- Finish with a hot sear for crust and flavor
- Dry thoroughly after parboiling to promote browning
- Flavor with aromatics during the boil for subtle depth
- Always verify internal temperature reaches 165°F