Best Way to Grill Chicken Breast: Juicy, Evenly Cooked
Learn the best way to grill chicken breast for juicy, safe results. This comprehensive guide covers prep, heat management, marination, and serving tips from Grill Cooking.

The best way to grill chicken breast is to start with evenly sized fillets, pat dry, season, and cook over medium direct heat until the internal temperature reaches 165°F, then rest before slicing. Use a two-zone grill for reliability, and a meat thermometer to avoid overcooking. Juicy results come from consistent heat, proper resting, and oiling.
Why this method matters
Grilled chicken breast can be dry and bland if you push it through high heat without control. The best way to grill chicken breast balances safety, flavor, and ease for home cooks. This approach relies on heat management, moisture retention, and precise timing—ingredients any home cook can master. By starting with evenly sized pieces, patting surfaces dry for a strong sear, and using a two-zone grill, you create a reliable environment where the outer crust forms quickly while the inside finishes evenly. The core principles are simple: control heat, monitor temperature, and allow the meat to rest before slicing. This guide from Grill Cooking walks you through practical steps, real-world timings, and common pitfalls to avoid. With this method, you’ll achieve juicy bites, a good crust, and consistent results across cooks and grills.
Selecting and preparing chicken breasts
The foundation of a great grilled chicken breast is choosing boneless, skinless fillets that are uniform in thickness. Look for breasts that are similar in size to ensure even cooking. Remove any tendons and trim off excess fat so there’s nothing that slows browning. If your fillets vary in thickness, consider light pounding to a uniform 3/4-inch thickness. Pat the surface dry with paper towels to promote a clean sear and to help salt and any rub stick. For extra flavor and moisture, you can brine lightly in a kosher salt solution for 15–30 minutes, or apply a dry rub at least 15 minutes before grilling. Pat dry again after brining or seasoning to keep the crust crisp. These prep steps minimize gaps between exterior browning and interior doneness and reduce the risk of overcooking.
Marinade, seasoning, and oiling for flavor and sear
Marination adds flavor and can improve moisture retention, but not every marinate is necessary. A light, acid-based marinade (lemon juice, vinegar, or yogurt with herbs) for 30 minutes to 2 hours can brighten flavor; longer times risk texture changes. If you prefer dry seasoning, use a simple blend of kosher salt, pepper, garlic powder, and a touch of paprika for color. Oil the chicken or lightly oil the grill grates to prevent sticking, then baste carefully during the last minutes of cooking for extra gloss and protective moisture. For best sear, leave the chicken dry after any marinade and avoid overcrowding the grill.
Heating strategy: two-zone grilling explained
Two-zone grilling involves one hot zone for searing and a cooler zone for finishing. On a gas grill, turn burners to high for searing and lower others to medium or medium-low for the indirect finish. On a charcoal grill, bank two areas—hot coals and a cooler area—and place the chicken on the cooler side after a quick sear. This approach reduces flare-ups and lets you push the chicken to its target internal temperature without burning the exterior. A thermometer becomes essential here, as it confirms doneness while allowing you to time the sear precisely.
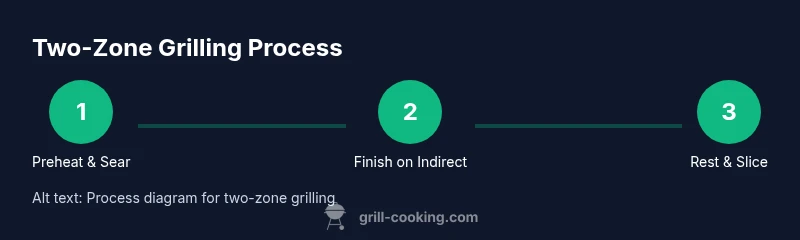
Step-by-step cooking flow: sear, then finish
Begin with a hot surface and a light oil coating. Place the chicken on the hot zone and sear for 2–3 minutes per side, until a golden crust forms. Move the pieces to the cooler zone to finish cooking, flipping as needed for even doneness. Use an instant-read thermometer to reach 165°F in the thickest part, which typically requires 5–8 additional minutes depending on thickness. Avoid pressing on the meat or flipping too often, as this squeezes out moisture. Rest the chicken for 3–5 minutes before slicing to let juices redistribute and maintain juiciness.
Resting, slicing, and serving
Rest is critical for juicy chicken breast. After removing from heat, tent loosely with foil and let stand for 3–5 minutes. This lets juices reabsorb rather than run out when you slice. Slice against the grain in one clean motion to maximize tenderness. Serve with vibrant sides like grilled vegetables, a fresh herb salad, or a squeeze of lemon for brightness. If you have leftovers, store in a shallow container in the fridge for up to 3–4 days, or freeze for longer keeping quality.
Troubleshooting common issues
If the chicken finishes dry, you likely overcooked or used uneven thickness without sufficient resting. Check the thickness before cooking and keep a close eye on the thermometer during the final minutes. If you see flare-ups, move the meat away from direct flames and reduce oxygen exposure by closing the grill vents slightly on charcoal grills. Under-seasoned meat can be upgraded with a quick finishing rub or a light drizzle of olive oil and lemon juice after cooking. For thicker breasts, consider pounding or butterflying to shorten cook time and improve evenness.
Safety and storage tips
Always cook chicken to 165°F (74°C) as measured with an accurate thermometer. Prevent cross-contamination by using separate utensils and cutting boards for raw and cooked meat. After grilling, refrigerate leftovers within two hours and reheat to 165°F when eating later. For meal prep, portion into single-serving containers and store in the refrigerator for up to 3–4 days. When freezing, wrap tightly and label with date for best quality. These practices keep your grilled chicken safe and tasty across multiple meals.
Tools & Materials
- Instant-read thermometer(Probe into thickest part, avoid touching bone)
- Tongs(Long, sturdy, non-slip grip)
- Grill brush(Bristle or paddle style for cleaning grates)
- Oil spray or brushing oil(Light coating for sear and nonstick)
- Kosher salt(For seasoning and quick brine)
- Black pepper, garlic powder, paprika(Basic dry rub)
- Olive oil or neutral oil(Light coating before grilling)
- Cutting board(For resting and slicing)
- Chef's knife(Cleanly slice after resting)
- Paper towels(Dry surfaces and pat dry before seasoning)
- Aluminum foil (optional)(Tent for resting)
- Storage containers(Seal leftovers for fridge or freezer)
Steps
Estimated time: 30-45 minutes
- 1
Inspect and pat dry
Inspect breasts for even size; pat dry thoroughly to remove surface moisture that inhibits sear. This helps achieve a better crust and reduces steaming during cooking.
Tip: Dry surface equals a better sear; moisture is the enemy of crust. - 2
Season or marinate
Apply a light marinade or dry rub to all sides. If marinating, keep to 30 minutes to 2 hours for best results without softening texture.
Tip: Pat dry after marinating to maintain surface dryness for sear. - 3
Preheat for two-zone grilling
Set up a hot zone for searing and a cooler zone for finishing. Aim for about medium heat on the finish side to avoid overcooking.
Tip: Two-zone setup reduces flare-ups and protects the interior. - 4
Oil the grates and the chicken
Lightly oil the grates and the chicken surface to prevent sticking and promote an even crust.
Tip: Oil on the grate prevents sticking; oil on the chicken helps with browning. - 5
Sear then move to finish
Sear each side for 2–3 minutes until golden, then transfer to the cooler zone to finish to 165°F.
Tip: Avoid moving pieces too often; let crust form for a reliable sear. - 6
Check temperature and rest
Check thickest part with thermometer. Remove at 165°F and rest 3–5 minutes.
Tip: Resting keeps juices from running out during slicing. - 7
Slice and serve
Slice against the grain for tenderness; serve with bright sides or a squeeze of lemon.
Tip: Angle knife with grain direction for cleaner slices. - 8
Store leftovers safely
Refrigerate within two hours; store in shallow containers for quick cooling.
Tip: Label with date and use within 3–4 days.
FAQ
What internal temperature should chicken breasts reach for safety and juiciness?
Cook chicken breasts to 165°F (74°C) in the thickest part. Use an instant-read thermometer and let the meat rest before slicing.
Cook to 165 degrees and rest briefly for juiciness.
Is marinating chicken breasts worth it before grilling?
A short marinade or dry rub adds flavor and can improve moisture. Marinate 30 minutes to 2 hours, then grill as directed.
Marinate 30 minutes to 2 hours for best flavor and moisture.
How long should I grill chicken breasts on a gas grill?
Plan about 6–8 minutes per side over medium heat, then verify with a thermometer before resting.
Typically six to eight minutes per side, then check the temp.
How can I tell if chicken breasts are done without a thermometer?
Look for opaque appearance and juices running clear. But a thermometer is the reliable method.
Color and clear juices help, but use a thermometer for accuracy.
Bone-in vs boneless chicken breast for grilling?
Boneless breasts cook faster and are easier to season; bone-in can stay juicier but require longer cooking and more heat control.
Boneless are faster; bone-in stays juicier with longer cook time.
What is two-zone grilling and why use it for chicken?
Two-zone grilling sears on high heat and finishes on a cooler zone to prevent overcooking and scorching.
Sear on the hot zone, finish on the cooler zone.
Watch Video
Quick Summary
- Choose boneless, uniform breasts for even cooking
- Use two-zone heat to sear and finish safely
- Cook to 165°F and rest before slicing
- Dry surface is key to a good crust
- Resting improves juiciness and sliceability