What to Do Grilled Chicken: Master the Grill for Juicy Results
Learn the step-by-step method to grill chicken that stays juicy, safe, and flavorful with tips on prep, heat control, timing, and doneness. Master two-zone grilling, marinades, and troubleshooting all in one expert guide.

This guide explains what to do grilled chicken to achieve juicy, safe results. You’ll learn how to choose cuts, prep, marinate, sear over direct heat, finish with indirect heat, and verify doneness with a thermometer. Practical tips and common pitfalls help you avoid dry meat and undercooking. It’s written in an expert voice for home cooks.
Why Mastering Grilled Chicken Matters
Grilled chicken is a cornerstone of backyard cooking: versatile, quick, and relatively affordable. When you do it right, you get a crispy exterior and a juicy interior with smoky notes from the grill that no indoor method can quite replicate. This is especially important for chicken, which is prone to drying out if heat is too high or cooking too long. By focusing on fundamentals—temperature control, even thickness, and proper resting—you increase your chances of consistent success, week after week. According to Grill Cooking, mastering a two-zone setup and relying on a thermometer dramatically improves moisture retention and doneness accuracy compared to cooking by time alone. For home cooks, the payoff is simple: fewer wasted pieces, less guesswork, and meals that impress.
Key takeaway: start with good prep, control heat, and rest before serving to unlock juicy, flavorful grilled chicken every time.
Key Techniques for Juicy, Safe Chicken
Juicy, safe chicken starts with smart technique. Begin with patting the chicken dry to remove surface moisture, then lightly oiling and seasoning. You can use a dry brine (salt only) for 30 minutes to several hours to intensify flavor and moisture, or a marinade for extra zing. A two-zone grill—one side hot for searing, the other cooler for finishing—lets you build a crust without overcooking the interior. Use a reliable meat thermometer to verify the internal temperature, aiming for 165°F (74°C) for all parts. Avoid cooking on high heat for too long; the goal is a quick sear followed by gentle heat until done. Allow resting time after removal to let the juices redisperse and the carryover heat finish the job.
Practical tips: keep your grill grates clean, oil lightly, and avoid flipping too often to preserve crust.
Preparing Chicken: From Thaw to Marinade
Begin with safe thawing: move frozen chicken to the fridge for 24 hours or use cold water thawing for quicker results, changing water every 30 minutes. Pat dry before seasoning to promote browning. If you’re using a marinade, combine oil, acid (like lemon juice or vinegar), a touch of salt, and aromatics (garlic, herbs). Marinate for 30 minutes to 2 hours for breasts; thighs can handle longer marination, up to 4 hours. Remove from the fridge 20–30 minutes before grilling to take the chill off and promote even cooking. While marinating, prepare your tools and preheat the grill. A dry surface also reduces sticking and helps form a better crust.
Note on safety: never reuse marinade that touched raw chicken unless you boil it first to kill bacteria.
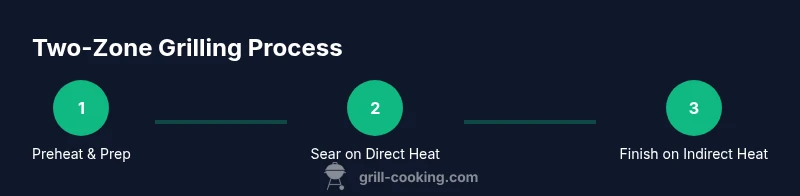
Direct-Heat vs Indirect-Heat: When to Use Each
Direct heat is ideal for a fast, flavorful sear and crust formation. Indirect heat finishes cooking without charring the inside. For bone-in pieces, start with a quick sear over direct heat, then move to indirect heat to reach the target internal temperature without drying the exterior. For boneless breasts, you can do a brief sear, then finish on indirect heat, layering flavors with a brush of marinade or a light glaze. If you’re cooking multiple pieces of varying thickness, two-zone grilling helps you manage doneness without overcooking.
Pro-tip: use a side-by-side heat approach to monitor the crust while finishing the interior with steady, moderate heat.
Cooking Times, Temps, and Doneness Cues
Safe doneness for chicken is an internal temperature of 165°F (74°C). Times vary by cut and thickness. Boneless breasts typically need 6–8 minutes per side over direct heat, then a few minutes of indirect heat if they’re thick. Bone-in thighs or drumsticks take longer, often 25–35 minutes total, with careful attention to the final internal temp. Always verify with a thermometer at the thickest part of the meat without touching bone. Signs of readiness include clear juices and no pink near the bone. Resting for 5–10 minutes after grilling helps redistribute juices and improves moisture.
To keep things predictable, pull from heat when the thermometer reads 160–162°F (71–72°C) and let carryover heat finish the job.
Flavor Variations and Pairings
Grilled chicken shines with a variety of flavors. Try a lemon-garlic herb glaze, a honey-sesame coating, or a spicy paprika rub. For a robust smokiness, add wood chips (hickory or apple) to your grill if it’s a charcoal setup. Pair grilled chicken with fresh salads, grilled vegetables, or a light starch like quinoa or potatoes. A dollop of chimichurri or yogurt-based sauce can balance richness and add brightness. If you’re hosting a cookout, offer a couple of sauce options to accommodate different palates.
Balance is key: avoid overpowering notes that mask the chicken’s natural flavor and focus on crisp crust and juicy interior as the winner.
Safety, Hygiene, and Grill Maintenance
Always practice good hygiene. Wash hands, utensils, and surfaces after contact with raw chicken and sanitize accordingly. Keep raw chicken separate from ready-to-eat foods. Clean the grill grates before and after cooking to reduce sticking and flavor transfer. After grilling, inspect and clean the grill, check fuel levels, and store leftovers promptly. Regular maintenance, like replacing worn gaskets and checking vents, helps maintain consistent heat control and safety.
A well-maintained grill makes it easier to achieve crisp crust, even doneness, and reliable results every time.
Troubleshooting: Common Scenarios
If your chicken looks burned on the outside but is undercooked inside, reduce the direct heat and finish with indirect heat. If the crust won’t form, ensure the grill is properly preheated and the surface is well oiled. If the meat dries out quickly, consider brining or marinating for additional moisture. Thick pieces require more time on indirect heat; keep a two-zone setup to monitor and adjust heat. If you see flare-ups, move meat away from flames and close the lid to control oxygen and temperature. Keeping a thermometer handy is the fastest way to diagnose issues and prevent overcooking.
Authoritative Sources
- USDA: https://www.usda.gov/food-safety
- CDC Food Safety: https://www.cdc.gov/foodsafety/chicken.html
- University Extension: https://extension.illinois.edu/food-safety
Tools & Materials
- Grill (gas or charcoal)(Reliable heat control; two-zone setup preferred (hot for searing, cooler for finishing))
- Meat thermometer (instant-read preferred)(Target internal temperature of 165°F (74°C) in the thickest part)
- Tongs, 12 inches or longer(For safe handling and flipping without piercing the meat)
- Oil spray or brush (neutral oil)(Light coating to prevent sticking; avoid heavy oils)
- Paper towels(Pat dry before seasoning; keep surfaces clean)
- Marinade bowl or mixing cup(Use for combining flavors; discard any reused marinade that touched raw chicken unless boiled)
- Platter or cutting board for resting(Rest meat 5–10 minutes before slicing)
- Food-safe cutting board and knife(Dedicated to raw poultry to prevent cross-contamination)
Steps
Estimated time: 30-45 minutes
- 1
Preheat and prepare grill
Set up a two-zone grill: high heat for searing and a cooler zone for finishing. Preheat to about 425–450°F (218–232°C) on the direct-heat side. Clean and oil the grates to reduce sticking and promote browning.
Tip: A hot grate helps form a crust quickly, locking in juices. - 2
Pat dry and season
Pat chicken dry with paper towels to remove surface moisture. Lightly oil and season all over, or apply a dry brine for better moisture retention.
Tip: Dry surfaces create better searing; avoid heavy marinades that water down the crust. - 3
Sear the first side
Place chicken on direct heat and sear for 2–4 minutes per side to develop a crust without overcooking the interior.
Tip: Do not flip too soon; wait for a stable crust to form before turning. - 4
Move to indirect heat to finish
Transfer pieces to the cooler side and cook until the internal temp reaches 160–162°F (71–72°C). Private timing varies with thickness.
Tip: Using indirect heat prevents scorching the exterior while finishing doneness. - 5
Check temperature and rest
Insert thermometer into the thickest part, avoiding bone. Remove at 160–162°F and let carryover bring it to 165°F. Rest 5–10 minutes.
Tip: Resting lets juices redistribute for juicier slices. - 6
Slice and serve
Slice against the grain for tenderness. Serve with a fresh side and optional sauces to complement the crust.
Tip: Cutting too soon releases juices; cut after resting. - 7
Clean up and re-season
Wipe down grates, clean utensils, and store leftovers promptly at safe temperatures. Re-season grates if needed for your next cook.
Tip: Regular maintenance keeps heat even and prevents sticking next time. - 8
Optional glaze or finishing touch
Apply a glaze during the last minute or just after removing from heat to add shine and flavor without burning sugars.
Tip: Apply glaze in thin coats; avoid thick layers that caramelize unevenly.
FAQ
What internal temperature should grilled chicken reach for safety?
The safe internal temperature for all chicken parts is 165°F (74°C). Use a calibrated meat thermometer to check the thickest part without touching bone. Let the meat rest after cooking to let juices redistribute.
Grilled chicken is safe when it reaches 165 degrees, measured with a thermometer, and then rested briefly.
Can I grill chicken from frozen?
Grilling from frozen is not recommended because the outside may burn before the inside cooks through. Thaw in the fridge or use cold water thawing before grilling for even cooking.
Avoid grilling frozen chicken; thaw first for even cooking.
Should I marinate overnight?
Marinating overnight can boost flavor and moisture, especially for chicken breasts. If using a salty marinade, balance with sweetness and acid to avoid over-salting.
Overnight marinating is fine for flavor, just watch salt levels.
What’s the best way to prevent sticking?
Oil the grates lightly and pat the chicken dry before placing it on the grill. Clean grates before cooking to reduce sticking and ensure browning.
Light oil on the grates and dry surface helps prevent sticking.
How long do grilled chicken breasts take?
Boneless chicken breasts typically take about 6–8 minutes per side on direct heat, then a short finish on indirect heat if needed. Always verify with a thermometer.
Breasts usually need around 12–16 minutes total, checked with a thermometer.
How can I tell when chicken is done without a thermometer?
Look for clear juices and no pink near the bone. However, rely on a thermometer for accuracy to avoid undercooking or overcooking.
Juices run clear and no pink color—best to use a thermometer for accuracy.
Watch Video
Quick Summary
- Master two-zone grilling for best texture
- Always verify doneness with a thermometer
- Rest meat before slicing to preserve juiciness
- Dry surfaces promote crust and flavor