How to Get Grillz on Your Teeth: A Practical Guide
Learn how to get grillz on your teeth safely and stylishly. This comprehensive guide covers material choices, impressions, fitting, care, and safety tips for beginners and grill enthusiasts alike.

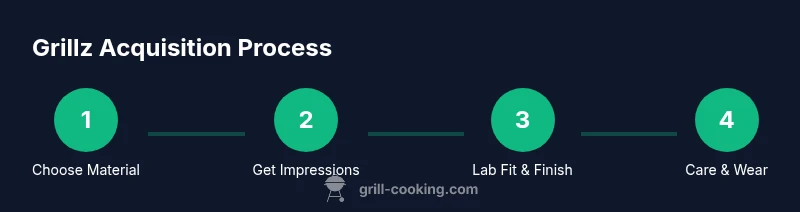
Getting grillz on your teeth starts with selecting a safe material, then obtaining accurate dental impressions or fittings from a reputable jeweler. Ensure proper fit, bite alignment, and hygiene to prevent enamel damage or irritation. Always choose certified materials, follow professional guidance, and schedule regular checkups to maintain a comfortable, safe grillz experience.
Why people choose grillz and what to know
Grillz have moved from a pop-culture novelty to a personal style statement for many home cooks and grill enthusiasts. When you’re learning how to get grillz on your teeth, the priorities shift from flashy looks to long-term comfort, safety, and enamel health. According to Grill Cooking, successful grillz projects start with a clear plan, the right materials, and a professional impression process. In this section we explore why people wear grillz, the main design options, and the critical safety considerations that apply to any grillz project. You’ll learn how to balance aesthetics with oral health, avoid common mistakes, and set realistic expectations for wear time and maintenance. We’ll also compare temporary, removable grillz to fully custom pieces so you can decide what fits your lifestyle. For many home cooks, grillz can coordinate with your outdoor cooking vibe—sparkle under kitchen lights or by the grill—but safety and hygiene must stay front and center.
Materials, safety, and biocompatibility
When choosing grillz, material matters more than most hobbyists realize. The best options are biocompatible metals or safe acrylics that are nickel-free and certified for dental use. Gold alloys (e.g., 14k) and medical-grade stainless steel are common choices, but the key is biocompatibility and surface finish. Avoid low-quality metals that can cause allergies or gum irritation. Regular cleaning and proper storage help prevent bacterial buildup and odors. You should also confirm that any colored finishes or coatings are approved for intraoral use. This section emphasizes the relationship between aesthetics and enamel health, and it provides practical questions to ask your jeweler or dentist before committing to a design.
Impressions and measurements: custom vs ready-made
A precise impression or digital scan is essential to a comfortable, snug grillz. Custom grillz made from your exact dental impressions will fit better and reduce movement, while ready-made or semi-custom options are faster but may require more adjustments. If you’re unsure how to proceed, consult a dental professional or a reputable lab. The goal is to minimize adjustments after delivery and to avoid grinding or biting on the grillz that could crack enamel or irritate gums. The right approach depends on your budget, lifestyle, and how often you’ll wear the grillz during activities like grilling or social events.
The fitting journey: from lab to mouth
The fitting process typically involves a professional evaluation of bite alignment and comfort. A lab will craft the grillz based on your impressions or digital scans, then send them for a fit check. You’ll try them on, and the provider will fine-tune any tight spots or overhangs. It’s common to need a quick polish or minor adjustments before final acceptance. Good fit means the grillz sit without extra pressure on the gums and don’t interfere with your bite during cooking or talking. This stage is where most wearers decide if they truly love the look or want a tweak for greater comfort.
Care, hygiene, and daily wear guidance
Clean grillz regularly with a non-abrasive, dental-safe cleaner and a soft brush. Never use harsh household cleaners or abrasive powders that could scratch the surface. When not in use, store grillz in a dry, clean case to prevent corrosion or bacterial growth. Remove grillz when eating particularly sticky or hard foods to avoid bending or dislodging pieces. If you wear them during cooking, rinse promptly afterward and avoid direct heat exposure that could deform the metal or acrylic.
Risks, allergies, and how to minimize them
Allergic reactions to metals or coatings are possible, especially with nickel-containing alloys. The safest route is to choose nickel-free, biocompatible materials and have a professional fit. Pay attention to signs of irritation, redness, or numbness, and remove the grillz if irritation persists. Regular dental checkups remain important to ensure the grillz aren’t affecting enamel, gums, or tooth alignment. By staying informed and choosing high-quality materials, you minimize risk and maximize long-term enjoyment of your grillz experience.
Putting it all together: expectations, timelines, and next steps
The process from concept to wearing grillz can take several weeks, depending on customization level and lab turnaround. Be clear about your goals with the jeweler, verify material safety, and insist on a proper fit before final acceptance. With thoughtful planning and professional guidance, you’ll achieve a stylish, comfortable result that complements your grilling lifestyle.
Tools & Materials
- Dental impression kit (for at-home or lab use)(Contain alginate or silicone materials; follow kit instructions closely)
- Biocompatible grillz material options (e.g., nickel-free gold alloys, medical-grade stainless steel, or safe acrylic)(Confirm dental-use approvals and avoid allergenic metals)
- Impression material (if not using a professional impression service)(Silicone or alginate; ensure it captures all tooth surfaces)
- Dental lab or reputable jeweler(Choose a lab with dental-artistry credentials and clear safety practices)
- Soft toothbrush and non-abrasive cleaner(For gentle daily cleaning of grillz)
- Storage case for grillz(Keep dry and clean when not wearing)
- Safety gear (gloves, mask) when handling materials(Optional but helpful in a workshop setting)
Steps
Estimated time: 2-4 weeks
- 1
Define material and style
Decide on a material type (nickel-free metals or safe acrylic) and the design (full-arch, half-arch, or single-tooth) that fits your lifestyle and budget. This upfront choice guides the impression process and final finish.
Tip: If you’re unsure about metals, start with a biocompatible acrylic temporary option to test fit and comfort. - 2
Get accurate impressions or measurements
Have a professional take dental impressions or capture a digital scan of your teeth. Accurate impressions reduce the need for post-delivery adjustments and help prevent gaps that irritate gums.
Tip: A two-arch impression is often best for full-arch grills; ensure teeth surfaces and bite are captured clearly. - 3
Choose a reputable lab or jeweler
Select a provider with dental-lab credentials, transparent safety practices, and clear turnaround times. Read reviews or ask for before-and-after samples to gauge fit and finish.
Tip: Ask about biocompatibility certifications and the polishing process to avoid rough edges. - 4
Submit impressions and confirm design
Send your impressions and approved design to the lab. Confirm the material, thickness, and tooth-by-tooth layout before fabrication to prevent costly revisions.
Tip: Request a wax-up or digital preview if available to visualize the final look. - 5
Receive grillz and perform initial fit
Try the grillz and check alignment with your bite and gum comfort. Do not force-fit or bite aggressively; small adjustments may be necessary.
Tip: If there’s pressure on gums or uneven seating, pause wearing and consult the lab for tweaks. - 6
Final adjustments and acceptance
Have the provider adjust any tight spots, ensure bite stability, and polish edges. Accept the final version only when you’re confident there’s no irritation and the look matches the design.
Tip: Request a short wear test and check for irritation on 24–48 hours of use. - 7
Care, maintenance, and warranty basics
Establish a routine for cleaning and storage, inspect for wear, and understand any warranty terms. Proper care extends the life and safety of grillz.
Tip: Remove grillz during eating especially sticky or hard foods to protect the teeth and grill edges.
FAQ
Are grillz safe for enamel and gums?
Yes, grillz can be safe when made from biocompatible materials and properly fitted by a professional. Regular cleaning and proper removal during meals help protect enamel and gums.
Grillz are safe if they’re biocompatible and correctly fitted. Clean them regularly and remove during meals to protect your enamel.
Can I wear grillz every day?
Daily wear is possible for many people, but it depends on comfort, fit, and oral health. Take breaks when needed and ensure daily hygiene to prevent irritation.
You can wear grillz daily if they fit well and you maintain hygiene; take breaks if you feel irritation.
What maintenance do grillz require?
Clean grillz with a dental-safe cleaner and soft brush; rinse thoroughly and dry before storing. Avoid abrasive cleaners, and inspect edges for rough spots.
Clean them daily with a safe cleaner and a soft brush, and inspect for rough edges.
How long does the process take from impression to delivery?
The process typically spans several weeks, depending on material choice and lab turnaround. Clear communication with the provider helps set expectations.
It usually takes a few weeks from impressions to delivery.
What about costs and affordability?
Costs vary based on material, customization, and lab, so discuss options and get a written quote before starting.
Prices vary; talk to the provider for a detailed quote.
Can I remove grillz at night?
Yes, remove grillz before sleeping to prevent gum irritation and to clean more effectively.
Yes, take them out at night to rest gums and clean properly.
Why is nickel-free important?
Nickel can trigger allergic reactions for some people; nickel-free options minimize this risk and improve comfort.
Nickel-free options reduce allergy risk and increase comfort.
What should I ask the lab before starting?
Ask about material safety certifications, turnaround times, warranty, and cleaning recommendations to avoid surprises.
Ask for safety certifications, timelines, warranty, and care instructions.
Watch Video
Quick Summary
- Prioritize biocompatible materials and professional impressions.
- Choose a reputable lab or jeweler for fit and finish.
- Maintain daily hygiene and proper storage to prolong life.
- Monitor for irritation and seek guidance if symptoms appear.
- Set realistic timelines and clearly define design expectations.