Learn How to Make Grillz: A DIY Guide
A practical, safety-focused guide to making dental grillz at home. Learn materials, steps, cleaning, and safety tips from Grill Cooking Team.

Learn how to make grillz safely at home with a focus on material safety, proper fit, and careful finishing. This guide covers essential tools, beginner-friendly steps, and crucial safety warnings to protect teeth and gums. Always consider a dental professional for long-term wear and hygiene advice. Follow the step-by-step plan below for best results.
What grillz are and why safety matters
Grillz are decorative dental pieces worn over the front teeth to create a bold, fashionable look. If you’re here to learn how to make grillz, this guide from Grill Cooking emphasizes safety, biocompatible materials, and proper fit. A well-made grillz should sit comfortably without causing pressure, irritation, or movement. The Grill Cooking team notes that many DIY projects succeed when you plan around oral hygiene and wear duration, not just appearance. Dental jewelry that sits in the mouth requires careful material selection and hygiene to prevent irritation, infections, or enamel wear. If you have any doubt about fit or materials, seek professional advice before wearing grillz regularly.
Safety-first: dental health, materials, and wear considerations
Safety is the foundation of any DIY grillz project. Use materials labeled for intra-oral use, avoid alloys containing nickel if you or your household has sensitivities, and choose cleaning agents that are non-abrasive to enamel. Do not rush the process; improper fit can irritate gums, cause sores, or trap bacteria. Grill Cooking recommends consulting a dentist if you plan to wear grillz for extended periods, especially for those with braces, implants, or ongoing dental work. Always work in a clean environment, sanitize tools, and monitor for any signs of discomfort during wear.
Materials and preparation: choosing biocompatible options
Before you begin, you must select materials that are safe for oral use. Biocompatible metals or dental-grade acrylics are commonly discussed options, but not all products are suitable for mouth contact. Stick to food-grade or intra-oral-safe resins and metals, and avoid unknown alloys. Gather tools such as mold material, safe finishing compounds, polishing equipment, and non-toxic sealants. Plan your design with simple shapes first, then advance to more complex patterns as you gain confidence. Hygiene is essential—wash your hands thoroughly, sanitize work surfaces, and keep all resin or metal pieces out of reach of children and pets.
Molding and casting concepts: from impression to model
Creating a precise mold is critical for comfort and fit. Start with a clean impression material that’s non-toxic and easy to sterilize. A well-made impression captures the bite and alignment of the teeth without adding unnecessary pressure. When casting, ensure your model represents the intended wear surface and that the grillz will not interfere with bite or speech. Subtle adjustments during casting help prevent chafing. Remember, the goal is a secure fit that feels natural and does not irritate gum tissue or enamel.
Finishing, sealing, and wearing guidelines
Finishing is not just cosmetic—it determines comfort and safety. Use fine polishing compounds to smooth rough edges, then seal with a dental-safe glaze or resin cure. Inspect for sharp corners and remove any burrs that could injure the tongue or gums. When wearing grillz, avoid chewing hard foods that could crack the piece or damage teeth. Regular cleaning with non-abrasive cleaners is essential to prevent bacteria buildup. If you notice irritation, remove the grillz and consult a dental professional.
Alternatives and professional options: when to seek help
DIY grillz can be fun and creative, but professional fabrication offers precision and safety. Consider visiting a licensed jewelry maker who specializes in intra-oral pieces or a dental lab that can provide a custom-fit design using approved materials. If you’re uncertain about the material or fit, a professional can provide an accurate mold and ensure proper bonding or seating. Grill Cooking encourages exploring these safe alternatives when in doubt, to protect oral health while still achieving a personalized look.
Tools & Materials
- Dental-grade metal or alloy suitable for intra-oral use(Biocompatible and nickel-free if possible)
- Acrylic resin approved for intra-oral use(Food-safe, non-toxic, and cure-ready)
- Dental impression material (non-toxic putty)(For accurate bite capture)
- Mold tray or impression tray(Stable base for impression material)
- Safety gloves and protective eyewear(Protect hands and eyes during work)
- Non-abrasive polishing compounds(Smooth edges without scratching)
- Fine sanding papers (grits 600-1200)(Remove burrs and refine surface)
- Dental-safe sealant or glaze(Improve surface finish and hygiene)
- Dental-safe adhesive (optional)(Only if you are using temporary seating under professional guidance)
- Rubbing alcohol or isopropyl cleanser(Sterilize tools and surfaces)
- Jaw-friendly pliers with smooth jaws(Shape pieces without marring surfaces)
- Soft cloths or lint-free wipes(Clean surfaces without scratching)
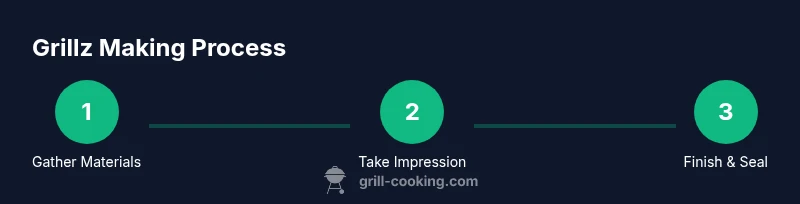
Steps
Estimated time: 60-120 minutes
- 1
Gather and sanitize materials
Collect all intra-oral-safe materials and tools. Sanitize surfaces and wash hands thoroughly to prevent contamination before handling any dental-grade items.
Tip: Lay out a dedicated workspace and label each item for easy access. - 2
Take a dental impression
Mix the impression material according to the instructions and seat it gently over the front teeth to capture the bite. Allow it to cure fully before removing.
Tip: Work calmly to avoid distortion; a rushed impression leads to poor fit. - 3
Create a wax or resin model
Pour or sculpt a basic model that matches the impression. This sets the foundation for the grillz shape and bite alignment.
Tip: Keep the model light and simple at first; you can add contours later. - 4
Cast the grillz in chosen material
Cast or press your grillz using the biocompatible metal or acrylic. Ensure the piece forms a snug, non-obtrusive seating surface over the teeth.
Tip: Check fit against the model before curing; adjust as needed to avoid bite interference. - 5
Finish and polish the edges
Use fine sanding and polishing compounds to smooth any burrs. Rinse, dry, and apply a dental-safe glaze or sealant.
Tip: Polish with a clean, soft cloth to avoid micro-scratches that harbor bacteria. - 6
Test fit and assess safety
Place the grillz in the mouth without forcing; ensure comfortable wear and check for irritation. Seek professional guidance if any discomfort or fit issues persist.
Tip: Do not wear while chewing hard foods; monitor for signs of sensitivity or pain.
FAQ
Is it safe to make grillz at home?
DIY grillz can be safe if you use biocompatible materials and follow hygiene best practices. However, long-term wear and precise fit are best handled by a professional to protect teeth and gums.
DIY grillz can be safe if you use safe materials and maintain hygiene, but for long-term wear, see a professional.
What materials are considered safe for intra-oral use?
Materials labeled for intra-oral use, such as dental-grade resins and biocompatible metals, are preferred. Avoid unknown alloys or untested resins that could cause irritation or allergies.
Choose dental-grade materials labeled for intra-oral use and avoid unknown alloys.
Do grillz require professional fitting?
Professional fitting ensures proper bite alignment and comfort. DIY can work for practice, but a dentist or dental lab can provide a precise, safe result for regular wear.
Professional fitting ensures proper bite and comfort; consider it for regular wear.
How should I clean grillz safely?
Use non-abrasive cleaners and rinse thoroughly after each wear. Avoid harsh chemicals that could degrade materials; dry completely to prevent bacterial growth.
Clean with non-abrasive cleaners, rinse well, and dry completely.
Can DIY grillz damage teeth?
Yes, ill-fitting grillz can irritate gums, scratch enamel, or trap bacteria. Prioritize fit, hygiene, and limit wear duration to reduce risk.
Poorly fitting grillz can irritate gums and enamel—fit and hygiene matter.
What are alternatives to DIY grillz?
Consider visiting a licensed jewelry maker or a dental lab for custom-fit grillz made with approved materials. This can deliver a safer, better-fitting result than basic DIY methods.
Professional options can offer safer, better-fitting grillz.
Watch Video
Quick Summary
- Define safety before aesthetics when making grillz.
- Use intra-oral-safe materials and proper hygiene.
- Accurate impressions lead to better fit and comfort.
- Finish edges smoothly to avoid gum irritation.
- Professional options exist if you’re unsure about DIY.