How to Make Grill Chicken in Oven: A Complete Step-by-Step Guide
Learn to achieve grill-flavored, juicy chicken indoors with a high-heat bake, rack method, and finishing broil. Includes prep, timing, safety tips, and flavor ideas for a delicious indoor grilling experience.

You can make grill-flavored chicken in the oven by using a high-heat bake with a final broil for char and grill marks. Start with seasoned chicken on a wire rack over a foil-lined pan, bake at 425°F until the internal temp hits 165°F, then broil 2–4 minutes per side. Let rest before serving.
Why oven-grilled chicken can rival outdoor grilling
Indoor grilling can achieve that smoky, charred finish with the right technique. According to Grill Cooking, you can replicate grill flavor using high-heat baking and a brief broil to finish. The goal is a crisp exterior with juicy, evenly cooked meat, not drying out the center. Choosing bone-in cuts or skin-on breasts gives more flavor and helps stay moist when finished under the broiler. Using a wire rack elevates the chicken, exposing more surface to heat and promoting browning on all sides. By layering a simple marinade or dry rub, you create the first flavor layer before any heat contact.
Tools and ingredients you'll need
- Oven preheated to a high heat (about 425°F / 220°C)
- Baking sheet lined with aluminum foil for easy cleanup
- Wire rack that fits inside the baking sheet
- Meat thermometer for accurate doneness
- Tongs for flipping chicken pieces
- Brush or spoon for glaze (optional)
- Chicken pieces (breast, thighs, or mixed)
- Salt, pepper, and a chosen dry rub or marinade
- Optional: citrus juice, garlic, herbs for extra flavor
Tools & Materials
- Oven(Preheat to 425°F (220°C))
- Rimmed sheet pan(Line with aluminum foil for easy cleanup)
- Wire rack(Sits on the sheet pan to elevate chicken and promote browning)
- Meat thermometer(Insert into thickest part to reach 165°F (74°C))
- Tongs(For safe turning without piercing the meat)
- Brush or spoon for glaze(For glaze or marinade during cooking (optional))
- Paper towels or clean cloth(Pat chicken dry before seasoning)
- Seasonings/marinade(Salt, pepper, rub or marinade of choice)
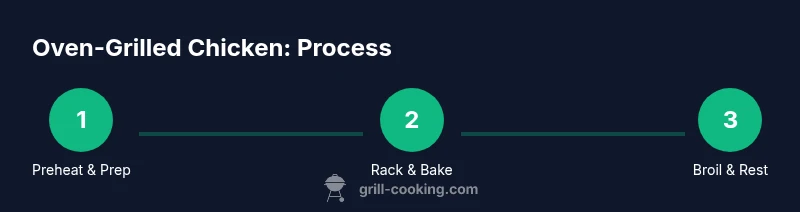
Steps
Estimated time: 30-40 minutes
- 1
Preheat oven and set up rack
Preheat the oven to 425°F (220°C) and place a wire rack inside a rimmed sheet pan. This setup promotes even heat circulation and helps browning without soggy bottoms.
Tip: Avoid opening the oven during preheat to maintain a steady temperature. - 2
Season and pat dry the chicken
Pat the chicken dry with paper towels, then apply your salt, pepper, and chosen rub or marinade. Dry surfaces promote browning and a better crust.
Tip: Dry surface = better browning; moisture on the surface can steam the meat. - 3
Arrange on rack with space
Place pieces on the wire rack with space between them to ensure air can circulate around every piece for even cooking.
Tip: Crowded pieces steam instead of sear; give each piece room. - 4
Bake to near-doneness and check temps
Bake until the thickest piece reaches about 160–165°F (71–74°C). Use a thermometer rather than relying on color alone to judge doneness.
Tip: If using bone-in, expect a slightly longer cook time. - 5
Finish with broil for color
Broil for 2–4 minutes to develop browning and grill-like edges. Watch closely to prevent burning sugars.
Tip: If your broiler is very close, move the pan up one rack and rotate for even browning. - 6
Rest before serving
Remove from heat and rest the chicken 5–10 minutes. Resting lets juices redistribute for juicier slices.
Tip: Slice against the grain to maximize tenderness.
FAQ
Can I use bone-in chicken for this method?
Yes, bone-in cuts stay juicier and benefit from longer cooking times; adjust accordingly and use a thermometer to ensure doneness.
Yes, bone-in works; just adjust the time and use a thermometer.
What oven temperature should I use?
A high-heat bake around 425°F (220°C) works well; convection can help with browning.
About 425 degrees; convection helps browning.
Can I cook from frozen?
It's best to thaw completely; cooking from frozen can lead to uneven doneness and longer cook times.
Best to thaw first; frozen chicken cooks unevenly.
How long should chicken rest after cooking?
Rest 5-10 minutes to redistribute juices and keep meat tender.
Rest for 5 to 10 minutes.
Can I glaze while cooking?
Yes, brush glaze toward the end, especially during the last 1–2 minutes of broiling to prevent burning.
Yes; glaze toward the end and watch closely.
Is this method safe for all chicken cuts?
Yes, breasts and thighs work well; adjust cooking time based on thickness and bone presence.
Breasts or thighs are fine; adjust time as needed.
Watch Video
Quick Summary
- Preheat properly and use a rack to promote even browning
- Finish with a brief broil to mimic grill char
- Always confirm doneness with a thermometer (165°F / 74°C)
- Let the chicken rest before slicing for maximum juiciness
- Experiment with rubs and glazes for varied flavors