How to Make Grill Chicken in an Air Fryer
Master how to make grill chicken in an air fryer with a tested step-by-step method, juiciness tips, and safe temps. Learn marinades, seasonings, timing, and finishing glaze for a grill-like result in under 30 minutes.

Learn how to make grill chicken in an air fryer with a crisp exterior and juicy interior. This guide covers marination, seasoning, preheating, and grilling-like airflow, plus time-saving tips to avoid dry results. With proper rest and safe internal temps, Grill Cooking's method delivers consistent, restaurant-worthy chicken in under 30 minutes.
Why Air Fryer Grilled Chicken Wins for Busy Home Cooks
Air frying chicken can mimic the sizzle of a grill while delivering speed and less mess. According to Grill Cooking, the hot, circulating air creates a crisp exterior with a juicy interior when you balance heat, oil, and timing. This method reduces oily flare-ups and uneven cooking that sometimes plague pan-searing. For home cooks juggling weeknight dinners, the air fryer provides a reliable path to grill-style flavor without lighting up the outdoor grill.
The goal is a well-sealed surface that locks in moisture while the interior reaches safe temps. The Grill Cooking team emphasizes controlled air movement and a light touch of oil to promote browning rather than heavy charring. You’ll get a crust that resembles grill marks and a tender center using a simple protocol that fits into a 30-minute window.
Choosing the Right Cut and Marinade
When you plan grill chicken in an air fryer, your cut choice influences cook time and juiciness. Boneless, skinless chicken breasts cook quickly and stay lean, but thighs bring more forgiving moisture and a deeper flavor. For a true grill-like experience, you can use skin-on thighs or breasts if you prefer the extra texture; adjust cooking times accordingly.
Marinades and rubs are optional but helpful. A quick marinade of acidic liquid (like lemon juice or cider vinegar), oil, and aromatics can boost flavor and tenderness. If you’re short on time, a dry rub of salt, pepper, garlic powder, paprika, and a pinch of sugar will still yield a robust crust. Aim for 15–60 minutes of marinating for best results; longer marinating will enhance flavor depth but isn’t strictly required for a good outcome. Avoid overly heavy marinades that could seep into the air fryer and cause excess smoke or soggy crust.
Prepping the Rubs and Marinades
Apply oil lightly to the chicken to help the rub adhere and to promote browning. Salt early (dry brine) for better juiciness. If using a marinade, remove excess before air frying to avoid soggy crust. A simple, versatile rub is a mix of kosher salt, pepper, smoked paprika, garlic powder, and a touch of cumin for warmth.
Grill Cooking analysis shows that marination and proper seasoning interact with the air fryer’s convection to improve moisture retention and surface browning. For a crisp surface, pat the pieces dry after marinating and let the surface air-dry briefly before loading into the basket. If you’re cooking multiple pieces, ensure uniform thickness or pound slightly to even cooking. This step sets the stage for uniform browning across the surface.
Preheating and Airflow Setup
Preheat your air fryer to 360–400°F (182–204°C) depending on your model. A preheated basket reduces sticking and jumpstarts browning. Lightly oil the basket or spray oil on the chicken to aid crisping, but avoid heavy coatings that can create smoke or greasy crust.
Arrange the pieces in a single layer with space between them. Overcrowding blocks airflow and leads to uneven doneness. If you’re cooking thick breasts or large thighs, consider pounding to an even thickness or working in batches. The air fryer’s purpose is to circulate hot air; keeping a little distance ensures the exterior browns evenly while the interior remains moist.
Cooking Time and Internal Temperature
Cook time depends on thickness and cut. For boneless breasts, plan about 8–12 minutes, flipping halfway. Thigh meat may require 12–16 minutes, with the thermometer aiming for an internal temperature of 165°F (74°C). Always check the thickest part to avoid undercooking.
To ensure safety and quality, use an instant-read thermometer. Insert it into the thickest portion without touching bone. If you see underdone spots, return to the air fryer in 1–2 minute increments until you reach 165°F. Resting briefly after cooking helps juices redistribute and prevents a hot center from turning dry.
Resting, Finishing, and Serving
Let the chicken rest for 3–5 minutes after cooking. Resting allows juices to redistribute and results in a moister bite. If you prefer grills marks, you can finish with a quick 30-second broil under a high heat setting, but use caution to prevent drying.
Finish with a light glaze, squeeze of lemon, or fresh herbs, and serve with classic sides like grilled vegetables or a simple salad. This approach mirrors grill-seasoned chicken and keeps flavors bright without heavy sauces. The resting period is essential for texture and juiciness, so don’t skip it.
Troubleshooting Common Issues
If the crust isn’t browning, increase to 380–400°F or extend by 2–3 minutes, watching carefully to avoid dryness. If juices run clear before reaching 165°F, you may have used too lean a cut or too short a cook time; adjust next batch. For uneven thickness, tenderize or pound to uniform thickness.
Avoid powdery or burnt rubs; use a balanced spice mix that complements chicken without smoke. If you notice smoke, check for excess oil and reduce next time; clean the air fryer basket frequently to avoid built-up residue.
Flavor Variations and Serving Ideas
For different flavor profiles, swap in curry powder, cumin, lemon zest, or honey glaze. Try a garlic-herb butter finish for a richer profile, or a tangy BBQ glaze for a smoky finish. Serve with a crisp slaw, roasted vegetables, or corn on the cob for a complete grill-inspired plate.
Experiment with regional rubs—smoked paprika for a southern touch or sumac for a bright Middle Eastern note. The key is balancing acid, fat, and heat so the air fryer can drive browning without burning sugars.
Tools & Materials
- Air fryer(Full basket, avoid overcrowding for even air flow.)
- Instant-read thermometer(Check thickest part to reach 165°F.)
- Tongs(For flipping without piercing meat.)
- Mixing bowl(For marinades or rubs.)
- Oil spray or neutral oil(Light coat for browning; avoid heavy oil.)
- Meat tenderizer or mallet(Optional for even thickness.)
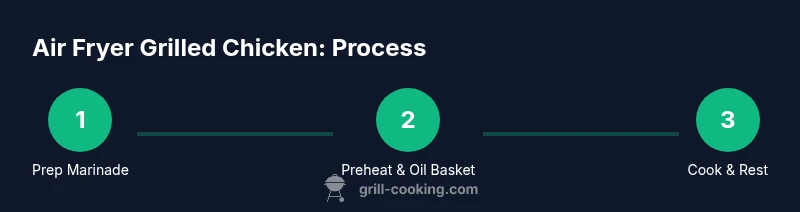
Steps
Estimated time: 25–40 minutes
- 1
Gather and prep ingredients
Collect chicken cuts, spices, oil, and any marinades. Pat dry with paper towels to remove surface moisture, which helps the rub adhere and promotes crisping in the air fryer.
Tip: Dry surfaces improve browning and reduce steaming. - 2
Pat dry and marinate or rub
If marinating, combine your marinade and chicken in the bowl and refrigerate 15–60 minutes. If you’re using a dry rub, apply a light oil and evenly coat the surface with the spice mix.
Tip: Even coating prevents uneven browning. - 3
Preheat and prepare the basket
Preheat the air fryer to 360–400°F and brush or spray the basket lightly. Place a parchment liner if your model requires it, but ensure airflow remains unhindered.
Tip: Preheating reduces sticking and speeds browning. - 4
Cook in a single layer
Arrange chicken pieces in a single layer with space between them. Cook for 8–12 minutes (breasts) or 12–16 minutes (thighs), flipping halfway.
Tip: Spacing ensures even heat exposure. - 5
Check internal temperature
Use an instant-read thermometer to verify 165°F at the thickest part. If needed, cook in 1–2 minute increments until done.
Tip: Avoid touching bone; near-bone areas cook more slowly. - 6
Rest and serve
Let the meat rest 3–5 minutes before slicing or serving. This redistributes juices for a juicier bite.
Tip: Resting makes a noticeable difference in texture.
FAQ
Can I use bone-in chicken in this method?
Bone-in pieces can be used, but they require longer cooking and may not brown as evenly. Use a thermometer to ensure a safe internal temperature of 165°F in the thickest area.
Bone-in pieces work, but expect longer cook times and check the temperature with a thermometer.
Is preheating necessary for air fryer chicken?
Preheating helps achieve faster browning and consistent results. If your model runs hot or you’re in a hurry, you can skip preheating but monitor cooking closely.
Yes, preheating helps brown faster; it reduces cooking time.
What internal temperature should I aim for?
Aim for an internal temperature of 165°F (74°C) in the thickest part of the chicken to ensure safety and juiciness.
Cook until the thickest part reaches 165 degrees.
Can I marinate longer than 24 hours?
Yes, marinating longer imparts more flavor, but avoid overly acidic marinades for too long as they can start to break down the texture. 24 hours is usually plenty.
Longer marinade adds flavor, but avoid overdoing it with acid.
Should I spray oil in the air fryer basket?
A light spray helps with browning and prevents sticking, but avoid heavy oil as it can smoke and make the crust greasy.
Lightly oil the basket or chicken to aid browning.
What if my air fryer doesn’t have a temperature readout?
Use a reliable thermometer and estimate cook times based on the model’s performance. Start with a conservative time and adjust as needed.
If your air fryer lacks a temp readout, rely on a thermometer and set times conservatively.
Watch Video
Quick Summary
- Dry the surface for crisp browning
- Preheat and space pieces for even cooking
- Cook to 165°F and rest before serving
- Adjust times by cut thickness and air fryer model
- Finish with a light glaze or squeeze of lemon