Pressure Wash Grill: Safe, Effective Cleaning Guide
Discover how to pressure wash a grill safely and effectively with our step-by-step guide. Learn tools, safety tips, and maintenance guidance from Grill Cooking to keep your outdoor cooking area pristine.

You can deep-clean a grill by pressure washing exterior surfaces to remove grease and char. Always prep the grill, protect burners and electronics, and follow safety guidelines. This guide walks you through a safe, effective process.
Why Pressure Wash Grill is Beneficial
A thorough exterior clean with a pressure washer can remove baked-on grease, smoke residue, and loose corrosion from a grill's body, lid, and shelves, restoring former luster and reducing the risk of flare-ups caused by trapped grease. For home cooks, this is not just cosmetic; a clean grill heats more evenly, protects protective coatings, and makes subsequent maintenance easier. When done correctly, pressure washing can simplify annual upkeep and keep flavor-rich drippings away from vents that could cause smoky off-notes. The Grill Cooking team notes that the right approach targets exterior surfaces first, then hard-to-reach crevices after the primary buildup has softened. Focus on the hood, knobs, handles, and side shelves before moving to the grate area. A deliberate, controlled cleaning rhythm—not blasting at full power—minimizes the risk of damaging enamel, ceramic coatings, or gasket seals. Preparation matters: remove disposable catch trays, detach battery-powered igniters if present, and disconnect the propane hose or electrical supply when applicable. According to Grill Cooking, regular exterior pressure washing reduces grime and improves the grill's appearance. By following best practices, you can extend grill life and keep your cooking area safe and inviting for family meals.
Safety First: What to Protect When Cleaning
Safety comes first when pressure washing a grill. Ensure the gas supply is fully shut off and the grill has cooled completely before any cleaning. If you own an electric ignition, disconnect the power source and remove batteries to prevent accidental activation. Cover or remove electronics and ignition modules, and protect valves, hoses, and regulator from direct spray. Keep a safe distance from burners and avoid blasting propane or natural gas lines. Wear eye protection and sturdy gloves, and work in a well-ventilated outdoor area. Using a nozzle with a wider spray pattern helps control the force and prevents masking or denting delicate surfaces. If you encounter delicate porcelain-coated grates or enamel finishes, treat them with a gentler approach—pressure washing can be too aggressive for fragile coatings. Remember, safety beats speed; a cautious start saves you time later by preventing costly damage and leaks. The Grill Cooking team emphasizes taking a measured approach to protect the grill’s longevity and your family's safety.
Tools & Materials You'll Need
Before you begin, assemble the following tools and supplies so you can work efficiently and safely. Having the right setup reduces the risk of damage and speeds up the cleaning process.
- Pressure washer with adjustable nozzle (wide spray recommended) — Essential for exterior surfaces
- Plastic sheeting or painter’s tape — Protects burners, control panel, and electronics from spray
- Degreaser or grill-safe cleaner — Breaks down heavy grease and burnt-on residue
- Non-metal grill brush or non-scratch pad — Avoids scratching porcelain or enamel
- Protective gloves and eye protection — Mandatory safety gear
- Buckets of warm water and mild soap — Optional for pre-cleaning
- Towels or microfiber cloths — For final wipe-downs and drying
- Old towels or tarps — To protect the ground and catch runoff when needed
Surface-Specific Cleaning: Grates, Hood, and Exterior
Different grill surfaces respond to pressure washing in distinct ways. Exterior panels and the hood benefit from a controlled spray from top to bottom to push off accumulated grease and smoke. Grates require a gentler touch; use a non-metal brush or a heat-safe scouring pad to avoid damaging porcelain or chrome. Before spraying, remove grates and soak them briefly in warm soapy water if possible to loosen grime, then scrub with care. You can spray detritus from the underside of the hood, but avoid hitting the burner tubes directly. For gas grills, never spray directly into delicate valves; keep your nozzle at a safe distance and angle. After applying cleaner to the exterior, rinse with a broad, even sweep to prevent streaks. Finally, wipe down knobs and handles to remove any smear and inspect for looseness or corrosion. A thorough exterior clean helps prevent flavor transfer and makes spring and summer use more enjoyable, with your grill looking showroom-clean between cooks.
Cleaning Frequency and Maintenance Tips
How often you pressure wash depends on how often you grill, weather exposure, and how well you cover the unit when not in use. Start with a light exterior wipe-down after each grilling session to remove heat smoke and grease; perform a deeper pressure wash seasonally or whenever you notice heavy buildup. Between deep cleans, perform quick checks for rust, loose screws, and gasket wear. Regular maintenance extends the life of gaskets, burners, and panels, and keeps your grill resale-ready. Grill Cooking analysis shows that combining routine light cleans with periodic deeper cleanings yields the best balance of effort and results. If you use a smoker attachment or a warming rack, inspect and clean these parts according to their specific care instructions to prevent flavor carryover.
Common Mistakes to Avoid and Troubleshooting
Common missteps include blasting at high pressure on porcelain coatings, which can chip surfaces, and spraying near gas valves or ignition components. Never pressure wash inside the burner box or directly onto electrical wiring or control modules. Use minimal spray pressure near fragile coatings and avoid saturating seals. If you notice lingering grease in crevices after cleaning, repeat with a milder cleaner and a softer scrub, then rinse thoroughly. If rust appears, treat promptly with an appropriate rust remover and reseal if necessary. For stubborn bonds, switch to a safe degreaser and let it sit for a few minutes before re-scrubbing. Remember, failure to protect vulnerable parts can lead to leaks, uneven heating, or ignition failures.
Post-Cleaning Care: Drying, Reassembly, and Storage
After washing, allow the grill to dry completely before reassembling any removed parts. Reinstall grates, trays, and warming racks in the same orientation to ensure proper airflow. Wipe all surfaces with a dry microfiber cloth to remove any remaining moisture, which helps prevent rust and water spots. Store the grill cover nearby to help protect against sudden rain, and consider applying a light coat of manufacturer-approved protective spray on metal surfaces to slow oxidation. If you plan to store the grill for an extended period, ensure all hoses are drained and disconnected to prevent mildew. A properly dried, reassembled grill reduces the likelihood of odors and ensures a ready-to-cook setup for your next outdoor gathering.
Seasonal Plan for a Cleaner Grill
Create a simple seasonal plan: perform a light exterior wipe-down after each use, a deeper exterior wash quarterly, and a full interior and grate cleaning at the start of grilling season. Align your schedule with weather patterns to avoid cleaning in wet or freezing conditions. Inspect hoses, valves, and seals during each maintenance window and address any wear promptly. A routine, predictable plan keeps your grill reliable, maximizes flavor, and minimizes surprise breakdowns when you fire it up for guests.
Tools & Materials
- Pressure washer with adjustable nozzle(Use a wide spray setting to avoid surface damage)
- Plastic sheeting or painter’s tape(Cover burners and electronics)
- Degreaser or grill-safe cleaner(Choose a product safe for enamel/porcelain)
- Non-metal grill brush or non-scratch pad(Avoid metal bristles that can shed)
- Protective gloves(Grip and protection while scrubbing)
- Eye protection(Goggles or glasses to shield from spray)
- Buckets of warm water and mild soap(Helpful for pre-soak of grates)
- Towels or microfiber cloths(Drying and buffing after rinse)
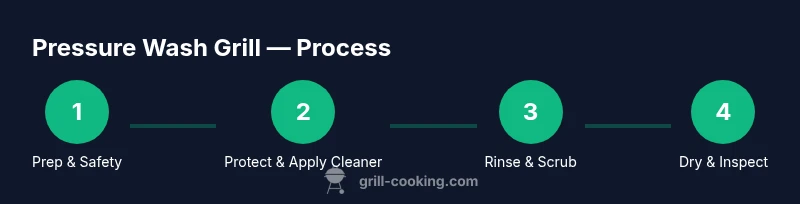
Steps
Estimated time: 30-45 minutes
- 1
Power down and cool surfaces
Turn off the grill, shut off gas supply or disconnect power, and allow all components to cool completely. This prevents accidental ignition and makes spraying safer. Starting from a cool surface also helps the cleaner work more effectively.
Tip: Always confirm there are no hot spots before you begin spraying. - 2
Protect sensitive components
Cover knobs, ignition modules, and wiring with plastic wrap or tape to prevent spray intrusion. Detach or remove removable electronics where possible to reduce risk of water damage.
Tip: Double-check seals and gaskets for wear before spraying. - 3
Attach correct spray nozzle and cleaner application
Attach a wide-angle nozzle to the pressure washer and apply a grill-safe degreaser to exterior surfaces. Avoid blasting directly at burners or valves; keep the spray at a safe distance and angle.
Tip: Let the cleaner dwell for a minute to soften heavy grease before rinsing. - 4
Rinse from top to bottom
Begin at the hood and work downward in broad, even strokes. Avoid concentrated spray on any single area for extended periods to prevent streaking or coating damage.
Tip: Rinse continuously to prevent soap residue from drying on surfaces. - 5
Scrub stubborn grime where needed
Use a non-scratch pad or brush on exterior crevices and the grate edges. If grime persists on grates, soak them briefly in a warm soapy solution and re-scrub with gentle pressure.
Tip: Never use metal bristles on porcelain-coated grates. - 6
Dry, inspect, and reassemble
Wipe all surfaces with a dry cloth and let everything air-dry fully. Reassemble removed parts, inspect for damage or leaks, and store the equipment properly.
Tip: Store the grill behind a breathable cover to minimize weather exposure.
FAQ
Is it safe to pressure wash a grill?
Yes, when you follow safety steps and avoid sensitive components like burners, ignition, and electrical parts. Use a wide spray and keep a safe distance to minimize damage. Always ensure the grill is cool and the gas supply is shut off before cleaning.
It's safe if you follow safety steps, stay away from burners, and use a wide spray with the grill cooled and gas shut off.
What surfaces should I avoid with pressure washing?
Avoid spraying directly into burners, valves, ignition modules, and electrical components. Porcelain-coated grates and enamel surfaces require gentler handling to prevent chipping.
Avoid the burners and electrical parts; gentler handling is best for porcelain and enamel surfaces.
What cleaner should I use for a grill?
Choose a grill-safe degreaser or mild dish soap with warm water for exterior surfaces. Read the product label to ensure compatibility with enamel, porcelain, and stainless steel finishes.
Opt for grill-safe degreaser and mild soap; check the label for your grill’s finish.
How often should I pressure wash my grill?
Deep-clean the exterior seasonally and perform lighter wipe-downs after heavy use. The frequency depends on weather exposure, cooking frequency, and how well you cover the grill when not in use.
Do a seasonal deep clean, plus lighter wipes after heavy use.
Can I pressure wash a gas grill’s burner area?
Avoid direct pressure on burner passages. Instead, clean around the exterior and vent areas, and use a gentle brush to dislodge debris from crevices without forcing water into fuel lines.
No direct spray on burner passages; clean around vents and use a gentle brush.
Watch Video
Quick Summary
- Start with safety and protection of sensitive parts
- Use the right nozzle and cleaner to avoid surface damage
- Rinse and dry thoroughly to prevent rust and odors
- Create a seasonal cleaning plan to keep the grill in top condition