How to Clean Grill Grates: A Step-by-Step Guide
Learn to clean grill grates effectively with safe tools, proven techniques, and maintenance tips. This step-by-step guide covers quick post-cook cleaning, deep-clean methods, rust prevention, and long-term grill care for durable, delicious grilling.

In this guide you will learn how to clean grill grates effectively, remove burnt-on residue, and maintain grate longevity using safe cleaners and tools. You’ll need a grill brush, sponge, disposable gloves, and a mild degreaser. Follow steps for indirect heat and direct heat methods, plus maintenance tips for rust prevention.
Why clean grill grates matters
According to Grill Cooking, keeping the grates clean is essential for even heat distribution, preventing flare-ups, and preserving the true flavor of your food. When you maintain clean grill grates, you reduce cross-contamination risks and ensure better browning and sear marks. Clean grates also last longer, since burnt-on fats and salts won’t bake into the metal. This section explains the science behind why buildup happens and how proper cleaning directly impacts grill performance, appetite appeal, and food safety. You’ll learn how soot, caramelized fats, and mineral deposits form a protective film that actually hinders heat transfer if left unchecked. By forming a routine around post-cook brushing and periodic deep cleaning, you establish a foundation for consistently tasty meals and safer grilling sessions.
Safety first: prepare your space and gear
Cleaning grill grates safely requires a calm workspace, the right gear, and a plan. Start with cooling the grill completely before touching grates. Wear disposable gloves to protect your hands from heat and cleaning agents. Work in a well-ventilated area, away from flammable materials, and keep a bucket of clean water handy for quick rinses. If your grill is gas-powered, turn the burners off and disconnect the gas supply if you’ll perform a deep clean. Always follow manufacturer recommendations for your specific grate material, whether it’s cast iron, stainless steel, or porcelain-coated.
- Always cool the grill before cleaning to avoid burns and steam injuries.
- Avoid aggressive cleaners on porcelain-coated grates to prevent pitting or cracking.
Tools and cleaners you’ll want on hand
Having the right tools on hand makes cleaning faster and safer. Here’s a practical list that covers most home grills:
- Grill brush (preferably brass or stainless steel for durability) — essential for loosening stuck-on residue.
- Nylon or stiff-bristle brush for sensitive surfaces.
- A basin or tub large enough for the grate size to soak if you’re doing a deep clean.
- Mild dish soap or degreaser suitable for grill use — avoid harsh solvents that can damage coatings.
- Sponges, microfiber cloths, and non-abrasive scrub pads.
- Disposable gloves and eye protection if you’re working with hot surfaces or chemical cleaners.
- Drying rack or towels to air-dry grates completely.
- Food-grade oil (like canola or grapeseed) for light seasoning after cleaning, where appropriate.
Note: If your grates are alloy or coated, always verify compatibility with the cleaner you choose to prevent coating damage.
Quick cleaning after every cook (10-15 minutes)
A routine quick clean keeps your grill tasting great and reduces heavy buildup. After you finish cooking and the grill has cooled enough to handle, spray or drizzle a small amount of warm, soapy water or a mild degreaser onto the grates. Scrub with a stiff brush, focusing on the ridges where food sticks. Wipe clean with a damp cloth, then dry with a towel before the next use. Quick cleaning helps minimize residue that bakes onto the surface during subsequent cooks.
- Use indirect heat or off-heat zones when brushing for safety.
- Don’t soak porcelain-coated grates for long periods; a thorough wipe is often enough.
Deep cleaning for stubborn residue (20-30 minutes)
When buildup resists the quick clean, a deeper approach is needed. Remove the grates and soak them in a basin with hot water and a degreasing soap for 10-15 minutes. For cast iron, you can use a more robust degreaser but avoid harsh chemical finishes that could strip seasoning. After soaking, scrub aggressively with a stiff brush or a brass scrub pad to lift charred bits. Rinse thoroughly with clean water, then dry completely before returning the grates to the grill. If you see mineral deposits or heavy grime, repeat the soak cycle or switch to a stronger but grill-safe cleaner.
- For porcelain-coated surfaces, avoid metal scrapers that can scratch the coating.
- Always finish with thorough drying to prevent rust formation.
Rust and material-specific care
Cast iron grates require special handling because seasoning is part of their long-term performance. After cleaning and drying, apply a light coat of oil and heat the grate to polymerize the oil. Avoid soaking cast iron too long, which can strip seasoning. Porcelain-coated grates are more forgiving but can chip if scrubbed aggressively. Stainless steel grates are durable but may develop rust in salty environments; if you notice rust spots, scrub with a brass brush and re-season if needed. In all cases, ensure grates are completely dry before reinstalling to reduce rust risk.
- Regular oiling helps form a protective layer and reduces food sticking.
- Inspect for warping or pitting during deep clean; address issues promptly.
Maintenance to prevent future buildup
Preventive maintenance is cheaper than deep cleaning. Clean grills after every use, cover when stored, and avoid excessive sugar-based marinades that caramelize heavily on the surface. A thin immediate wipe-down with warm water and a brush keeps the surface clean between heavy cleans. For high-traffic grills, schedule a deeper clean every 1-3 months depending on usage. If you rely on a grill brush, replace it as bristles wear to prevent shedding into food. Store cleaning tools in a dry area to prevent rusting and contamination.
- Establish a cleaning cadence aligned with your cooking frequency.
- Use shelf-safe cleaning products and avoid ones that can leave residues on grates.
Re-seasoning cast iron grates (optional but beneficial)
After deep cleaning and drying, you can re-season cast iron grates to restore their non-stick surface and protect against rust. Rub a thin layer of neutral oil across all cooking surfaces, then place the grates on the grill and heat for about 15-20 minutes at a moderate temperature. Allow to cool before storing. This seasoning process helps minimize food sticking and enhances heat distribution over subsequent cooks.
- Do not use excessive oil; a light film is all that’s needed.
- Seasoning is less necessary for stainless steel or porcelain-coated grates but can still be beneficial for rust prevention.
Troubleshooting and when to replace grates
If your grates show deep warping, cracks, or persistent rust that cannot be removed, replacement is the safest option to prevent food contamination and uneven cooking. Some grates are designed to be replaceable at home; others may require professional service or a new grill. Before you replace, confirm compatibility with your grill model and consider upgrading to corrosion-resistant materials if you grill frequently in humid or salty environments. Regular cleaning and proper storage extend grate life and keep your grill performing at its best.
FAQ-style quick tips and quick wins
By integrating regular quick cleans with periodic deep cleans, you’ll minimize stubborn residue and rust formation. Always dry grates thoroughly and store them in a dry, ventilated area. A light oiling after cleaning is a simple step that pays dividends in longevity and performance.
Tools & Materials
- Grill brush (brass or stainless steel)(Choose a brush size that fits your grate width; replace bristles if worn)
- Nylon or stiff-bristle brush(Gentler on porcelain-coated surfaces)
- Basin or tub for soaking(Large enough to hold your grate size)
- Mild dish soap or grill-safe degreaser(Avoid harsh solvents on coated surfaces)
- Sponge or non-abrasive scrub pad(For gentle cleaning and finishing wipe-downs)
- Disposable gloves(Protect skin from hot surfaces and cleaners)
- Drying towels or rack(Ensure complete drying to prevent rust)
- Food-grade oil (canola or grapeseed)(Light coat after cleaning, especially on cast iron)
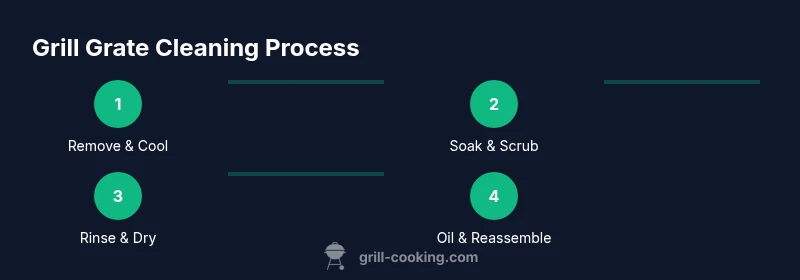
Steps
Estimated time: 30-45 minutes
- 1
Remove grates and cool
Turn off and cool the grill completely. Remove the grates and set them on a heat-resistant surface. This prevents burns and gives you full access for cleaning.
Tip: If the grill is still warm, use an infrared thermometer or gloved hand to gauge safe handling temperature. - 2
Brush loose debris
Use the grill brush to sweep away loose food particles from the grate surfaces and in the crevices. Work from front to back to keep residue from falling back onto cleaned areas.
Tip: Keep the brush at a slight angle to maximize debris removal without gouging the surface. - 3
Soak for stubborn buildup
Fill a basin with hot water and add a mild degreaser or dish soap. Submerge the grates and let them soak for 10-15 minutes to loosen charred residue.
Tip: If you have cast iron, avoid soaking too long to protect seasoning. - 4
Scrub the grates
After soaking, scrub with a stiff brush or brass pad. Target stubborn spots and rinse often to remove loosened debris.
Tip: For porcelain-coated grates, avoid aggressive scrubbing to prevent chipping. - 5
Rinse and dry
Rinse thoroughly with clean water to remove soap residues. Dry completely with a towel or air-dry on a rack to prevent rust.
Tip: Remove any residual moisture by patting dry and using a heat source briefly on the grates. - 6
Oil and reassemble
Apply a light, even coat of food-grade oil to the grates. Reinstall them once the grill has cooled to safe handling temperature.
Tip: A thin film helps prevent sticking and rust; wipe away excess oil. - 7
Season cast iron (optional)
If you have cast iron grates, perform a light seasoning after cleaning to restore the non-stick layer and rust protection.
Tip: Heat the grates gently after applying oil to polymerize the coating. - 8
Inspect and store
Inspect for warping, cracks, or rust. If everything looks good, store grates in a dry area and cover the grill to minimize exposure to moisture.
Tip: Regular inspection helps catch issues before they become costly repairs.
FAQ
Can I use steel wool on stainless steel or cast iron grates?
Steel wool can scratch and dull certain grate surfaces; use brass or nylon brushes for stainless steel and cast iron, and only use steel wool on surfaces that explicitly tolerate it. Always test a small area first.
Steel wool can scratch certain grates. Use brass or nylon brushes on stainless steel and cast iron, and test a small area first.
How often should I clean grill grates?
Clean grates after every cook with a quick brush and wipe, and perform a deeper clean every 1-3 months depending on usage and fuel type.
Clean after every cook, and deep clean every 1-3 months depending on use.
Can porcelain-coated grates be soaked or aggressively scrubbed?
Porcelain-coated grates should not be scrubbed with abrasive tools or soaked for long periods; use mild cleaners and a soft brush, then rinse and dry thoroughly.
Porcelain grates should not be scrubbed aggressively or soaked long; use mild cleaners and a soft brush.
What should I do about rust on cast iron grates?
Light surface rust can be removed with a wire brush and reseasoned. If rust is deep or widespread, consider replacing the grate to maintain performance and safe cooking.
Light rust can be removed and reseasoned; deep rust may require replacement.
Should I oil grates after cleaning?
Yes, apply a thin, even coat of high-smmoke point oil to prevent sticking and rust; reheat briefly to polymerize the coating if your grate material allows.
Oil lightly after cleaning to prevent sticking and rust, then reheat to polymerize.
Is soap safe for cleaning grill grates?
Mild dish soap is generally safe after cooling, but avoid leaving soap residues. Rinse thoroughly and dry before cooking again.
Mild soap is okay after cooling; rinse well and dry before next use.
Watch Video
Quick Summary
- Start with a safe, cooled grill and basic debris removal.
- Choose the right brush and cleaner for your grate material.
- Deep clean periodically to maintain flavor and heat efficiency.
- Dry thoroughly and oil lightly to prevent rust.
- Inspect grates for damage and replace when necessary.