How to Clean Grill Racks: A Step-by-Step Cleaning Guide
Learn to clean grill racks safely and effectively with a practical, step-by-step approach. This guide covers soaking, degreasing, scrubbing, drying, and maintenance to prevent rust and keep your grill ready for flavorful results.

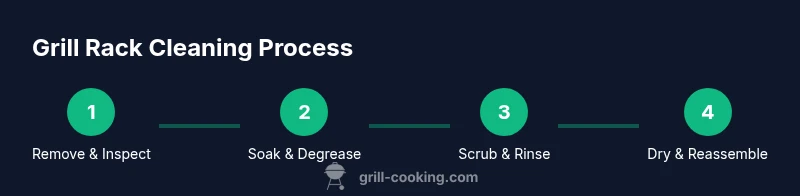
To clean grill racks, remove the racks, soak them in hot, soapy water, scrub with a stiff brush or pad, rinse thoroughly, and dry completely before reinstalling. For stubborn grime, use a baking soda paste and reheat the grill to dry.
Why clean grill racks matter
Regular cleaning keeps your grill functioning, prevents flavor transfer between cooks, and extends rack life. According to Grill Cooking, consistent upkeep reduces buildup and improves heat distribution. When grease and burnt bits accumulate, heat moves unevenly and flavors may carry over from one cook to the next. Clean racks also reduce flare-ups by removing fat buildup that could ignite on high heat. By making cleaning part of your routine, you’ll waste less fuel and enjoy more consistent results.
Maintaining clean racks not only improves flavor outcomes but also helps your grill perform closer to its best. Grime acts like insulation, trapping heat and causing hot spots that can char food unevenly. The Grill Cooking team emphasizes that a routine cleaning habit is the simplest way to sustain performance over time. A clean rack also reduces the effort needed for deep cleanings later, saving time on busy weeknights and chaotic weekends.
In addition to taste and efficiency, cleanliness reduces flare-ups and protects the rack surface from corrosive grease. A small daily effort compounds into longer rack life and less equipment downtime. When you treat cleaning as part of your cooking routine, you’ll notice more consistent searing, better browning, and fewer stuck-on residues when you cook again.
Tip: Keep a dedicated cleaning area near your grill so you can wipe down racks while the grill cools, making the process faster and safer.
Safety considerations before you start
Safety comes first when cleaning grill racks. Always ensure the grill is completely off and cooled before handling any parts. Put on heat-resistant gloves to protect hands from sharp edges and hot surfaces, and work in a well-ventilated area if you’re using cleaners with fumes. If you’re cleaning a gas grill, close the fuel source and unplug any accessories if applicable. Never clean a grill while it’s hot or still connected to a heat source. Electrical components, if any, should be protected and not exposed to water. If racks are damaged or corroded, replace them before cooking again to avoid warping or safety hazards.
By following these precautions, you reduce the risk of burns, chemical exposure, or accidental fires. The Grill Cooking team recommends keeping a dedicated pair of tongs and a brush you only use for cleaning to avoid cross-contamination with food prep tools.
Safety also means choosing the right cleaning agents. Mild dish soap and hot water are enough for everyday grime, while heavier grease may benefit from a baking soda paste. Avoid harsh solvents on enamel or coated surfaces, as they can strip coatings and glaze protective layers.
Materials and prep you’ll need (and why each matters)
Having the right tools makes the job easier. A dedicated grill brush, a nylon scrub pad, and a non-abrasive pad cover most cleaning needs without scratching coatings. A large basin or tub lets you soak racks fully, while hot water and dish soap cut through grease effectively. For stubborn residues, baking soda provides gentle abrasion without harsh chemicals. Vinegar can help break down fat in some cases, but avoid mixing it on certain coatings unless you’re sure it’s safe.
Before you begin, remove racks from the grill and place them on a clean work surface. This keeps the area organized and helps you track progress. Separate chrome, stainless steel, porcelain-coated, and cast-iron racks as needed so you apply the appropriate technique to each surface. Having a towel nearby for quick dabs and a spray bottle for wiping helps speed up the process.
If you’re cleaning after a heavy cook, you’ll want to allocate a little extra time and have a timer handy for soaking periods. The Grill Cooking team notes that planning the prep space and tools in advance reduces walk-away time and keeps you focused on safe, efficient cleaning.
Understanding rack materials and cleaning methods
Grill racks come in stainless steel, chrome, porcelain-coated steel, and cast iron variants. Stainless steel and chrome tolerate hot water and most cleaners; porcelain coatings require gentler scrubbing to protect the enamel. Cast iron racks benefit from drying thoroughly and a light oil coating after cleaning to prevent rust. Avoid using metal scrapers on coated or delicate surfaces to prevent chipping. Treat each material with a tailored approach: stainless steel and chrome are forgiving; porcelain-coated surfaces require gentleness; cast iron needs oil protection post-cleaning.
Selecting the right method for each rack extends life and keeps flavors clean. The Grill Cooking team recommends sticking to non-abrasive tools on delicate surfaces and using a dedicated degreaser only when needed. If you’re unsure about a surface, test a small inconspicuous area first.
Always consult manufacturer guidance if you’ve got specialty coatings or materials that aren’t listed here. Proper maintenance can prevent rust and keep your grill ready for repeat use.
The soaking and degreasing process
Soaking is a powerful step for removing baked-on grease. Fill a deep basin with hot water and a few squirts of dish soap; submerge the racks completely and let them soak to loosen grime. For very greasy racks, adding a splash of white vinegar can help break down fats. After soaking, use a nylon brush to remove loosened residue, starting at the corners and working inward. Rinse and check progress; repeat soaking if necessary, but avoid overly long submersion that could affect coatings.
Taking this approach prevents the need for aggressive scrubbing and reduces the risk of damaging coatings. The Grill Cooking team emphasizes that soaking is often the most efficient step for maintaining the integrity of coated racks and avoiding surface damage from scrubbing. Always dry thoroughly after soaking to prevent rust formation, especially on metal surfaces.
If you notice persistent residue after soaking, switch to a baking soda paste on those areas and re-soak briefly before scrubbing again.
Scrubbing strategies for different grime levels
For light buildup, a quick scrub with a nylon pad followed by a final rinse is usually enough. For heavy residue, apply a baking soda paste to the toughest spots and let it sit briefly before scrubbing again. Use circular motions along the wires to reach corners and joints, and periodically rinse to monitor progress. If coatings are present, avoid metal bristles that can scratch; a soft-bristle brush paired with a non-abrasive pad is often best.
Effective scrubbing reduces the chance of grease sticking to the rack surface, which speeds up future cleanings and maintains grill performance. After scrubbing, inspect each rack closely for any missed spots and repeat as needed. The Grill Cooking team notes that patience during this phase yields the cleanest results with minimal effort.
Stubborn areas may benefit from a second application of baking soda paste or a short extra soak before scrubbing again.
Drying, reassembly, and preventive maintenance
Dry racks completely with towels, or air-dry in a rack stand away from moisture. Reinstall the racks into the grill, then heat briefly to drive out remaining moisture. For cast iron racks, apply a light oil coating after drying to prevent rust. Store the grill and racks in a dry place when not in use to extend their life. A well-dried rack resists rust and maintains a smooth cooking surface over time.
Preventive maintenance includes wiping down racks after use and performing a quick clean between heavy cooks. The Grill Cooking team recommends a light oil wipe on metal racks to maintain a protective layer that helps resist rust and corrosion. If you notice rust forming, address it promptly by repeating the cleaning cycle and drying thoroughly before storage.
Troubleshooting common issues
Visible rust? It may indicate the rack is past its life and should be replaced. Persistent sticking or warping may require professional attention. If coatings chip during cleaning, discontinue use and replace with a compatible rack. In some cases, a light re-seasoning step (for cast iron) can restore performance after drying, but surface damage should be taken seriously to ensure safe cooking.
Tools & Materials
- Stainless steel grill racks (or other rack types)(Ensure racks are cool before cleaning; remove from grill)
- Hot water with dish soap(Or degreasing cleaner if heavily soiled)
- Baking soda(For paste on stubborn grime)
- White vinegar(Optional for extra degreasing)
- Plastic or nylon scrub brush(Soft to avoid scratches)
- Stiff-bristled brush(Use on metal-safe surfaces only; avoid on porcelain coating)
- Non-abrasive pad(For stubborn spots)
- Large basin or tub(Deep enough to fully submerge racks)
- Dish towels or microfiber cloths(For drying and buffing)
- Oil (optional) for cast iron racks(Light coat after drying to prevent rust)
Steps
Estimated time: 30-60 minutes
- 1
Remove racks and inspect for damage
Power off the grill and allow it to cool. Open the lid and slide out the racks. Check for warping, bends, or rust; set aside any damaged racks for replacement.
Tip: Handle racks gently to avoid bending or further damage. - 2
Scrape loose debris and pre-rinse
Use a grill brush to remove loose debris; rinse briefly under warm water to loosen stubborn particles. Inspect corners and joints for grime build-up before soaking.
Tip: Avoid metal-bristle brushes on coated surfaces. - 3
Soak racks in hot, soapy water
Fill a deep basin with hot water and dish soap; submerge racks completely and let them soak to loosen grease for 15–30 minutes. Add a splash of vinegar if heavily greased.
Tip: Keep soaking time within 15–30 minutes to protect coatings. - 4
Apply baking soda paste to heavy grime
Mix baking soda with a little water to form a paste and apply to the toughest spots. Let sit for 5–10 minutes to soften burnt-on residue.
Tip: Avoid paste on delicate enamel; test on a small area first. - 5
Scrub with brush or pad
Scrub along the wires with a stiff brush or non-abrasive pad, working in sections. Rinse area often to monitor progress.
Tip: Move methodically to avoid missing spots. - 6
Rinse thoroughly
Rinse racks under clean running water until all soap and residue are gone. Check for a film and re-rinse if needed.
Tip: Ensure no soap remains, as it can affect flavor. - 7
Dry completely and reassemble
Dry racks with towels or air-dry fully before reinstalling. If using cast iron, apply a light coat of oil after drying to prevent rust; heat the grill briefly to dry before use.
Tip: Moisture is the enemy—dry thoroughly. - 8
Store and maintain
Store racks in a dry area when not in use and perform light cleanings between heavy cooks to maintain surface integrity.
Tip: Keep a dedicated cleaning routine to extend rack life.
FAQ
What is the best cleaner for grill racks?
A mix of hot water and dish soap works well for routine cleaning. For burned-on grime, a baking soda paste helps without harsh chemicals. Avoid bleach on metal racks.
Use hot soapy water, and for stubborn spots try baking soda paste.
Are grill racks dishwasher-safe?
Many stainless steel racks are dishwasher-safe, but check manufacturer guidance. Porcelain-coated or cast-iron racks can be damaged by dishwasher cycles.
Depends on the rack—stainless steel may go in the dishwasher, coated types usually should be hand-washed.
Can I soak racks overnight?
Long soaking can cause rust on some metals; limit soaking to 15-60 minutes for most racks, and avoid standing water in coated surfaces.
Avoid soaking overnight; limit to a short soak.
How often should I clean grill racks after cooking?
Clean them after every use for best results. For heavy cooking, do a quick wipe-down within minutes of cooking.
Clean after every use to prevent buildup.
What about cast iron grill racks?
Cast iron should be dried thoroughly and re-seasoned after cleaning. Avoid soaking too long; apply a light oil coating to prevent rust.
Cast iron needs drying and a light oil after cleaning.
Is it safe to use steel wool on grill racks?
Avoid steel wool on enamel or porcelain coatings to prevent scratching. Use nylon brushes or brass pads on metal surfaces.
Don't use steel wool on coated racks; use gentler pads.
Watch Video
Quick Summary
- Remove and inspect racks before cleaning
- Soak and degrease to loosen grime
- Use non-abrasive tools on delicate surfaces
- Dry thoroughly and apply light oil on cast iron when needed