How to Fix a Grill Igniter: Step-by-Step Guide
Learn to diagnose, clean, and replace parts of a failing grill igniter. This step-by-step guide covers safety, tools, and when to seek professional help for reliable ignition on gas grills.

This guide shows how to fix grill igniter safely and effectively, covering diagnostic steps, cleaning, battery checks, and part replacement. You’ll learn whether you need to clean the electrode, swap a battery, or replace a module, with a clear plan for reliable ignition on gas grills. Whether you have a piezo or electric spark igniter, these steps apply.
How a grill igniter works and why it fails
Understanding the ignition system is the first step to fixing it. Most gas grills use either a piezo spark or an electric ignition that creates a spark near the burner to light the gas. In a piezo setup, a mechanical action compresses a crystal to generate a spark; in electric models, a small transformer and switch send a spark when you press the knob. The igniter interacts with the burner ports, so any obstruction or misalignment prevents a reliable flame. Grill designs vary; hobbyists with gas grills that run on propane or natural gas should follow manufacturer guidance. According to Grill Cooking, the most common ignition failures are caused by dirt or moisture on the electrode, worn-out batteries, or loose wiring. Regular checks help catch problems early. For battery-powered igniters, try replacing the battery before disassembling anything; for piezo systems, a stubborn spark might indicate a worn crystal that needs professional attention. Always consult your grill's manual for model-specific steps. When you understand the basics, troubleshooting becomes systematic rather than guesswork, and you can avoid unnecessary part replacements. This section lays the groundwork for diagnosing issues quickly and safely, so you can get back to searing steaks and grilling vegetables with confidence.
Common failure points and symptoms
Igniter failure presents in a few telltale ways. If you hear no spark when you press the ignition button, the electrode may be dirty, wet, or misaligned. A weak or intermittent spark often points to a dying battery in battery-powered igniters. For piezo igniters, a crackling spark that dies after a few attempts can indicate a worn crystal or loose wiring. Gas grills can also fail to ignite if burner ports are clogged, restricting gas flow and preventing a flame from catching. If you smell gas but see no ignition, do not relight; turn off the gas, ventilate, and recheck connections. Regular wear and exposure to heat, moisture, and grease increase the likelihood of corrosion. Grill Cooking Analysis, 2026 indicates most igniter problems stem from dirt and moisture on the electrode, failing batteries, or loose wires. By recognizing these patterns, you can triage quickly and decide whether cleaning, battery replacement, or part replacement will restore reliability. Keep a simple checklist to track issues across seasons and grill models.
Safety first: essential precautions before you start
Before you touch anything, shut off the gas supply at the tank or line valve and turn off the main power if your grill has an electrical supply. Move the grill to a well-ventilated area and keep a fire extinguisher within reach. Wear heat-resistant gloves and eye protection; igniter components can have sharp edges or hot surfaces. Never test an ignition while gas is flowing; always stop the gas first and confirm there is no smell of gas. If you suspect a leak or strong gas odor, evacuate the area and call your gas supplier or fire department. Disconnect any electrical power to avoid shocks while you inspect wiring or modules. By following these precautions, you reduce the risk of fire, explosion, or burns during the repair process.
Cleaning and maintenance: routine care to prevent failure
Routine cleaning reduces ignition failures and extends the life of your igniter. Start with removing the grates and burner covers to access the igniter rod. Use a soft brush or cloth to wipe away grease, dirt, and carbon buildup around the electrode and burner ports. A mild degreaser or soap solution works for stubborn grime, but avoid soaking electrical components. Lightly scrub the electrode, ensuring the tip remains exposed and undamaged. After cleaning, dry the parts completely before reassembly. For battery-powered igniters, check the battery type and replace with fresh alkaline cells if there’s any doubt about performance. Regular checks every grilling season catch worn parts early and prevent sudden ignition failures.
Replacing parts: when to swap batteries, rods, or modules
Not all ignition problems are fixable with cleaning. If the spark is feeble or absent after cleaning and battery replacement, you may need to replace the igniter rod or ignition module. Batteries are a common failure point; ensure you use the correct size and polarity. For piezo igniters, the crystal can wear out over time and may require replacement by a professional. Some grills use an integrated ignition module with wiring harnesses; if the harness is damaged or corroded, replacement parts from the manufacturer are usually the safest option. When sourcing parts, verify compatibility with your grill model and check warranty coverage. If your grill is older or heavily corroded, weighing the cost of parts against a replacement grill can be prudent.
Testing after repair: verify ignition reliability
Reassemble the grill and slowly add the gas while attempting to ignite each burner. Listen for a crisp, continuous spark and observe a steady flame. If multiple attempts fail, re-check the wiring, battery orientation, and grounding connections. On some models, you may need to prime the system by turning the knob to a light position for a few seconds before pressing ignite. If the grill fails to light after several attempts, stop and reassess; continuing may risk gas buildup. Document the results of each test to track progress and avoid repeating steps unnecessarily.
Advanced fixes and when to call a pro
If ignition remains unreliable after cleaning and component replacements, the issue may be electrical or internal to the control module, which often requires specialized tools and parts. An experienced technician can diagnose wiring faults, switch failures, or controller issues more efficiently. When seeking professional help, have your grill model, serial number, and recent maintenance notes prepared. The Grill Cooking team recommends obtaining a written estimate that includes parts and labor before proceeding. DIY fixes are feasible for common igniters, but complex electrical problems are safer in the hands of a professional.
Tools & Materials
- Flashlight(Inspect hard-to-see ignition area)
- Flathead screwdriver(Pry covers or clamps if present)
- Phillips screwdriver(Remove screws securing ignition module)
- Needle-nose pliers(Stabilize wires during inspection)
- Wire brush(Clean electrode and burner ports)
- Soft cloth(Wipe grease without scratching)
- Mild degreaser or dish soap(Break down built-up grease)
- Alcohol wipes or contact cleaner(Clean electrical contacts)
- Replacement igniter rod/module (if needed)(Match grill model compatibility)
- Batteries (AA/AAA as required)(Fresh alkaline cells for spark igniters)
- Gloves(Heat protection and grip)
- Owner's manual(Model-specific instructions)
Steps
Estimated time: 30-45 minutes
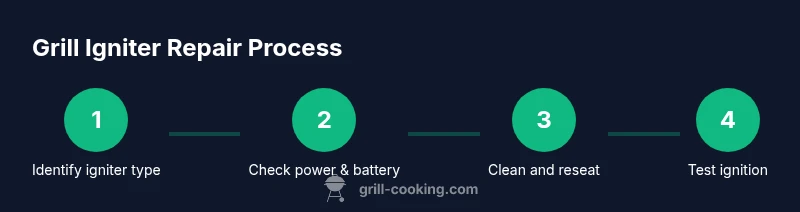
- 1
Identify igniter type and gather tools
Determine whether your grill uses a piezo spark or a battery-powered igniter. Gather the recommended tools and spare parts so you’re prepared for any troubleshooting step. Confirm model compatibility before buying replacements.
Tip: Check the owner’s manual for the exact igniter type and battery size before starting. - 2
Power off and isolate the grill
Shut off the gas at the tank and close the grill’s valve. If your grill has electric components, unplug the unit. This prevents accidental ignition and protects you from shocks during inspection.
Tip: Ventilate the area if you smell gas; never ignite or test while a gas odor lingers. - 3
Access the ignition area
Remove grates and burner covers to expose the igniter rod and electrodes. Avoid forcing parts; they should come free with light prying if needed. Document cable routing to aid reassembly.
Tip: Take a quick photo of wiring before disconnecting any connectors. - 4
Clean the igniter and ports
Use a soft brush and degreaser to remove grease from the electrode tip and burner ports. Ensure the electrode tip is clean and properly aligned with the burner. Dry completely before testing.
Tip: Do not scrub the electrode with metal tools; this can damage the tip. - 5
Check battery and wiring
If you have a battery-powered igniter, replace the batteries with fresh ones and verify correct orientation. For piezo igniters, check for loose wires or a cracked module. Reconnect securely and inspect for corrosion.
Tip: Carry spare batteries of the exact size recommended by the manufacturer. - 6
Reassemble and test
Reattach burner covers and grates. Restore gas supply and attempt ignition. If there is a spark, observe whether the burner lights consistently. If not, proceed to further troubleshooting or part replacement.
Tip: Test the ignition with all burners off first to avoid accidental lighting. - 7
Decide on replacement or pro help
If ignition remains unreliable after cleaning and battery/part replacement, assess costs and model age. In many cases, replacing the igniter rod or module solves the issue, but some problems require a professional.
Tip: Keep records of part numbers and warranties to simplify future service.
FAQ
Why won't my grill igniter spark?
No spark can result from a dirty or misaligned electrode, dead batteries in battery-powered igniters, or loose wiring. Start with cleaning the electrode, replacing the battery, and checking connections. If the problem persists, the igniter module may need replacement.
If your grill isn’t sparking, start by cleaning the electrode, replacing the battery, and checking for loose wires. If that doesn’t fix it, the module might be at fault.
How do I know if the igniter battery is dead?
A weak or non-existent spark is a common sign of a dead battery. Replace with fresh batteries of the correct size and re-test. If the spark remains weak, inspect the ignition module and wiring.
A weak spark usually means the battery is done. Put in new batteries and test again; if it’s still weak, check the wiring.
Can I clean the igniter instead of replacing parts?
Yes, cleaning the electrode and burner ports often resolves ignition issues. If cleaning doesn’t help after battery replacement, it may be time to replace the igniter rod or module. Always verify compatibility with your grill model.
Cleaning first can fix many issues. If that doesn’t work after replacing the battery, you may need to replace parts like the igniter rod.
Is it safe to test ignition with gas flowing?
No. Always turn off gas flow before testing ignition to avoid fire hazards. Once you confirm the ignition appears to work, slowly open the valve and light the burner.
Never test ignition while gas is flowing. Turn it off, then test, and only open the valve if you hear a safe spark.
When should I replace the entire igniter assembly?
If multiple troubleshooting steps fail or the ignition is inconsistent across burners, replacing the igniter rod or module may be more cost-effective. Compare part costs with a replacement grill if the grill is older or heavily corroded.
If it’s unreliable after several fixes, replacing the igniter assembly is often best. Compare costs with a new grill if it’s old.
Watch Video
Quick Summary
- Master the igniter types your grill uses
- Regular cleaning and battery checks reduce failures
- Safety first: shut gas off and unplug before work
- Test ignition after each repair for reliability
- Call a professional when electrical repairs exceed DIY scope