How to Clean a Grill After Use: A Practical Guide
Discover a proven, step-by-step method to clean your grill after use. From tools to safety and maintenance, Grill Cooking guides home cooks to flawless, flavorful grilling.

Goal: clean your grill after use to prevent flare-ups and preserve flavor. You’ll learn a safe, step-by-step routine for all grill types, plus essential tools and maintenance tips. By the end, you’ll confidently scrub grates, clean burners or briquettes, wipe the exterior, and condition the metal to resist corrosion. Gather brushes, soap, a bucket, towels, gloves, and oil for finishing.
Why Cleaning Your Grill After Use Matters
According to Grill Cooking, cleaning your grill after use is essential for safety, performance, and flavor. Grease and carbon buildup provide fuel for flare-ups and can lead to uneven heating. Over time, accumulated residue causes corrosion, makes future cooks difficult, and can alter the taste of foods. Grill Cooking Analysis, 2026 indicates that a regular cleaning routine correlates with longer grill life and more consistent heat distribution across burners and grates. A clean grill also reduces the chance of pests taking up residence in grease traps and drip pans. When you establish a routine, you’ll spend less time scrubbing later and more time enjoying reliably delicious meals.
- Safety first: hot grills cause burns and flare-ups if brushed aggressively.
- Performance: clean grills heat more evenly, preserving sear and flavor.
- Longevity: regular maintenance slows corrosion and extends component life.
This section sets the stage for a practical, repeatable routine you can perform after every cook. The goal is to create a simple cadence that protects your investment and makes cleanup predictable rather than daunting.
Tools, Materials, and Safety Mindset
Before you tackle cleanup, assemble the right tools and establish a safety mindset. Using the right tools minimizes risk and speeds the process, especially when dealing with hot surfaces or sharp edges. Start with a hot-off-the-grill safety check: ensure the grill is off, cool enough to touch, and stable on a level surface. A clean workspace reduces clutter and helps you stay organized through the steps. Grill Cooking recommends using dedicated grill-specific tools rather than improvised household items to avoid damage to grates and burners. Have your brush, scraper, soap, bucket, towels, gloves, and a light oil ready. If you ever feel uncertain about the grill’s safety or if you smell gas, pause and address the situation before proceeding. Building a routine now saves time and frustration on future cooks.
- Maintain a dedicated cleaning zone to keep grease away from food prep areas.
- Wear heat-resistant gloves to protect hands during hot-cleaning steps.
- Use gentle cleaning agents on sensitive finishes to prevent scratching.
The right mindset is safety plus efficiency, which keeps you from rushing and missing hidden buildup.
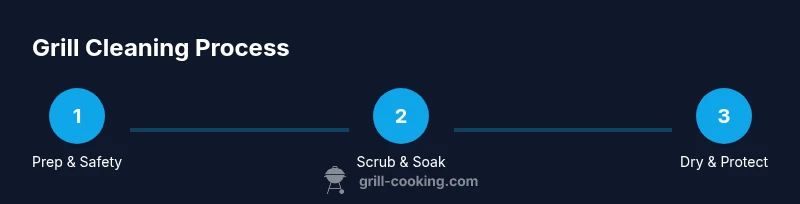
Step-by-Step Overview: Core Actions (High-Level Preview)
A robust cleaning routine blends quick wipe-downs with deeper cleaning as needed. Start with safety, then remove removable parts, scrub surfaces, and reassemble. Think of the process as three layers: (1) surface cleanup for immediate grease and crumbs, (2) deeper cleaning for grates and interior components, and (3) exterior care and preventative maintenance. This overview gives you a sense of flow before you dive into the detailed steps in the step-by-step section. Grill Cooking Analysis, 2026 notes that a structured approach reduces buildup over time and improves heat management across cooking zones. The emphasis is on consistency and patience, not brute force.
- Layered cleaning reduces surface tension and makes each pass more effective.
- Preheating lightly before scrubbing can loosen stuck-on residue safely.
- Always dry thoroughly to prevent rust and ensure seasoning optimum.
Grill-Type Specific Tips: Gas, Charcoal, Pellet
Different grill designs require tailored techniques. Gas grills benefit from cleaning burners after cooling to remove debris that could clog gas ports. Charcoal grills need ash removal and drip-pan maintenance to prevent flare-ups from accumulated grease. Pellet grills combine grate cleaning with attention to the pellet hopper and exhaust paths to maintain consistent airflow. Regardless of type, avoid harsh chemical cleaners on hot metal; opt for mild soap and water or manufacturer-approved cleaners when needed. The goal is to preserve protective finishes while removing grime that can dull flavor and performance. Grill Cooking emphasizes using the correct brushes for each surface to prevent scratching porcelain-coated grates and to maintain manufacturer finishes.
- For porcelain-coated grates, choose a gentler scrub to avoid micro-scratches.
- Check burner or vent openings for clogging after deep clean.
- Reseason grates lightly after cleaning to preserve non-stick properties.
This section helps you adapt the routine to your equipment while maintaining best-practice safety and care.
Safety, Maintenance, and Storage
After cleaning, drying and protecting your grill is essential. Store it in a dry, protected area to minimize rust and weather damage. A light coat of oil on grates helps prevent sticking and rust while the grill sits idle. Regular maintenance includes inspecting seals, gaskets, and drip pans for wear and corrosion, replacing parts as needed. The Grill Cooking team recommends documenting your cleaning routine in a quick checklist so you can stay consistent across cooks. For safety, never move a hot grill or remove parts while the surface is still hot. Always reassemble correctly and ensure all knobs and ignition systems are dry before use. Finally, a clean grill looks better and performs more consistently, making the next cook easier and more predictable. The Grill Cooking team recommends turning the grill to a low heat for a short burn-off after cleaning to verify that all residues are removed and the surface is dry.
Authority sources and further reading
For best practices and safety guidelines, consult credible sources:
- https://www.fsis.usda.gov
- https://www.cdc.gov/foodsafety
- https://extension.illinois.edu
Incorporating these guidelines with your routine will help you maintain a grill that stays safe, performs well, and lasts longer. The Grill Cooking team emphasizes safety, routine, and proper technique as the foundation of any successful, enjoyable grilling season.
Tools & Materials
- Stiff-bristle grill brush(Choose brass bristles for porcelain-coated grates when possible to minimize scratching)
- Flat scraper or non-metal scraper(Plastic or metal scraper; ensure it reaches between grates)
- Bucket or sink with warm water(Warm water helps loosen grease without overheating your hands)
- Mild dish soap(Avoid harsh cleaners on painted or coated surfaces)
- Sponge or non-abrasive scrub pad(Non-abrasive to protect finishes)
- Absorbent towels or microfiber cloths(Use dry towels for final wipe and drying)
- Heat-resistant gloves(Protect hands during hot-surface handling)
- Oil or cooking spray (for seasoning grates)(Light coating after drying helps prevent sticking)
- Aluminum foil (optional)(Can be used to cover the drip pan for quick containment)
- Grill-safe degreaser (optional)(Only if heavy grease buildup persists and if recommended by manufacturer)
Steps
Estimated time: 60-90 minutes
- 1
Power down and cool
Turn off the grill and disconnect the propane or gas supply if safe to do so. Allow the grill to cool to a comfortable touch temperature; hot surfaces can cause burns or steam injuries when cleaners are applied. This initial cooling phase reduces risk and prepares surfaces for safe cleaning.
Tip: Use heat-resistant gloves during this phase to prevent accidental burns. - 2
Detach grates and remove debris
Carefully remove the cooking grates and any removable ash or drip pans. Shake off loose debris into a trash bag or designated container. Lighter, loose debris can be brushed away before soaking for a deeper clean.
Tip: Keep grates oriented the same way so they reinstall correctly. - 3
Pre-clean with brush to loosen grime
Using the grill brush, scrub between and across the grates to dislodge stuck-on residue. Do long, confident strokes to lift grease rather than grind it in. If you have porcelain-coated grates, avoid harsh scrubbing to prevent micro-scratches.
Tip: Brush while the grates are still slightly warm for easier removal of residue. - 4
Soak removable components
Fill your sink or a large tub with warm, soapy water and soak grates and removable trays for 10-15 minutes. Soaking helps lift stubborn grease, making scrubbing more effective. After soaking, rinse with clean water and set aside to dry.
Tip: Avoid soaking non-removable pieces; refer to manufacturer guidelines for soaking limits. - 5
Scrub grates and components
Return to the soaked parts and scrub with a non-abrasive pad or nylon brush. Use circular motions to lift grease without gouging enamel. Rinse thoroughly and dry with a clean towel to prevent water spots and rust.
Tip: Reserve steel wool for metal surfaces only if the manufacturer permits it; otherwise stick to softer materials. - 6
Clean interior surfaces and burners/briquettes
Wipe down interior walls, the flame tamers, and the drip pan area. If you have a gas grill, check burner ports for obstructions and clear with a caned or short tool if safe to do so. For charcoal grills, remove old ash and clean the ash pan.
Tip: Never dislodge burners with force; consult the manual if you suspect damage. - 7
Wipe exterior and controls
Wipe the exterior surfaces with a damp cloth and mild cleaner. Clean knobs and control panels carefully to avoid moisture intrusion. Dry everything completely before reassembly to prevent rust and electrical issues in electric ignition models.
Tip: Use a soft cloth to prevent scratching the paint or chrome finish. - 8
Dry, reassemble, and oil grates
Dry all parts thoroughly, reassemble, and apply a light coat of oil to the grates to prevent sticking. If desired, perform a quick burn-off on low heat to ensure any remaining cleaner residue is volatilized and the surface is dry. Store with a cover to minimize dust and moisture.
Tip: Don’t over-oil; a thin layer is enough to protect the surface without smoking during the next cook.
FAQ
How often should you clean a grill after use?
Clean after every cook. A quick wipe-down helps prevent buildup, while a deeper clean weekly or monthly, depending on use, keeps components in good condition.
Clean after every cook, with a deeper clean on a regular schedule that fits how often you grill.
Can I use water on a hot grill?
Avoid applying water to a hot grill. Let it cool before cleaning to prevent burns and warping. Once cooled, you can start with a dry wipe and then a mild wash.
Don’t spray water on a hot grill; wait for it to cool before cleaning.
Is it safe to use soap on grills?
Yes, mild dish soap and warm water are safe for most grills when used on exterior surfaces and non-coated parts. Avoid harsh cleaners on coated or enamel surfaces unless the manufacturer approves.
Yes, mild soap and warm water work for many grills; check your manual for coatings.
What about cleaning pellet grills?
Pellet grills require cleaning of grates, drip pans, and ash collection areas. Empty and dispose of ash when cold, then follow the same basic cleaning steps for grates and interior surfaces.
Clean the grates and ash areas, then follow the usual steps for interiors.
How can I prevent rust after cleaning?
Dry surfaces thoroughly and apply a light, even coat of oil to grates after drying. Keep your grill covered when not in use to reduce moisture exposure.
Dry completely and oil lightly to protect grates from rust.
Should I cover my grill after cleaning?
Yes, cover your grill after cleaning and drying to protect it from moisture and dust when not in use.
Covering helps protect the grill when it's idle.
Watch Video
Quick Summary
- Prepare safely before cleaning to prevent burns.
- Use the right tools to protect grill finishes and parts.
- Follow grill-type specifics for best results.
- Dry thoroughly and oil grates to prevent rust and sticking.
- Document and maintain a regular cleaning routine for longevity.