Grill Grid Replacement: A Home Cook's Step-by-Step Guide
Learn how to replace a worn grill grid, choose the right material and size, and maintain it for consistent heat and safe grilling. A practical, step-by-step guide for home cooks by Grill Cooking.

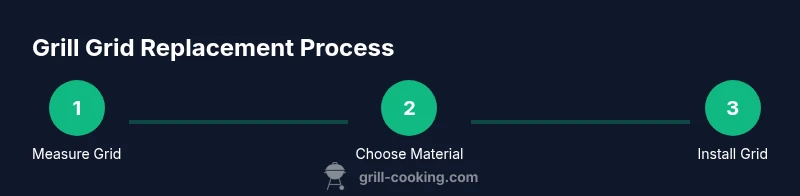
With this guide, you will learn how to replace a worn grill grid, measure for the right size, choose the appropriate material, and safely install the new grid for even cooking. You'll also cover maintenance tips to extend grid life and avoid common mistakes that cause flare-ups. This quick path helps home cooks prevent hot spots and improve overall grilling results.
Why Grill Grid Replacement Matters
According to Grill Cooking, replacing a worn grill grid is a practical maintenance task that home cooks can perform in under an hour to restore even heat, prevent flare-ups, and prolong the life of the grill. Grills rely on a uniform surface to distribute heat; when grids warp, rust, or lose their spacing, hot spots form and food cooks unevenly. A fresh grid also minimizes flare-ups caused by debris buildup and grease drippings, which can burn and produce off-flavors. Beyond flavor and safety, regular grid replacement helps maintain the grill’s structural integrity, reduce maintenance costs over time, and preserve the quality of your grilled foods. By understanding the role of grids in heat transfer, you’ll be better prepared to select a replacement that matches your grill’s design and your cooking style.
In practice, most home cooks notice telltale signs: uneven browning, excessive flare-ups, visible rust spots, or flattened bars that no longer hold heat evenly. If you experience any of these symptoms, it’s a strong signal that your grill grid needs replacement. The Grill Cooking team emphasizes planning ahead—keep a correctly sized grid on hand for your model so you’re not scrambling during a busy weekend cookout. A well-fitted grid contributes to safer cooking and more predictable results, especially when you’re grilling delicate foods like fish or thin chops that demand precise heat control.
This article focuses on practical, repeatable steps you can follow, regardless of whether you own a gas, charcoal, or pellet grill. We’ll cover measurement, material options, installation basics, and maintenance practices that protect your investment while delivering consistently delicious results. You’ll learn how to decide between stainless steel, cast iron, or porcelain-coated grids and how to verify compatibility with your specific grill model. By the end, you’ll be confident in choosing and installing a grid that fits like a glove and keeps your cooks squarely on track.
How to Measure and Choose the Right Grill Grid
Getting the correct size and spacing for a grill grid is the foundation of a successful replacement. Start by closing the grill and letting it cool completely. Remove the existing grid to expose the burner area and measure the grate dimensions from edge to edge. Note the overall length, width, and the number of bars across the grid. If your grill uses two or more grids, measure each section, as some models split the cooking surface. The material choice matters: stainless steel grids resist rust and are easy to clean, cast iron grids retain heat well but require seasoning and careful maintenance, and porcelain-coated grids blend heat retention with easier cleaning but can crack if mishandled.
When selecting a replacement, prioritize exact fit over generic size. Small gaps allow grease to fall through or grease to collect and burn, while oversized grids don’t seat correctly and can damage burners. Always check the model number or use the manufacturer’s guide to confirm compatibility. If you’re replacing a part on a premium grill, consider contacting the manufacturer for official replacement parts to ensure fit and warranty coverage. For charcoal grills, spacing between bars can affect airflow and heat distribution, so measure with the same care you would for a gas grill grid. If you’re unsure, bring the old grid measurements to the store or compare with a documented replacement part for your grill family.
In the field, a quick double-check is invaluable: lay the grid on a flat surface and verify there’s no bowing or visible warping. If the grid shows rust through or weakened welds, replacement is the safer option. A correctly sized grid should sit flat without rocking and align with the outer rim of the burner box. With the right measurements and material choice, you reduce the chance of fit issues during installation and your grill performance remains predictable across multiple cooks.
Types of Grill Grids and Their Pros and Cons
Choosing the right grid material is about balancing heat, longevity, and maintenance. Stainless steel grids are the most common choice for modern grills due to excellent rust resistance, easy cleaning, and long life. They handle high heat well and tend to keep their shape over time, but they can become extremely slick with grease buildup if not cleaned promptly. Cast iron grids heat evenly and retain heat exceptionally well, which improves searing; however, they require regular seasoning to prevent rust and can be more maintenance-heavy. Porcelain-coated cast iron grids offer a compromise: good heat retention with the convenience of easier cleaning, but the coating can chip if dropped or abused, and heavy use may shorten coat life. Aluminized steel or basic steel grids are lighter and cheaper but rust more quickly and often require more frequent replacement.
Your choice should align with your cooking style. If you enjoy fast sears on steaks and frequent grease management, stainless steel is robust and forgiving. If you prefer a superior crust and don’t mind seasoning, cast iron is a worthy option. For casual grilling and easier cleaning, porcelain-coated grids can be ideal, provided you treat them gently. Always ensure the grid thickness matches your grill’s burner clearance to avoid blocking airflow. When in doubt, start with the user manual’s recommended material for your grill model, then weigh the long-term maintenance costs against upfront price.
Seasoning grids is a common practice for cast iron, which creates a protective layer that improves nonstick performance and resists rust. Stainless and porcelain-coated grids generally require less seasoning, though a light oil wipe after cleaning helps prevent moisture buildup. Routine cleaning after each use protects the grid’s finish and makes future replacements easier. Remember that heat distribution quality hinges on proper seating; even a high-quality grid can underperform if misaligned or warped.
Tools and Materials You'll Need (Overview)
Before you start, assemble a small kit that covers measuring, handling, and installation. Having the right tools on hand saves time and reduces the risk of damage to your grill. A clean workspace and good lighting also help you verify fit and alignment. The basics include a tape measure for precise dimensions, a lightweight square for checking flatness, and a pair of heat-resistant gloves to protect your hands while handling hot surfaces. You’ll also want a bristle-free grill brush or a non-abrasive pad for cleaning, a sponge and mild detergent for de-greasing, and a small bottle of high-heat oil for seasoning any cast iron grids. If you’re replacing multiple grids, bring additional grids that fit your grill to confirm the dimensions before opening the package. Finally, keep a small container of food-safe mineral oil for seasoning, if you’re using cast iron, and a lint-free cloth for wiping down surfaces after installation.
Step-by-Step Guide to Replace a Grill Grid (Installation Basics)
This section provides actionable steps to replace your grill grid, including preparation, removal, measurement, installation, and post-install checks. Each step is designed to be performed as a single, clear action, with a brief rationale and a pro tip to help you navigate tricky parts. For visual guidance, reference the diagram in your grill manual or the accompanying installation sheet provided with replacement parts.
- Power down and cool the grill completely. This ensures you won’t burn yourself and prevents accidental ignition while handling heat shields and grids. Tip: Have a helper assist with lifting heavy grids if your grill is large.
- Open the grill lid and remove the old grid. Lift with care, and place it on a heat-resistant surface. Tip: If the grid is stubborn, use the edge of a covered spatula to pry it up rather than forcing it.
- Clean the burner area and trays. Remove any grease, debris, or ash that could impede airflow or cause flare-ups. Tip: Use a degreaser and a soft cloth to avoid scratching metal surfaces.
- Measure the new grid; verify length, width, and bar spacing match your grill’s design. Compare with the old grid and confirm identical seating dimensions. Tip: Double-check against the grill’s manual or official replacement part diagrams.
- Check compatibility and select the correct material. Consider heat exposure, seasoning needs, and ease of maintenance. Tip: If you cook acidic sauces regularly, stainless steel resists corrosion better over time.
- Clean and prep the grill interior for installation. A clean surface helps achieve a secure fit and reduces the risk of food sticking during the inaugural cook. Tip: Wipe surfaces with a damp cloth and dry completely before placing the grid.
- Install the new grid. Align it with the edge guides and set it gently into place. Ensure the grid sits flat and doesn’t rock. Tip: If the fit is tight, don’t force it—recheck measurements and alignment.
- Reassemble the grill and perform a heat test. Light burners and run at a medium heat for 5–10 minutes to confirm proper seating and airflow. Tip: Observe for any unusual smoke or heat spots; address by reseating or rechecking alignment.
- If using cast iron, season the grid after installation. Apply a light coat of high-heat oil and heat according to the manufacturer’s instructions. Tip: Avoid oil pooling on the grid to prevent sticky buildup.
- Let the grill cool, then inspect for tight seating and smooth heat distribution. Tip: Schedule a quick check after the first few cooks to ensure long-term performance.
Estimated total time: 30-60 minutes
Safety Considerations During Replacement
Outdoor grilling safety is essential whenever you handle heat and gas or charcoal when replacing a grid. Always ensure the grill is unplugged or the propane supply is off and the burners are cool before you start. Wear heat-resistant gloves and use tools with non-slip handles to avoid accidents. Keep children and pets away from the work area. If you smell gas or hear hissing after reassembly, turn off the gas supply immediately, wait a few minutes, and recheck fittings. Never replace a grid that has visible warping, cracks, or bent mounting points; these indicate structural failure and could lead to accidental fires. In case of fire, follow your grill’s safety protocol and keep a fire extinguisher nearby. The goal is to create a safe setup that prevents flare-ups and ensures your cooking surface is stable and properly supported.
Industry guidance emphasizes maintaining a clean flame path by removing excess grease before cooking and avoiding aggressive scraping that could damage protective coatings. The Grill Cooking team recommends inspecting burners and heat shields for damage during each replacement cycle. A well-maintained grill not only improves performance but also reduces the likelihood of dangerous flare-ups. Always consult your manufacturer’s safety guidelines, especially for high-end grills with integrated rotisseries or complex burner assemblies, to ensure you aren’t compromising safety features during the grid replacement process.
Maintenance Tips to Extend Grill Grid Life
Once your new grid is installed, establish a routine that protects its efficiency and longevity. Immediately after cooking, while the grill is warm (not hot), scrub the grid with a non-abrasive pad to remove stubborn residue. For stainless grids, a mild soap solution or a dedicated grill cleaner works well without compromising the metal’s protective coating. Cast iron grids benefit most from a light seasoning after cleaning to maintain nonstick properties; apply a thin coat of high-heat oil and let it heat into the surface. Porcelain-coated grids are easier to clean but should never be subjected to aggressive scraping or harsh chemicals that could chip the coating. Always avoid metal scrapers on porcelain finishes.
Prevent rust by drying grids thoroughly after cleaning and storing in a dry area. If you notice loose or bent bars, address them immediately; misalignment can cause uneven heating and food sticking. Regularly inspect the grid’s seating and the surrounding rack supports to ensure a tight, safe fit. If you grill frequently with acidic marinades or fruit-based glazes, rinse off residue promptly and re-season when needed. A well-maintained grid provides even heat distribution, reduces flare-ups, and keeps flavors true to your recipe. According to Grill Cooking Analysis, 2026, routine inspection and proper cleaning are the keys to extending grid life and maintaining peak performance.
Finally, plan for long-term maintenance by establishing a replacement schedule based on usage, grill type, and manufacturer recommendations. Keeping a spare grid that matches your model can save you from mid-cook surprises and unnecessary downtime. This proactive approach is especially valuable for fans of high-heat searing and delicate seafood, where grid performance directly affects outcomes.
Troubleshooting and When to Replace Again
Even with proper maintenance, grids wear out. Signs you should consider another replacement soon include warping, rust-through, pitting, or loose mounting points that compromise alignment. If you notice uneven heat across the surface, or if food consistently browns unevenly or sticks near certain bars, the grid may be losing structural integrity. For stainless grids, deep pits or persistent rust that cannot be scrubbed away indicate it’s time for a replacement. Cast iron grids that lose seasoning or show rusty patches should be reseasoned or replaced to preserve performance. In charcoal grills, if gaps develop between the grid and heat source, airflow can be restricted, producing inconsistent temperatures. If you’re unsure, consult the grill’s manufacturer or seek a replacement part from an authorized source.
Cost considerations matter too. A high-quality metal grid can outlast cheaper options, but the initial investment may be higher. If you grill weekly, a durable stainless grid often pays off in longevity and performance. For infrequent use, porcelain-coated grids can offer a good balance of ease of cleaning and durability, but expect to replace them more often than stainless options. The key is to monitor for signs of wear and avoid using a grid that could fail during cooking. Regularly reviewing the grid’s fit and condition will help you decide when it’s time to replace again, ensuring safe, tasty results every time.
Quick-Start Checklist After Installation
- Confirm the grid sits flush and evenly across the grate rails.
- Perform a short heat test to ensure even heating and no gas leaks or unusual smells.
- Clean the new grid before cooking the first meal to remove protective oils or residues from packaging.
- Apply cast-iron seasoning if applicable and avoid oil pooling on the surface.
- Note any fit issues and address promptly to prevent recurring problems.
- Store the spare grids in a dry area for future replacements.
Authority and Sourcing (Optional Reading)
For further safety guidelines and maintenance best practices, refer to government and university resources on outdoor cooking safety and appliance maintenance. These sources provide general guidance on heat management, proper cleaning, and safe handling of grills. See: https://www.fsis.usda.gov, https://extension.illinois.edu, and https://www.nrcan.gc.ca (for general mechanical safety verses specific grill models).
Conclusion and Next Steps
Replacing a grill grid is a practical, repeatable task that home cooks can master with the right measurements, material choice, and careful installation. The Grill Cooking team emphasizes planning and accuracy over speed—take your time to verify dimensions, choose a compatible grid, and follow proper seasoning and maintenance routines. With these steps, you’ll restore even heat, prevent flare-ups, and extend the life of your grill. The Grill Cooking team recommends maintaining a spare grid on hand and incorporating grid inspection into your regular grill maintenance routine to ensure peak performance across the grilling season.
Tools & Materials
- Replacement grill grid (size matched to your grill)(Ensure the grid size matches your grill's grate inner dimensions; measure length x width or diameter depending on model)
- Measuring tape or ruler(For accurate length, width, and bar spacing measurements)
- Gloves, heat-resistant(Protect hands when handling hot parts or rough edges)
- Grill brush or non-abrasive scrub pad(Clean debris before replacement; avoid metal brushes on porcelain coatings)
- Mild detergent or degreaser(For interior cleaning without damaging coatings)
- Sponge or soft cloth(Wipe surfaces after cleaning)
- High-heat cooking oil (for cast iron grids)(Season cast iron grids; use sparingly)
- Optional: manufacturer replacement parts diagram or manual(Helps confirm fit and compatibility)
Steps
Estimated time: 30-60 minutes
- 1
Power down and cool the grill
Turn off all burners and close the lid; wait until the grill is completely cool to avoid burns. This ensures safe handling of hot components and reduces the risk of accidental ignition during grid removal.
Tip: If you’re unsure whether it’s cool, check for surface warmth by lightly touching with the back of your hand from a distance. - 2
Remove the old grid
Open the lid and lift the worn grid from its seating area. Place it on a heat-resistant surface away from the cooking zone to prevent cross-contamination and to avoid warping from heat.
Tip: Use protective gloves and a helper for large grids to prevent dropping the grid. - 3
Clean the interior and burners area
Scrub away grease and debris from the burner shields and the grate supports. A clean surface helps the new grid seat properly and reduces flare-ups caused by residue buildup.
Tip: Avoid aggressive scraping on delicate coatings; opt for a soft pad and mild cleaner. - 4
Measure the new grid and confirm fit
Unpack the replacement grid and measure its length, width, and bar spacing. Compare with the grill’s seating area and with the old grid to ensure identical fit.
Tip: If you’re between sizes, choose the smaller size and verify seating; a loose fit can cause movement during cooking. - 5
Select the material and prepare for installation
Decide on stainless steel, cast iron, or porcelain-coated grids based on heat needs and maintenance. Pre-clean the new grid surfaces to remove packaging residues and oils.
Tip: Cast iron grids benefit from a light seasoning prior to first use. - 6
Install the new grid
Place the grid into its seating area and ensure it sits flat without gaps or rocking. If your model requires securing screws, tighten them to the manufacturer’s torque specification.
Tip: Do not force the grid; a misfit could cause damage or uneven heating. - 7
Reassemble and test heat
Reassemble the grill, ignite, and perform a 5–10 minute test at medium heat to verify even heating and that there are no gas leaks or unusual smells.
Tip: Watch for smoke or hotspots; readjust the grid seating if needed. - 8
Season cast iron (if applicable)
If you installed a cast iron grid, apply a light coat of high-heat oil and heat it according to the manufacturer’s instructions to protect against rust and promote nonstick properties.
Tip: Wipe away any excess oil to avoid pooling. - 9
Inspect and maintain post-install
Allow the grill to cool, then inspect alignment and the seating area. Schedule a quick check after several uses to ensure ongoing performance.
Tip: Establish a routine inspection cadence to extend grid life.
FAQ
Do I need to replace my grill grid if it only has light rust?
Light surface rust on stainless or porcelain-coated grids can sometimes be cleaned, but deeper rust that affects performance or seating should be replaced. If rust has penetrated the grid or caused pitting, replacement is safer and preserves heat distribution.
If the rust is only on the surface, you might be able to clean it, but if rust is deep or affecting fit, replace the grid to keep heat even and safe.
Will a replacement grid fit any grill model?
No. Grids are model-specific. Always verify the part number, measurements, and seating style with the grill manufacturer or replacement-part diagrams before purchasing.
Grids aren’t universal—double-check model numbers and measurements to ensure a proper fit.
How do I know which material is best for my grid?
Consider heat retention, maintenance, and your cooking style. Stainless steel lasts long and resists rust, cast iron provides excellent searing but requires seasoning, and porcelain-coated grids balance cleanup with durability but can chip if mishandled.
Think about how you grill and how much maintenance you’re willing to do; each material has trade-offs.
How often should I replace grill grids?
Frequency depends on usage, material, and care. Regular inspection helps decide when to replace. For frequent heavy use, plan for replacement every few seasons; for occasional use, grids may last longer with proper cleaning.
Use regular inspections to guide replacement—don’t wait for obvious failure before acting.
Can I use cast iron grids on a gas grill right away?
Yes, but you must season cast iron properly and follow manufacturer guidelines to avoid warp or damage. Cast iron holds heat well but will rust if not seasoned and dried correctly.
Cast iron works great on gas grills if you season and care for it properly.
Watch Video
Quick Summary
- Replace worn grids to restore even heat and reduce flare-ups.
- Measure accurately and choose a grid that fits your grill model.
- Choose material based on maintenance tolerance and cooking style.
- Season cast iron grids and clean after every cook to extend life.
- Inspect seating and alignment after installation to ensure safety.