How to Grill Scallops to Perfection
Learn to grill scallops for a perfect sear and tender center. This step-by-step guide covers selection, prep, heat control, seasoning, and serving ideas from Grill Cooking.

Master grilling scallops to achieve a crisp exterior and juicy interior. This guide covers selecting dry-packed scallops, pat-drying, proper heat, quick searing, and finishing flavors, so you can serve restaurant-quality scallops grill results at home. You’ll learn how to time the sear, judge doneness by appearance, and pair scallops with bright citrus and herbs for a crowd-pleasing grill night.
Why scallops grill require precision and timing
Grilling scallops is all about balance. The goal is a bold, caramelized crust that seals in a tender, almost creamy center. Because scallops are lean and cook quickly, even a moment too long on the heat can turn them from silky to rubbery. When you say scallops grill, you’re aiming for a fast, high-heat kiss of the grill that creates crust without drying out the interior. This balance is what separates a good grilled scallop from a great one, and it’s why dry-pack quality matters as much as your grill technique. In short, precision in moisture, heat, and timing is the secret to reliable results in scallops grill sessions.
According to Grill Cooking, the best results start with dry scallops and a hot grill. The team found that moisture on the surface dramatically lowers the chance of a crisp crust, so pat-drying is non-negotiable. Expect a rapid, theater-like sear when heat is properly managed, and you’ll understand why this small seafood shines on the grill.
Throughout this guide, we’ll emphasize practical steps you can replicate at home, with straightforward flavor concepts and quick timing checks that work with most grills. Whether you’re hosting a weeknight dinner or a small backyard gathering, scallops grill can deliver a restaurant-worthy crust in minutes with the right approach.
Selecting and prepping scallops
Choose dry-packed sea scallops rather than wet or previously frozen options. Dry scallops sear better and stay cohesive, while wet scallops can steam and seize up when placed on direct high heat. Look for uniform size (about 1 to 1.5 inches in diameter) to ensure even cooking. Remove any side muscle (the tough crescent-shaped flap on the side) as it can curl and cause uneven searing. Pat the scallops thoroughly with paper towels until the surface is very dry; moisture on the surface is the enemy of that golden crust you want. Finally, season lightly with salt and pepper just before they hit the grill to avoid drawing out extra moisture.
Grill Cooking’s take emphasizes dryness and light seasoning. The surface should look matte rather than gleaming with water before it meets the heat. If time allows, refrigerate the pat-dried scallops for 15 minutes to further reduce surface moisture, which helps with crust development.
If you’re new to scallops grill, consider threading them on skewers or using a grill basket to keep multiple scallops aligned and easier to flip. This is especially helpful on small grills or crowded coals where movement is tricky.
Drying, moisture management, and resting
Even after pat-drying, a thin glaze of moisture can form on the surface as scallops come to room temperature. A brief rest in the fridge (10–15 minutes) can help remove surface moisture again and promote a better sear. Don’t skip this step; moisture is the enemy of that crisp crust you crave. Just before grilling, give them a final pat with dry paper towels.
A dry surface means your scallops grill will produce that distinctive mahogany crust quickly. If your grill is very wet or if you see obvious moisture on the scallops the moment they touch the grates, lift them off and dry again. This extra minute or two of prep results in a far superior crust and a more controlled interior texture.
For best results, avoid over-handling the scallops once they’re ready. Overworking can lead to a buildup of surface moisture, making the sear uneven. A light touch and steady hands are your friends here.
Grill setup and heat management for scallops grill
High heat is essential for a quick sear, but you also want control to avoid scorching or overcooking. For gas grills, set up a two-zone system: a hot direct-heat zone and a cooler, indirect zone. This allows you to sear rapidly on the hottest part and move servings to indirect heat if needed. For charcoal grills, bank the coals to one side to create a similar two-zone setup. Clean grates ensure good contact and clear grill marks. Lightly oil the grates or brush the scallops with a touch of oil to reduce sticking.
Position the scallops so they rest flat against the grate; avoid leaning them on their edges, which can cause curling and uneven cooking. If you’re using skewers or a basket, ensure minimal crowding to maintain consistent heat around each piece. A clean, well-oiled grill is the best starting point for reliable, delicious results when you say scallops grill.
Seasoning, marination, and finishing flavors
Keep seasonings simple to let the seafood shine. A light sprinkle of kosher salt and freshly cracked pepper is usually enough. For extra brightness, finish with a squeeze of lemon and a dab of butter for a glossy, glossy finish. If you prefer a herb note, add minced chives or dill just at the end. Some cooks like to baste briefly with melted butter during the last 30 seconds of cooking; this adds flavor and helps the crust stay glossy. Avoid heavy marinades; scallops grill best when they’re not overwhelmed by strong flavors that can mask their delicate sweetness.
Grill Cooking suggests finishing with a bright citrus touch and a small amount of optional herbs so the final bite is clean and fresh, not heavy. A light glaze can be interesting, but it should go on at the very end to avoid burning and scorching the sauce.
Searing technique for a perfect crust on scallops grill
The crust is where the magic happens. Place each scallop on the hot grates and sear for about 1 to 2 minutes without moving them; when you see a deep golden crust forming and the edges begin to look opaque, it’s time to flip. Use tongs rather than a fork to avoid piercing the delicate flesh and causing moisture loss. After flipping, sear for another 1–2 minutes on the opposite side. The goal is a blistered, caramelized surface with a just-cooked center. If the crust is not browning after 1.5 minutes, give the scallop a tiny nudge and check the color again.
If you have a grill basket, you can baste lightly with a touch of butter during the final 30 seconds, then remove promptly to avoid overcooking. The key is speed and precision: scallops grill best when the surface contact is swift and the interior remains juicy.
Doneness tests, resting, and serving ideas
Doneness is often judged by visual cues: the center should be mostly opaque with a slight translucence near the middle, and the crust should be deeply colored with a crisp edge. Remove scallops as soon as they’re set and still a touch firm, because carryover heat will finish cooking them off the grill. Let the scallops rest for a minute or two before serving to redistribute juices and maintain tenderness.
Serve with a bright citrus squeeze, a pat of herb butter, or a light drizzle of olive oil. For a simple pairing, offer a crisp white wine, a lemon wedge, and a small green salad or grilled asparagus. If you’re feeding a crowd, arrange scallops on a platter with lemon wedges and a sprinkle of chopped parsley for a restaurant-style presentation.
Troubleshooting, safety, and quality tips
Common issues include sticking, overcooking, or uneven searing. If the scallops stick, check that your grate is properly oiled and the surface is dry; lowering heat slightly and giving them a longer initial sear can help. If you notice curling, try skewering the scallops or using a basket so you can flip each one evenly. Always pat dry and avoid adding liquid right before grilling, since moisture creates steam rather than sear. Finally, practice makes perfect—keeping your technique consistent will yield better results over time.
Tools & Materials
- Fresh sea scallops (dry-packed)(Pat dry thoroughly with paper towels to remove surface moisture)
- Paper towels(Pat-dry the scallops and keep hands dry during prep)
- Skewers or grill basket (optional)(Helps with handling and spacing on the grill)
- Tongs(Use to flip without piercing the flesh)
- Neutral oil (grape seed or canola)(Lightly oil the grates or scallops to prevent sticking)
- Butter or olive oil for finishing (optional)(For baste or final glaze)
- Lemon wedges and/or fresh herbs(Brighten flavor at service)
- Salt and freshly ground black pepper(Season lightly just before grilling)
- Grill (gas or charcoal) with direct heat capability(High heat for searing)
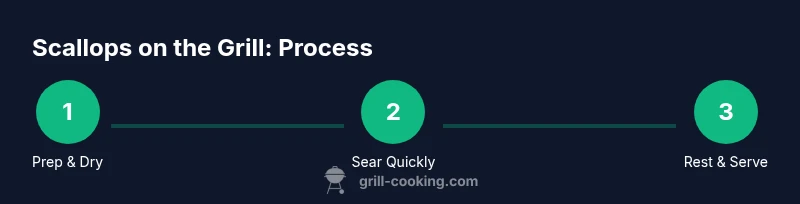
Steps
Estimated time: 25-35 minutes
- 1
Pat scallops dry and prep
Pat dry each scallop with paper towels and remove the small side muscle if present. This ensures a crisp exterior and prevents moisture from steaming the surface.
Tip: Keep surfaces dry; moisture is the enemy of sear quality. - 2
Preheat grill to high direct heat
Heat the grill to a very hot setting and clean the grates. A hot surface is essential for a quick, caramelizing crust on the outside while keeping the center tender.
Tip: Two-zone setup helps manage sear without overcooking the interior. - 3
Oil grates or scallops lightly
Lightly oil the grates or brush the scallops with a small amount of oil to promote easy release and even browning.
Tip: Avoid heavy oiling—the goal is just a thin film to prevent sticking. - 4
Place scallops on the grill
Arrange scallops on direct heat, perpendicular to the grates so they don’t spin and cook evenly. Do not crowd the pan or grill; space allows even searing.
Tip: Leave them undisturbed for 1–2 minutes until a crust forms. - 5
Flip and sear the other side
Turn once with tongs and sear the second side for another 1–2 minutes. The goal is a golden crust with a still-juicy center.
Tip: If using butter, baste in the last 30 seconds to add gloss and flavor. - 6
Check doneness and rest
Remove when the scallops are mostly opaque with a slight translucence in the center. Rest for 1 minute to redistribute juices.
Tip: Carryover heat will finish cooking—err on the side of undercooking slightly. - 7
Finish and plate
Finish with a squeeze of lemon and optional herbs. Plate immediately to preserve crust and texture.
Tip: Serve with light greens or simple sides to keep the focus on the scallops grill. - 8
Clean up the grill
While the grill is hot, wipe down grates and oil lightly to prevent sticking on future grills.
Tip: A clean grill guides better searing and reduces sticking across cooks.
FAQ
Can you grill frozen scallops?
Grill frozen scallops are not ideal; thaw completely, pat dry, and proceed as with fresh scallops to ensure a proper sear and even doneness.
thaw and pat dry before grilling for best results; avoid grilling from frozen.
What heat level should I use for scallops?
Use high direct heat to sear quickly, then move to indirect heat if needed to finish without overcooking the center.
Use high heat to sear, then back off if needed to finish cooking.
Should I marinate scallops?
Marination isn’t necessary and can mask the delicate sweetness of the scallop. If used, keep it light and brief.
Keep marinades light and short to avoid overpowering the scallop’s flavor.
How long per side on the grill?
Cook about 1–2 minutes per side on high heat, watching for a deep crust and an opaque center.
About a minute or two per side, depending on thickness.
Why do my scallops stick to the grill?
Sticking usually means surface moisture or insufficient oiling. Ensure dry surfaces and light oil on grates or scallops, and avoid crowding.
Dry surfaces and light oil prevent sticking; avoid overcrowding.
What should I serve with scallops?
Serve with lemon, herb butter, and a bright side like asparagus or a simple salad for balance.
Lemon, butter, and a light green side pair beautifully.
Watch Video
Quick Summary
- Pat dry scallops before grilling.
- Use high direct heat for a rapid, even sear.
- Do not overcook; aim for opaque centers and crisp crusts.
- Keep seasoning light; finish with lemon or herbs.
- Rest briefly and serve promptly for best texture.