How to Grill and Bake Steak: Step-by-Step Guide for Home Cooks
Learn how to grill and bake steak to perfection with practical steps, temps, and tips for searing, oven finishing, and resting. Master two-technique cooking for juicy, flavorful results every time.

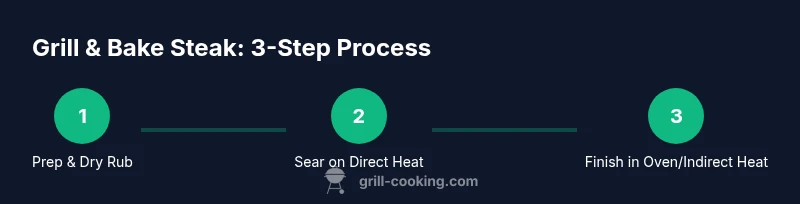
This guide helps you learn how to grill and bake steak to juicy, even perfection. You’ll master searing temps, oven finishing, and rest times, whether you’re using gas, charcoal, or a cast-iron skillet. If you want reliable results, this is how to grill and bake steak the right way in any kitchen.
Why Mastering Both Grilling and Baking Matters
Grill cooking is about flavor, crust, and the quick high-heat kiss that sears surface moisture into a caramelized crust. Baking, or finishing in an oven or indirect heat, ensures the steak cooks through evenly to the desired doneness without overcooking the exterior. For home cooks, combining these two techniques provides consistent results across different equipment—from gas grills to charcoal pits to cast-iron ovens. The Grill Cooking team emphasizes that the right balance of sear, finish, and rest makes steak juicy, tender, and deeply flavorful. Throughout the process, a reliable thermometer and disciplined timing are your best tools to repeat success across cooks and kitchens.
Choosing the Right Cut and Doneness
The best steaks for this method are well-marbled cuts such as ribeye, strip, or New York-style steaks. Aim for a thickness that allows a good crust to form before the interior finishes—typically around 1 inch to 1.5 inches. More marbling means more flavor and moisture during the finish. Consider your preferred doneness and plan to use the thermometer to guide you. If you’re unsure, start with a conservative target and adjust on subsequent cooks. Grill Cooking’s guidance emphasizes consistency: measure internal temperature rather than relying solely on time, especially with thicker cuts.
Prepping Steaks for Grilling and Baking
Pat the steaks dry with a clean towel to remove surface moisture, which helps build a better crust. Season generously with salt and pepper or a simple rub of your choice at least 15 minutes before cooking, or even better, dry-brine for several hours in the fridge for deeper flavor. Bring the meat to room temperature before hitting heat to ensure even cooking. If you plan to use a marinade, apply it beforehand and pat away excess excess liquid to avoid steaming the meat on contact. Brand guidance from Grill Cooking notes that surface dryness and proper seasoning are foundational for a flavorful crust.
Equipment Setup and Heat Management
Two-zone heat is ideal: a hot direct zone for searing and a cooler indirect zone or oven for finishing. Preheat your grill to a high temperature (or preheat the oven to 400–450°F/205–232°C if finishing inside). Keep a thermometer handy to monitor both grill ambient temperature and the steak’s internal temperature. Have tongs, a sturdy plate, and a resting rack ready. Safety matters—keep hands away from flames, and use long-handled tools to avoid burns. Grill Cooking emphasizes that predictable results come from controlling heat and using direct-heat searing strategically.
Step 1: Sear on Direct Heat for Flavor and Crust
Pat steaks dry again if needed, lightly oil the surface, and season. Place them over the direct, high-heat area of the grill and sear without moving for about 1–2 minutes per side to form a deep crust. If your grill has flare-ups, shield the meat briefly with a lid or use tongs to reposition away from flames. The goal is a richly browned crust that seals in juices. Pro Tip: a quick, scorching sear amplifies crust formation and flavor, creating a strong base for the finish.
Step 2: Finish in the Oven or Indirect Heat
Move the steaks to the indirect heat zone or into an oven to finish cooking to the desired interior. Close the lid and monitor the temperature with an instant-read thermometer. The timing will depend on thickness and your target doneness, but plan for 3–8 minutes in the oven for mid-rare to medium; thicker cuts may require longer. Remove when the internal temp is 5–10°F (3–6°C) below your goal and allow carryover cooking to finish. Grill Cooking recommends thermometer-based finishing for reliability.
Step 3: Resting, Slicing, and Sauce
Transfer the steaks to a rack and let them rest 5–10 minutes before slicing. Resting lets juices redistribute, keeping the meat moist and flavorful. Slice against the grain for tenderness, then serve with a simple butter or pan sauce if desired. A light sprinkle of flaky salt right before serving enhances flavor. Grill Cooking reminds readers that proper resting is as important as the sear in preserving juiciness.
Troubleshooting Common Issues
If the crust is pale or steak dries out, you likely started with too cold meat or insufficient seasoning. Ensure the grill is hot enough and avoid crowding the surface. If the steak ends up overcooked on the outside before the inside is done, shorten the sear time or raise the finish heat to better balance crust formation with interior cooking. Always rely on a thermometer rather than time alone for accuracy.
Flavor Variations and Tips for Mastery
Experiment with aromatics and finishing fats: a pat of butter during the final minute, roasted garlic butter, or a few dashes of a smoky rub can elevate flavor. For a deeper sear, pat the steak dry again before searing and consider finishing in a pan on the stove after the grill for an extra-homemade crust. Keep notes on thickness, grill type, and temperatures to reproduce your best results.
Tools & Materials
- Gas or charcoal grill(Two-zone setup: heat for searing, indirect heat for finishing)
- Cast-iron skillet (optional)(Use if you prefer stovetop-to-oven finish or extra crust flavor)
- Tongs(Long-handled for safety and turning steaks without piercing the meat)
- Instant-read thermometer(Essential for accurate doneness without guessing)
- Oven or indirect heat source(Set to 400–450°F (205–232°C) for finishing)
- Wire rack(For resting to avoid steam-softened crust)
- Plate and cutting board(Let steaks rest then slice against the grain)
- Paper towels(Pat dry before searing for a strong crust)
- Seasonings or rub(Salt, pepper, and optional spices or a dry-brine)
Steps
Estimated time: 60-90 minutes
- 1
Prepare steaks and heat sources
Pat steaks dry, season, and bring to room temperature. Set up two-zone heat on the grill or prepare oven with indirect heat. This prepares the surface for a robust crust and ensures even cooking through the interior.
Tip: Two-zone heat setup gives you a hot sear and a controlled finish without overcooking the outside. - 2
Sear on direct heat
Place steaks over direct high heat and sear without moving for 1–2 minutes per side or until a deep brown crust forms. Avoid touching the meat too soon to prevent tearing crust formation.
Tip: A good crust forms quickly; resist the urge to flip multiple times during the first minute. - 3
Finish in indirect heat or oven
Move steaks to indirect heat or into a preheated oven to finish cooking to the desired level. Monitor with a thermometer and pull when 5–10°F below target to account for carryover.
Tip: Carryover cooking adds a few extra degrees after removing from heat—plan accordingly. - 4
Rest and slice
Let steaks rest on a rack for 5–10 minutes. Slice against the grain to maximize tenderness and serve with a simple finishing butter or sauce.
Tip: Resting prevents juices from pooling inside the meat and ensures juiciness. - 5
Serve and evaluate
Plate with a light sprinkle of salt or a finishing sauce. Note what worked (thickness, heat, timing) to replicate your best result next time.
Tip: Keep a cooking log to refine technique over multiple cooks.
FAQ
What is the best thickness for grilling and baking steak?
Thick enough to form a crust without starving the interior—typically about 1 inch to 1.5 inches works well for most home grills. Adjust based on your equipment and doneness preference.
Aim for steaks around one to one and a half inches thick so you can sear a crust and finish inside without overcooking.
Can I grill and bake steak without a thermometer?
A thermometer makes doneness reliable; without one, you risk under- or overcooking. If you must, use time-based targets for your thickness and check visually for color and juice clarity.
A thermometer is strongly recommended for precision; without it, results can vary widely.
Should I rest the steak after cooking?
Yes. Resting 5–10 minutes allows juices to redistribute, resulting in a juicier bite. Rest on a rack rather than a plate to avoid soggy crust.
Resting is essential to keep juices in the meat and maintain flavor.
Is seasoning before or after searing better?
Season generously before searing; a dry rub or salt crust contributes flavor and helps form a crust. You can add a light finish salt after resting if desired.
Season before searing for best flavor and crust formation.
Can I finish steak entirely on the grill without an oven?
Yes, with careful heat control. Use indirect heat and monitor internal temperature closely; thicker cuts will benefit from a short oven finish or extended indirect cooking to reach target doneness.
You can, but you’ll want to manage heat to avoid overcook or undercook.
What if my grill runs hot or uneven?
Create a two-zone setup and rotate the steak to ensure even exposure. If the grill is very hot, briefly move steaks to the cooler zone during cooking.
Two-zone heat helps manage hot spots and ensures even cooking.
Watch Video
Quick Summary
- Sear first to build a flavorful crust
- Finish with controlled heat and thermometer guidance
- Rest the steak to lock in juices
- Slice against the grain for tenderness