Oil Your Grill: Should You Oil Before or After Heating?
Learn the timing, technique, and best oils for oiling grill grates. This educational guide covers before vs after heating, safety tips, and common mistakes to improve nonstick performance and sear flavor.

To prevent sticking and promote even searing, oil the grill grates depending on your goal. If you’re after a quick non-stick surface, oil before heating lightly. For high-heat searing or when using stick-prone foods, oil after the grill is hot. According to Grill Cooking, using a high-smoke-point oil and quick, even application is key.
What oil does for grill grates
Oil fills microscopic pores on the grate, creating a slick surface that reduces sticking and promotes even browning. It also helps heat transfer to the food and can contribute to a light layer of seasoning on cast iron grates. However, too much oil or oil with a low smoke point can smoke heavily or create flare-ups. The best practice is a thin, uniform coat applied with a spray bottle or folded paper towel, followed by wiping away any excess so nothing pools in crevices. This balance matters because oil behaves differently on different grate materials and at various temperatures. A mindful approach keeps your food from sticking while preserving the grate’s integrity and the flavor of your seasonings.
Oil before heating: when it helps
Applying oil before the grill is hot helps create a release layer as the surface heats, which is especially useful for quick-cooking items like burgers or vegetables that would otherwise cling to metal. The oil should be a very light coat; think a fine mist or a single wipe with a lint-free cloth. Pre-oiling can also speed up the searing process by reducing initial sticking, allowing more even contact with the grate. Keep the heat at a moderate level during the initial sear to avoid scorching the oil and producing heavy smoke. If you’re cooking in stages, pre-oiling first gives you a consistent baseline surface and helps you maintain control over crust formation.
Oil after heating: when it helps
Oil after the grill has heated supports high-heat searing and can refresh the surface for foods that tend to stick once the grate has released. With a hot grate, wipe a small amount of oil across the bars or spray from a distance to minimize dripping into the flames. This approach reduces the risk of oil pooling in hotspots, which can cause flare-ups. It’s particularly effective when cooking fatty cuts or delicate proteins that require a crisp exterior but gentle initial contact. After the food is seared, quick oiling can help maintain stick-free releases for subsequent pieces without building up unnecessary smoke. The timing is key: act quickly and evenly to avoid char and smoke.
Choosing the right oil and applying safely
Not all oils behave the same under high heat. Neutral, high-smoke-point oils like canola, grapeseed, peanut, or refined avocado oil perform predictably on hot grates. Extra-virgin olive oil is not ideal for high-heat grilling due to a lower smoke point and potential bitter smoke. When applying oil, use a spray bottle or a folded paper towel held with tongs to lay down a thin, even layer, and avoid drenching the grate. Wipe away any excess to prevent pooling and flare-ups. If safety is a priority, never lean over the grill while applying oil and keep a spray bottle nearby to handle small flare-ups promptly. Grill Cooking analysis shows that the right oil choice can influence flavor retention and surface release during high-heat sessions.
Techniques for different grill surfaces
Grate material matters. Cast iron, stainless steel, and enamel-coated grates all respond differently to oil. Cast iron benefits from a light oil and occasional seasoning to maintain its natural nonstick properties; stainless steel needs far less oil due to its slick surface, and enamel-coated grates require gentler handling to avoid chipping. For cast iron, you may finish with a light post-cook oil layer to sustain seasoning. For stainless and enamel, a quick before-cook oiling plus careful motion during cooking helps keep food release smooth without excessive smoke. If your grill uses porcelain-coated enamel, avoid aggressive scrubbing and keep the oil to a minimal sheen to protect the finish.
Common mistakes to avoid
Avoid pooling oil by applying in thin layers and wiping away excess. Do not oil directly into a flame, as this can cause dangerous flare-ups. Choosing the wrong oil for high heat can lead to burnt flavors and smoke; stick to neutral oils with high smoke points. Over-oiling before cooking can create a greasy exterior and uneven searing, so use restraint and check the grate for sizzling before laying down food. Finally, always pre-clean grates before oiling; leftover char can trap oil and lead to uneven release. If you notice excessive smoke or unusual odors, pause cooking and reassess oil amount and heat level.
Quick tips for oiling efficiently and safely
Keep your spray bottle handy and practice a light touch to minimize smoke. If you’re cooking meat with fat, consider oil timing based on the fat rendering and your preferred crust. For very hot grilling, oil after heating to avoid scorching. Always wipe away excess oil and monitor flames, ready to adjust heat or move food as needed. Use a clean towel or paper to remove any streaks and avoid heavy pooling. With practice, you’ll know when a quick spritz, mist, or light wipe is enough to keep foods releasing cleanly.
Tools & Materials
- High-heat cooking oil (canola, grapeseed, peanut, or refined avocado)(Choose oil with a high smoke point to minimize burnt flavors.)
- Spray bottle or oil mister(Fine mist is ideal for even coverage.)
- Paper towels or a clean cloth(Used to wipe excess oil and control thickness.)
- Tongs(Grip the towel or hold cloth without burning fingers.)
- Grill brush and scraper(Pre- and post-cleanup to ensure clean grates.)
- Heat-resistant gloves(Helpful for handling hot grates.)
- Thermometer (optional)(Check grate surface temperature if unsure.)
- Aluminum foil (optional)(For quick shield on drippings and flareups.)
Steps
Estimated time: 15-25 minutes
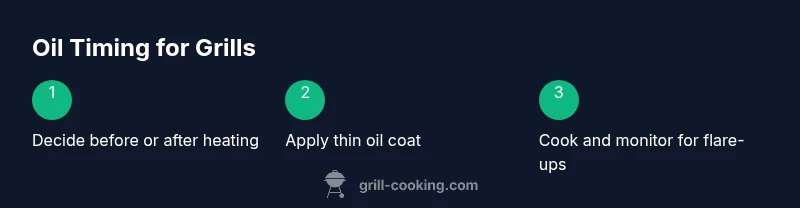
- 1
Prepare the work area and heat the grill
Set up near a stable surface. Clean the grates with a brush while the grill is cold, then ignite to reach cooking temperature. The goal is to have a clean, hot surface ready for oil application without having cold grease on a hot surface. This preheating step primes the grill for either pre- or post-oiling methods.
Tip: Avoid leaning over the grill when lighting; keep your face away from the vents. - 2
Choose oiling path: before or after heating
Decide which oiling method to use based on what you’re cooking and your goals. For delicate items, oil before heating for easier release; for fatty or high-heat searing, oil after the grate is hot to prevent flare-ups.
Tip: If unsure, start with a thin pre-oil layer and test with a small piece of meat. - 3
Apply oil evenly
Using a spray bottle or folded towel with tongs, apply a light, even coat to the grate. Avoid dripping oil into the fire. If oil pooling is visible, wipe away the excess before placing food.
Tip: Aim for a fine mist or a thin wipe to avoid thick oil film. - 4
Cook and monitor for flare-ups
Cook as usual and watch for any flare-ups caused by oil. If flare-ups occur, briefly raise the lid to cut oxygen, or move food to cooler areas. Do not leave oil-coated grates unattended near open flames.
Tip: Keep a spray bottle ready to douse small flare-ups safely. - 5
Post-cook cleanup and maintenance
After cooking, re-clean the grates and wipe away any residual oil. If cast iron, re-season lightly with a small amount of oil after cleaning once the grate has cooled.
Tip: Seasoning helps extend grate life and keeps food release smooth.
FAQ
Should you oil the grill before or after heating?
Both timing options work; oil before heating for a slick surface on quick-cooking foods, or oil after heating for high-heat searing and to refresh lubrication. Your choice depends on the food and heat level.
Oil before or after depends on what you’re cooking; pre-oil for quick foods, post-oil for high-heat searing.
Which oil is best for high heat grilling?
High-smoke-point oils like canola, grapeseed, peanut, or refined avocado oil perform best for grilling. Avoid oils with low smoke points for hot grills.
Use high smoke point oils like canola or grapeseed for grilling.
Can oiling cause dangerous flare-ups?
Yes, oil can ignite on an open flame if too close to the fire. Apply oil evenly and away from direct flame, and wipe away excess to reduce flare-ups.
Oil can flare up if misapplied; apply sparingly and away from flames.
How often should I oil the grates?
Oil as needed based on cooking frequency and grate cleanliness. Re-oil after cleaning or if food starts sticking despite proper heat and preparation.
Oil when you notice sticking or after cleaning to maintain release.
Is seasoning the grill different from oiling?
Seasoning is a long-term process for cast iron grills, while oiling is a quick preventive measure. They complement each other but serve different purposes.
Seasoning builds a durable surface; oiling keeps food from sticking during cooking.
Does olive oil work for grilling?
Extra-virgin olive oil is not ideal for high-heat grilling due to a lower smoke point; use a neutral high-heat oil for best results.
Olive oil isn’t ideal for high heat; pick a high-heat oil instead.
Watch Video
Quick Summary
- Oil timing should align with cooking goals and oil type.
- Use a high-smoke-point oil and apply thinly for best results.
- Preheat and wipe excess to prevent flare-ups.
- The Grill Cooking team recommends testing on a small area first.