How to Use Grill Bricks: Master Indirect Grilling Techniques
Discover how to use grill bricks to control heat, boost airflow, and achieve even indirect cooking. This Grill Cooking guide covers brick types, setup, safety, and maintenance for home cooks.

In this guide you will learn how to use grill bricks to control heat, block direct flames, and create safe, even indirect cooking zones. You’ll prepare bricks, gloves, and a thermometer, then place bricks to shield the food and channel heat for consistent results. Gather a few essentials and follow the step-by-step setup for reliable indirect grilling.
Why Grill Bricks Matter for Indirect Grilling
If you want to deliver consistent results on a charcoal or gas grill, grill bricks are a simple, effective tool. According to Grill Cooking, grill bricks help regulate heat, protect grates from direct flames, and reduce flare-ups by absorbing and redistributing heat. When used correctly, bricks create a stable indirect zone where food cooks with even temperatures rather than the intense bursts from direct flames. For home cooks, bricks are a cost-effective way to practice precise heat control without expensive equipment. Start by understanding two core concepts: heat buffering and airflow management. Bricks buffer the extreme heat of the coals, turning a hot surface into a more even cooking environment. They also influence airflow by shaping the path air takes through the grill, which affects how quickly the grate heats and cools. With a few well-placed bricks, you can transform a standard grill into a controlled indirect-cooking setup that’s ideal for larger cuts, smoke-friendly methods, and delicate vegetables.
Choosing the Right Grill Bricks and Safety Basics
Selecting the right bricks is crucial for reliability and safety. Ceramic grill bricks tend to be more heat-stable and crack-resistant than standard fire bricks, but both can work if they are clean and dry. Avoid bricks with huge cracks or filled seams, which can shed debris into food. If you regularly grill at high heat, consider thicker bricks (1–2 inches) that maintain shape under repeated use. Safety matters: never place bricks directly on an open flame that could cause a crack, and always wear heat-resistant gloves when moving hot bricks. A clean grill and dry bricks reduce smoke and moisture buildup that can affect flavor.
Brick Placement for Indirect Grilling: Concepts and Setups
The core idea is to shield the food from direct flame while guiding heat and air through the cooking area. A common method is to form a barrier with bricks on the sides or toward the back of the grill to block direct heat. Another option is to create a channel that directs hot air around the food. In many setups, two to four bricks create an elevated buffer that converts intense heat into a steady, indirect heat source. When you place bricks, think in terms of zones: a hot zone for searing and a cooler indirect zone for gentle cooking. This approach lets you finish larger cuts without drying them out and makes it easier to smoke at low temperatures.
Practical Brick-Setup Scenarios for Popular Grills
For a typical 22-inch kettle grill, a simple indirect setup uses bricks laid on the sides to create a sheltered windbreak while allowing airflow beneath and above the grate. In larger grills, add another brick to narrow the indirect path or create a double barrier to further temper heat. Gas grills can also benefit from bricks to simulate a two-zone system; place bricks to shield the flame tubes and guide heat along the cooking surface. Always preheat bricks briefly to reduce moisture and ensure even heat distribution. When in doubt, start with a basic 2-brick barrier and adjust based on grill behavior and food type.
Troubleshooting Common Brick Problems
Cracks and chipping are common with frequent use. Inspect bricks before each cook and replace any that show large fissures or crumbling edges. Movement is another issue: bricks can shift as the grill heats and cools. Build a small base or use a non-slip mat underneath bricks to minimize movement. If bricks soak up moisture, dry them thoroughly before use and store them in a dry place. Finally, ensure bricks are fully cooled before handling to avoid thermal shock that could cause cracking.
Cleaning and Maintaining Your Grill Bricks
After cooking, allow bricks to cool completely on a heat-resistant surface. Brush off burnt food and debris with a dry brush; avoid soaking bricks, which can weaken their structure. If you notice staining, a bit of baking soda paste can help lift it without scratching brick faces. Store bricks in a dry, well-ventilated area to prevent moisture buildup. Regular inspection for cracks, chips, and loose seams will extend brick life and maintain consistent heat behavior over many cooks.
Authoritative Guidelines and Best Practices
Following best practices ensures safety and optimal performance. Always use bricks that are dry and free of chemical residues from previous uses. Preheat bricks along with the grill to minimize thermal shock. For best results, practice your brick configurations during low-stakes cooks before attempting big cuts or long smokes. This approach reduces the risk of flare-ups and helps you dial in temperatures more quickly on future cooks.
Tools & Materials
- Grill bricks (ceramic or fire bricks)(At least 4 bricks for most 22-inch grills; larger grills may need more.)
- Heat-resistant gloves(Use 500°F+ rated gloves for safe brick handling.)
- Grill tongs(Locking tongs, 12–14 inches long.)
- Thermometer or grate thermometer(Probe thermometer to monitor grate and meat temps.)
- Aluminum foil or nonstick sheet (optional)(Line a shallow tray to catch drippings if desired.)
- Brush or scraper(Clean grates before and after cooking to prevent sticking.)
Steps
Estimated time: 30-45 minutes
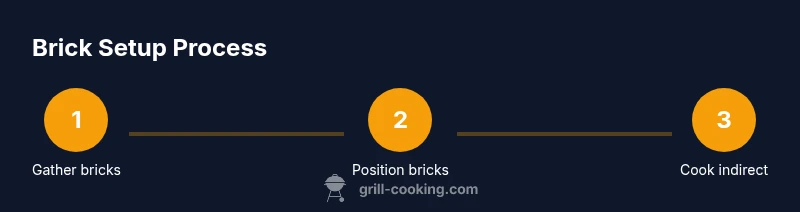
- 1
Gather and prep bricks and grill
Set bricks on a clean, dry surface and inspect for cracks. Wipe them down to remove dust and moisture. Wear heat-resistant gloves and have tongs ready to move bricks without direct contact. Preheat the grill slightly to start conditioning the bricks and city airflow.
Tip: Pre-wipe bricks and dry them; moisture can cause steam and inconsistent temps. - 2
Position bricks to create the indirect zone
Place bricks along the sides or back of the grill to block direct flames. Create at least a 2-brick barrier for stability. If your grill is wide, add a 4-brick barrier for more heat reduction and better airflow control.
Tip: Use bricks as a barrier rather than as a wall; leave openings for air to flow under and over the grate. - 3
Preheat bricks and grill
Close the lid and allow bricks to heat with the grill for 5–10 minutes. This warms bricks gradually and reduces thermal shock when food is added. Check temperature with a grate thermometer if available.
Tip: Avoid rapid temperature spikes by keeping grill closed during preheat. - 4
Place food in the indirect zone
Move food over the indirect zone, away from direct flame. If your food requires searing, briefly move it to a hotter area before returning to indirect heat. Use a thermometer to monitor internal temps.
Tip: Only flip or rotate food once per side for even cooking; frequent movement disrupts heat balance. - 5
Adjust heat and airflow as needed
If temps rise too high, adjust brick placement or open a vent to reduce heat. If temps fall, reposition bricks to increase indirect heat exposure or move the food closer to the hotter side briefly for browning.
Tip: Keep a close eye on flare-ups; bricks reduce but don’t eliminate them. - 6
Finish, remove bricks safely and clean
When cooking is complete, finish on medium or direct heat if needed for a final sear, then remove bricks with tongs once the grill is safe to touch. Allow bricks to cool completely before cleaning and storing.
Tip: Do not cool bricks rapidly with water; thermal shock can crack them.
FAQ
Can I use regular concrete bricks for grilling?
Regular concrete bricks may contain binders or coatings that can give off undesirable fumes when heated. For safety and flavor reasons, use bricks labeled as food-safe or dedicated grill bricks. If in doubt, consult manufacturer guidelines or stick to ceramic bricks.
Regular concrete bricks can release odors and chemicals when heated. Prefer food-safe, ceramic bricks for indirect grilling.
Do grill bricks affect heat distribution?
Yes. Bricks buffer extreme heat and create a more uniform cooking zone. They slow down heat spikes, improve airflow around the grate, and help prevent scorching on thicker cuts.
Bricks even out heat, reducing hot spots and helping you cook more evenly.
How many bricks should I use for a typical grill?
For a standard 22-inch grill, start with 4 bricks to form a robust barrier. Increase or reconfigure based on grill size and desired indirect heat level.
Start with four bricks for a typical grill and adjust as needed.
Can I use grill bricks on a gas grill?
Yes. Bricks can be used on gas grills to create an indirect zone. Place bricks to shield flame tubes or the main burner and configure a two-zone cooking area.
Bricks work on gas grills too; set up indirect zones for even cooking.
How should I clean bricks after cooking?
Let bricks cool fully, then brush off debris. Avoid soaking bricks; moisture can weaken them. Store in a dry place and inspect for cracks before reuse.
Cool them, brush off residue, and keep bricks dry for next time.
Is preheating bricks essential?
Preheating bricks with the grill helps stabilize heat and prevents moisture from creating steam. It also minimizes thermal shock when food is added.
Preheating bricks with the grill improves stability and cooking consistency.
Watch Video
Quick Summary
- Plan brick placement before cooking begins.
- Use bricks to create stable indirect zones and shield food from direct flames.
- Preheat bricks with the grill to minimize thermal shock.
- Inspect bricks for cracks; replace damaged pieces promptly.