How to Put a Grill in the Oven: A Practical Guide
Learn how to safely place an oven-safe grill inside your oven for indoors searing, finishing, or broiling. This comprehensive guide covers compatibility, gear prep, rack placement, heat control, and cleanup for reliable results.

By the end of this guide you’ll safely place an oven-safe grill inside your oven to sear, finish, or broil dishes indoors. You’ll learn how to verify compatibility, prep gear, choose the right rack height, and manage heat without damaging the oven. Essential items include an oven-safe grill grate, heat-resistant gloves, a drip pan, and a reliable thermometer.
Why indoor oven grilling makes sense
When outdoor grilling isn’t feasible due to weather, space, or schedule, using an oven to grill can be a game changer for home cooks. An oven-safe grill lets you create a seared crust, finish a thick cut, or add a smoky char without firing up the outdoor setup. The Grill Cooking team has observed that indoor grilling can offer consistent heat control, reduce smoke exposure outdoors, and help you achieve restaurant-style sears with modest equipment. The key is understanding the limits of your oven and the grill you choose to use, plus clear safety practices to prevent accidents. Expect better results when you plan around heat distribution, rack height, and ventilation. Additionally, know that not every grill is designed for oven use, so verify compatibility before you begin and adjust expectations accordingly.
Safety is non-negotiable
Indoors, heat and smoke concentrate in a small space. Before you attempt to place any grill inside an oven, confirm that the gear is rated for high-heat indoor use. Use an oven-safe grill grate or a grill pan designed for oven temperatures, and never place equipment with plastic handles, rubberized knobs, or non-stick coatings that aren’t rated for high heat. Always have a reliable thermometer, heat-resistant gloves, and a drip pan to catch fats and prevent scorching. If your kitchen ventilation is limited, supplement with an exhaust fan or open windows during use. Safety first keeps indoor grilling both delicious and hazard-free.
Tools and materials you’ll want on hand
To execute oven grilling safely, assemble a small toolkit: an oven-safe grill grate or cast-iron grill pan, a sturdy oven rack, a drip pan or sheet pan lined with foil, heat-resistant gloves, long tongs, a meat thermometer, and optional parchment or non-stick spray. Keep a spray bottle handy for managing flare-ups if you’re cooking fatty cuts. Confirm all items are compatible with your oven’s interior dimensions and heat limits. Practically, having the right gear minimizes the chance of damage to the oven and ensures you can finish cooking evenly.
Preparing the grill: cleaning, inspection, and setup
A clean grill is essential for predictable results. Remove any plastic components, disassemble detachable parts that can’t tolerate oven heat, and wipe away grease or food residues. Inspect the grill grate for rough edges or rust; replace any compromised parts. Wipe the inside of the oven rack and the shelf that will support the grill. Pre-check that the drip pan sits securely and won’t slide during operation. A quick inspection prevents unwanted smoke, scorching, or dislodged gear during the bake.
Rack placement and preheating strategy
Position the rack so the grille sits about 4–6 inches below the top heating element or as recommended by the grill’s manufacturer. This height provides a hot, direct zone for searing without scorching the surroundings. Preheat the oven to the target cooking temperature with the rack in place, allowing the grill to warm gradually in advance. A slow preheat helps mitigate thermal shock to metal components and reduces the chance of warping. If you are finishing a crust, you may shift the rack closer to the heat source toward the end of cooking.
Step-by-step overview (context before the formal steps)
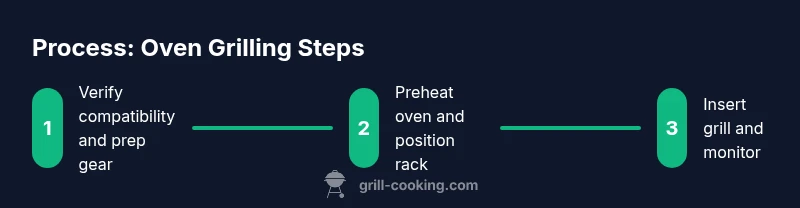
The following step-by-step sequence is designed to be straightforward and repeatable. Think of it as connecting the grill to an indoor oven workflow. You’ll verify compatibility, arrange the rack and pan, preheat, insert the grill, monitor the process with a thermometer, and finally remove carefully when the internal temperature reaches the target. The emphasis is on controlled heat, safe handling, and clean-up efficiency.
Indoor grilling techniques: broil vs finish methods
Broiling offers a direct heat source from above, which can quickly tighten surfaces and develop char. Finishing under oven heat requires careful timing to avoid drying the meat or overcooking edges. In most cases, establish an initial sear on the grill pan or grate, then switch to lower oven heat or move the rack away from the heat source to finish cooking evenly. Practice with small, fatty cuts first to fine-tune your timing and temperature control.
Safety tips for grease, smoke, and flare-ups
Grease flare-ups are more likely in a closed environment, so keep a drip pan level with the grill and avoid allowing drippings to pool directly on heating elements. Maintain proper ventilation, and never leave the oven unattended during high-heat operations. If you notice excessive smoke, turn off the oven, move to a safe venting area, and reassess the setup before resuming. Regular cleaning minimizes residue that can contribute to smoke and odor.
Cleaning up and maintenance after oven grilling
Let parts cool completely before handling. Wipe off remaining grease from the grill grate and pan, then wash or scrub with warm soapy water. Dry all parts thoroughly to prevent rust. Regular inspection for wear, chips, or warped metal helps conserve your gear for future oven grilling sessions. A short post-use wipe-down makes the next run quicker and safer.
Tools & Materials
- Oven-safe grill grate or grill pan(Choose a grate or pan rated for the oven’s max temperature; avoid plastic-coated surfaces.)
- Sturdy oven rack(Ensure it sits securely and leaves space for a drip pan beneath.)
- Drip pan or foil-lined sheet pan(Catch fats and prevent smoke; replace foil if it tears during use.)
- Heat-resistant gloves(Protect hands when handling hot grates and pans.)
- Long tongs(Use for safe gripping without getting close to heat.)
- Meat thermometer(Monitor internal temperature to finish safely and accurately.)
- Parchment paper or non-stick spray(Optional for preventing sticking on some pans.)
Steps
Estimated time: 25-40 minutes
- 1
Verify oven compatibility
Check that the grill is designated oven-safe and free of parts that could melt. Read manufacturer guidance and confirm the unit’s max temperature. This initial check prevents damage and unsafe conditions.
Tip: If uncertain, contact the manufacturer or use a tested, oven-rated grill pan instead. - 2
Clean and inspect the grill
Wipe the grill clean and remove any residue. Inspect for rust, bent bars, or loose components. Clean the drip tray and ensure there are no obstructions that could trap heat.
Tip: A clean surface improves sear quality and reduces smoke. - 3
Prepare the oven rack and pan
Place the drip pan on a lower rack or under a guard so drippings don’t reach the heating element. Position the grill on the upper rack in a stable configuration.
Tip: Use a rack height that keeps the grill 4–6 inches from the top heat source. - 4
Preheat to target temperature
Preheat the oven with the rack in position. Preheating helps achieve a proper sear and prevents sticking when you insert the grill.
Tip: Give the oven enough time to reach the desired temperature before adding food. - 5
Insert the grill and begin cooking
Carefully slide the grill into the oven using long tongs. Monitor closely, leaving space around the grill for air circulation.
Tip: Keep the door ajar for the first minute if your oven design supports it, to vent heat safely. - 6
Manage heat and monitor progress
Use a thermometer to verify internal temperature and adjust rack height if needed. Turn or stir as required to ensure even contact and heat distribution.
Tip: Avoid overloading with moisture-rich foods that steam instead of sear. - 7
Finish and remove safely
When the target internal temp is reached, remove the grill with gloves, transfer food to resting plates, and inspect for caramelization or char.
Tip: Let meat rest a few minutes to redistribute juices after finishing in the oven. - 8
Cool and clean up
Allow all components to cool before cleaning. Wipe residues from the grill and pan, then wash and dry thoroughly.
Tip: Regular cleaning prolongs the life of grill components and keeps flavors distinct.
FAQ
Is it safe to put a grill in the oven?
Yes, when the grill is oven-safe and you follow safety guidelines, including proper ventilation and heat control. Always inspect gear and avoid plastic components.
Yes, it’s safe if everything is rated for oven use and you follow the safety steps.
What kinds of grills can be used in an oven?
Only oven-safe grills or grill pans designed for high heat. Do not use grills with non-oven-safe handles or coatings.
Only use oven-safe grills or grill pans with proper heat ratings.
Can I use foil or parchment to prevent sticking?
Foil can help contain drippings, but avoid covering grill surfaces where heat needs direct contact. Parchment is not suitable on metal grates at very high temps.
Foil can help, but don’t cover the grill surface where heat needs to reach the food.
Why is ventilation important when oven-grilling?
Oven grilling can produce more concentrated smoke. Adequate ventilation reduces odor and improves indoor air quality while keeping flames and smoke away from the living area.
Ventilation helps keep smoke down and makes it safer and more comfortable to cook indoors.
What temperatures should I target for finishing?
Use a thermometer to determine doneness and finish at the lower end of the range when possible, then rest the meat to redistribute juices.
Rely on a thermometer and finish at the recommended doneness, then rest the meat.
How do I clean after indoor grilling?
Let components cool, wipe surfaces, then wash with warm soapy water. Dry thoroughly to prevent rust and prepare for next use.
Cool, wipe, wash, and dry completely after each use.
Watch Video
Quick Summary
- Verify oven compatibility before use.
- Use oven-safe gear designed for high heat.
- Monitor temperature with a thermometer.
- Ventilate adequately to minimize smoke.
- Clean components promptly after use.