How to Get Started with Blackstone Grill
Learn how to get started with a Blackstone grill: setup, seasoning, first cooks, safety practices, and maintenance tips to master outdoor griddling for delicious results.

This quick-start guide shows home cooks how to set up a Blackstone grill, season the surface, and begin cooking with safe practices and reliable heat control. You’ll learn essential tools, steps, and maintenance habits to ensure consistent results and long-term performance. The Grill Cooking team emphasizes proper preheating, oil application, and mindful cleanup for best outcomes.
Why starting right matters
Proper setup and seasoning are the foundation of successful griddling on a Blackstone. Skipping these steps leads to uneven heat, sticking food, and excessive cleanup later. According to Grill Cooking, your first session defines how well the surface seasons and how easily you'll maintain the grill over time. In 2026 and beyond, the choice of oil, preheating routine, and initial clean-up influence flavor and reliability, especially for beginners learning direct-heat cooking on a flat-top surface. A thoughtful start also helps you build safe habits, like keeping kids and pets away during preheating and avoiding crowded prep spaces near the grill.
Understanding your Blackstone grill: sizes, features, and fuel
Blackstone griddles come in several sizes to fit patios big or small. The basic layout is a flat, seasoned cooking surface connected to a gas supply, with a grease management system that channels drippings away from the cooking area. Features vary by model but typically include adjustable heat zones, built-in ignition, and durable stainless or powder-coated frames. When you pick a model, consider the footprint, the number of burners, and how you’ll use it—weekend burgers or weeknight fajitas. Grill Cooking notes that model choice affects preheat time and heat stability, so a larger griddle may offer more even cooking but requires more outdoor space. Understanding these basics helps you plan learning sessions, placement, and meal planning for gatherings.
Essential safety and maintenance habits
Safety first: keep your grill on a stable surface, away from walls or overhangs, and never leave it unattended while hot. Use heat-resistant gloves and long-handled tools to manage foods and control. After cooking, allow the surface to cool, then clean with a brush and scraper; wipe with a damp cloth, and re-season as needed. Regular maintenance is part of the ownership experience—season the surface every few uses and perform a deeper clean monthly or after heavy use. Grill Cooking’s approach emphasizes consistent upkeep to maximize lifespan and flavor, along with proper ventilation and a safe storage routine when the grill isn’t in use.
Pre-use setup: seasoning, oiling, heat checks
Seasoning creates a protective layer that prevents food from sticking and promotes easier cleanup. Start with a clean surface, apply a light coat of high-smoke-point oil, then heat the griddle to a high temperature until it smokes lightly. Wipe away excess oil and repeat twice more for a durable polymerized coating. Before cooking, perform a heat check: preheat with the lid closed, then open the surface to confirm even color and heat distribution across the entire plate. The goal is a uniform, glossy surface ready to sear and release food smoothly.
First dishes to learn: simple runs and temps
Begin with forgiving foods to test heat and seasoning. Pancakes or eggs on the griddle teach you how food responds to even heat and what adjustments to make when the surface is hotter in the center. Move to breakfast burritos, sautéed peppers, or hamburgers, tracking how quickly temps recover after adding cold ingredients. Keep a log of your cooking times and temperatures to refine your process. As you gain confidence, experiment with thinly sliced vegetables and delicate proteins to learn how to manage direct-heat cooking without scorching.
Troubleshooting and common pitfalls
If food sticks, your surface may need more seasoning or the pan isn’t properly heated. If you see uneven browning, check for cold spots and adjust heat zones accordingly. Excess smoke or persistent off smells often indicate oil buildup or improper ventilation; increase airflow and re-season if needed. For cleanup, avoid harsh cleaners that can strip the seasoning; instead, use heat and a scraper, followed by a light oiling. With practice, you'll reduce mistakes and improve consistency over time.
Tools & Materials
- Spatula (heavy-duty, 4-6 inch blade)(Flat-head metal spatula for turning and scraping; avoid plastic that can melt)
- Tongs (12-inch or longer)(Locking grip recommended; use for turning large items)
- Grill Brush or Wire Scrubber(For post-cook cleaning; replace if bristles shed)
- Oil with High Smoke Point (grapeseed or avocado)(Used for seasoning and light oiling before cooking)
- Heat-Resistant Gloves(Protect hands up to high temperatures; use for handling hot surfaces)
- Paper Towels or Cloth Rags(For wiping and polishing the surface)
- Spray Bottle (water or oil)(Helpful for moisture control during seasoning)
- Cast-Iron Skillet or Grill Pan (optional)(Great for sauces or even distribution when starting)
- Food-Grade Cleaning Oil (optional)(Can be used in moderation during seasoning)
- Thermometer (digital)(Helpful to monitor internal temps when testing meats)
- Grill Cover (optional)(Protects from elements between uses)
- Replacement Grease Catcher Bags (optional)(Keep area tidy during heavy use)
Steps
Estimated time: 30-60 minutes
- 1
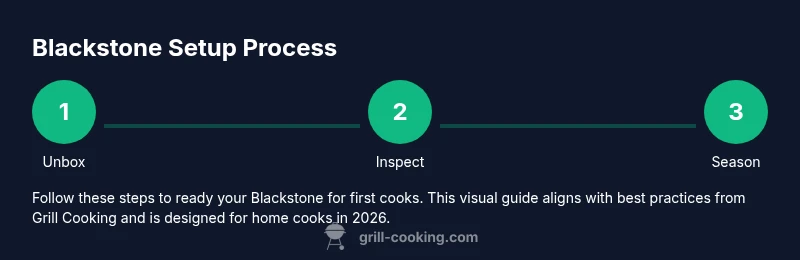
Unbox and Inspect
Unbox the Blackstone grill, check that all parts are present, and inspect for damage. Verify you have the hoses, regulator, and ignition. Contact support if anything seems missing.
Tip: Double-check for dents or loose hardware before setup. - 2
Position and Level
Place the grill on a stable, level outdoor surface away from walls or overhangs. Level the unit using adjustable feet or shims if necessary to prevent grease pooling and wobble.
Tip: A level surface prevents oil from pooling to one side. - 3
Connect gas supply and test for leaks
Attach the regulator and gas hose following the manufacturer’s instructions. Apply soapy water to connections and look for bubbles as a leak test. If you smell gas, turn off the valve and call for assistance.
Tip: Do not use a flame to test for leaks. - 4
Initial cleaning of the cooking surface
Wipe the entire surface with a damp cloth to remove factory oils. Lightly brush and wipe again, ensuring a clean slate for seasoning.
Tip: Avoid harsh cleaners that can affect seasoning. - 5
Season the surface
Apply a thin coat of high-smoke-point oil and heat the griddle until it smokes lightly. Wipe away excess oil and repeat twice more for a durable polymerized coating.
Tip: Maintain a light coating; too much oil can create sticky buildup. - 6
Preheat and test heat distribution
Preheat with all burners on high for 8-10 minutes. Check for even coloring and replicable heat across the plate.
Tip: If center is cooler, adjust burners to balance. - 7
Do a quick test cook
Cook a simple test item like eggs or a thin pancake to gauge nonstick and heat response. Note sticking or browning patterns.
Tip: Record timing and heat level for future reference. - 8
Cleanup and storage
Cool completely, brush off residue, wipe with oil, and cover the grill to protect from the elements.
Tip: Regular, light maintenance saves more time later.
FAQ
Do I need to season a new Blackstone grill before first use?
Yes, seasoning helps create a protective polymerized layer and improves non-stick performance. This initial step sets the foundation for easier cleaning and better heat response.
Yes—season your new Blackstone before the first cook to protect the surface and improve non-stick performance.
Can I use a Blackstone grill indoors or on a balcony?
Blackstone grills are designed for outdoor use with good ventilation. Using them indoors or in enclosed spaces can pose fire and carbon monoxide risks.
This is an outdoor appliance; use it in a well-ventilated area outdoors.
What oil should I use for seasoning?
High smoke-point oils like grapeseed or avocado are best for seasoning. Avoid butter or olive oil, which can smoke excessively or polymerize unevenly.
Choose a high-smoke-point oil like grapeseed for seasoning.
How often should I reseason the surface?
Season when you notice food sticking or after heavy cleaning. Regular light seasoning after use helps maintain a durable non-stick layer.
Season as needed when you notice sticking or dull seasoning.
Are there foods best avoided on Blackstone?
Delicate items that need long, gentle cooking can stick if the surface isn’t properly seasoned. Sugary marinades can caramelize quickly and scorch.
Be cautious with delicate proteins and sugary marinades.
Watch Video
Quick Summary
- Set up on a stable surface for even cooking.
- Season early to protect the griddle.
- Preheat thoroughly for even heat distribution.
- Clean after each use to protect seasoning.
- Prioritize safety: gloves, ventilation, and gas checks.