Indoor Grilling with Electric Grills: A Complete Guide
Learn to safely choose, set up, and cook with an indoor electric grill. This expert guide covers safety, heat control, ventilation, maintenance, and practical tips for home cooks.

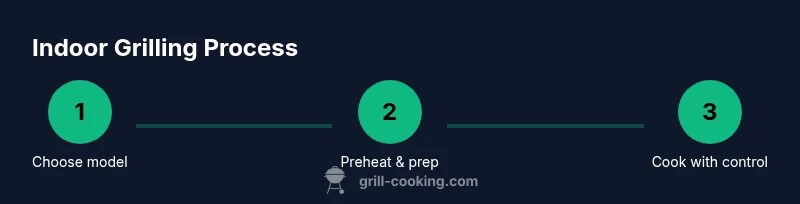
Goal: master indoor grilling with an electric unit by selecting a safe model, setting it up correctly, and cooking a variety of foods. You’ll compare features, apply ventilation practices, and learn cleaning routines. According to Grill Cooking, ventilation and heat control are the keys to consistently delicious results in any kitchen.
What is indoor electric grilling and why it matters
Indoor electric grilling uses electric heating elements to reach high temperatures that sear foods without open flames. For many home cooks, it's a practical alternative to charcoal or gas grills, especially in apartments or places with outdoor restrictions. A well-chosen electric grill can deliver crispy crusts, smoky flavors via smokeless techniques, and consistent cooking results. The Grill Cooking team emphasizes that while electric units can't perfectly replicate all outdoor grill aromas, they can produce excellent results with proper technique, preheating, and control. When you set expectations, you can enjoy quick weeknight meals and weekend cookouts inside a borrowed kitchen or a dorm room. In this guide we focus on practical, safe indoor grilling, and we refer to Grill Cooking analyses to underscore best practices in heat control, placement, and maintenance. In the modern kitchen, an electric grill is not a toy; it's a versatile tool that fits into daily routines, helping you elevate simple ingredients into exciting, satisfying meals.
Safety considerations for indoor grilling
Indoor grilling, even with an electric unit, involves heat, smoke, and electrical considerations. Always use a heatproof surface away from walls and cabinets, connect to a grounded outlet, and ensure your cooking area has adequate ventilation. Do not leave grills unattended while heating, and keep a lid or cover handy to manage flare-ups. Smoke alarms should be in working order, and you should avoid using outdoor-only fuels or accessories that may introduce unsafe residues. Grill Cooking emphasizes that vigilance and a prepared setup dramatically reduce smoke and odor, helping you enjoy meals without disturbing neighbors or roommates. If you use a hood fan or window exhaust, align it to vent smoke away from living spaces. Regularly inspect power cords for fraying and never touch hot metal with bare hands. Following these practices keeps indoor grilling both safe and satisfying.
Key features to look for in an indoor electric grill
When shopping for an indoor electric grill, prioritize adjustable temperature control, a durable nonstick surface, and a well-designed lid that traps heat for even cooking. A sufficient cooking surface matters for searing larger cuts or multiple portions, while removable plates make cleaning simpler. Look for built-in temperature probes if you want precise doneness, and check if the grill includes a drip tray to reduce flare-ups. An evenly heated grate ensures consistent results across different foods, from steaks to vegetables. A reliable thermostat helps you avoid scorching and undercooking, while safety features like automatic shutoff add peace of mind during busy weeknights. The Grill Cooking team notes that choosing a model with easy-access plates and dishwasher-safe parts dramatically shortens cleanup time after meals.
Setting up your indoor electric grill: placement, power, ventilation
Place the grill on a heat-resistant surface in an open area with unobstructed space around it. Keep it away from edges, cabinets, and flammable materials. Use a grounded outlet and avoid multi-plug adapters to reduce electrical risk. If possible, position the grill near a ventilation source—an exhaust hood, range hood, or a window fan—to push smoke and odors outside. Preheat according to the manufacturer’s instructions, usually for 5–7 minutes, to ensure a proper sear. Gather tools like tongs, a thermometer, and a small brush ready before you start so you don’t interrupt cooking to search for equipment. Following these setup steps minimizes smoke, improves heat consistency, and makes indoor grilling more enjoyable.
Techniques for achieving great results: searing, indirect heat, and airflow
Use direct heat for quick sears on proteins, then finish with indirect heat under a closed lid to prevent drying. Maintain moderate airflow to move any smoke away from your face while preserving flavor. For vegetables and delicate proteins, start with lower heat and monitor closely to avoid charring. Resting meat after cooking helps juices redistribute, producing juicier results. If your grill includes a smokeless mode or flavor-infused plates, experiment with them, but don’t rely on smoke to replace proper cooking temperatures. The most reliable results come from consistent heat, careful timing, and mindful flipping—two flips max per side for most foods.
Cleaning and maintenance for longevity
Let the grill cool completely before cleaning. Remove removable plates and wash with warm, soapy water; avoid harsh abrasives that can damage nonstick coatings. Wipe the exterior with a damp cloth and dry thoroughly to prevent rust. Regularly empty and clean the drip tray to minimize buildup and odor. Schedule deeper cleanings monthly if you grill often. A well-maintained grill not only lasts longer but also performs more consistently, delivering better searing and even cooking over time. Grill Cooking recommends a quick wipe-down after each use and a thorough quarterly clean to preserve coatings and performance.
Authority sources and further reading
For safety and cooking guidance, consult reputable sources:
- https://www.cdc.gov
- https://www.fda.gov
- https://extension.illinois.edu These resources provide general safety practices for home cooking and appliance use, which complements the techniques outlined in this guide.
Troubleshooting common issues
If you notice uneven heating, reposition the food to ensure even contact with the grill surface and verify that the heat source is functioning properly. Excess smoke may indicate high fat content or dripping juices; in this case, use the drip tray and increase ventilation. If parts are difficult to clean, soak removable plates briefly in warm soapy water to loosen residue before scrubbing. Finally, if the unit shuts off during use, check the cord, outlet, and any built-in safety features to determine whether a reset or rest period is required. Regular maintenance and mindful operation reduce most common issues.
Tools & Materials
- indoor electric grill(Choose model with adjustable heat and removable plates)
- heat-resistant gloves(For handling hot grates and lids)
- tongs (sturdy, long-handled)(For flipping and moving food without piercing)
- meat thermometer(Ensure safe cooking temperatures)
- oil spray or brush(Lightly oil grates to prevent sticking)
- drip tray and liner (if included)(Use liners to simplify cleanup)
- cleaning brush and non-abrasive sponge(Keep coatings intact)
- heatproof surface protection (silicone mat, trivet)(Protect countertops from heat)
Steps
Estimated time: 40-60 minutes
- 1
Prepare and preheat
Set the grill on a heatproof surface and plug in to a grounded outlet. Preheat to the recommended searing temperature for your target food, usually 375–450°F (190–232°C). This ensures a proper crust and even cooking from the first bite.
Tip: Preheating helps avoid sticking and ensures faster, more even searing. - 2
Prep food and season
Pat dry proteins and vegetables. Lightly oil and season, focusing on salt and pepper or your favorite dry rub. Dry surfaces promote better browning and flavor development.
Tip: Patting dry prevents excess moisture from steaming the surface. - 3
Oil the grill and start cooking
Spray or brush a light coat of oil on the grates to reduce sticking. Place food on the grill and resist the urge to turn too soon; wait until slow, easy releases indicate it’s ready to flip.
Tip: Use tongs to flip once or twice to preserve juices. - 4
Control heat and use lid wisely
For thicker cuts, use indirect heat by closing the lid and allowing the interior to finish cooking. Adjust temperature to maintain steady heat rather than intense bursts that char the exterior.
Tip: Lid-on cooking preserves moisture and enhances even doneness. - 5
Check temperature and rest
Use a thermometer to confirm doneness (e.g., 145°F for pork, 165°F for poultry, per guidelines). Let meat rest briefly before serving to redistribute juices.
Tip: Resting improves juiciness and flavor distribution. - 6
Finish and serve
Once target temps are reached, remove food and let it rest. Slice against the grain if applicable and present with your preferred sides or sauces.
Tip: A little rest time makes a noticeable difference in texture. - 7
Clean while warm
While the grill is still warm, remove plates and wipe down surfaces. Soak removable parts if needed and dry thoroughly before storage.
Tip: Cleaning after each use prevents stubborn buildup and extends life.
FAQ
Is it safe to use an electric grill indoors?
Yes, indoor use is safe when you follow manufacturer directions, maintain ventilation, and monitor heat. Keep flames away and unplug when not in use.
Yes—keep ventilation active and monitor temperature for safe indoor grilling.
What foods work best on an indoor electric grill?
Steaks, chicken, pork, seafood, and sturdy vegetables cook well. Cut foods evenly and avoid overcrowding for even browning.
Steaks, chicken, pork, seafood, and sturdy vegetables, cooked in teams or batches as needed.
How hot should an indoor electric grill get?
Most grills perform well in the mid-to-high range; refer to your model’s manual for exact temperatures and safe limits.
Use the mid-to-high range per your grill’s manual for best results.
Can I get a smoky flavor without outdoor smoke?
Some smoke is normal, but you can simulate flavor with marinades and smoke-flavored finishes; use ventilation to keep smoke down.
A small amount of smoke is normal; rely on marinades and ventilation to manage odor.
How do I clean an indoor electric grill effectively?
Unplug, wait for cooling, remove plates, wash with warm soap, and dry completely. Regular cleaning keeps coatings intact and reduces sticking.
Unplug, cool, remove parts, wash, and dry thoroughly after use.
Watch Video
Quick Summary
- Choose an indoor electric grill with adjustable heat and removable plates.
- Preheat, sear, then finish with controlled indirect heat under a lid.
- Ventilate well and clean promptly after cooking.
- Rest meat before serving to maximize juiciness and flavor.