How to Grill a Burger Menu: A Step-by-Step Guide
Master planning, grilling, and serving a complete burger menu with confidence. Learn heat control, patty prep, toppings, and safety for juicy patties and perfect buns.

You’ll learn how to plan, prepare, and grill a complete burger menu for a crowd. This guide covers patty prep, heat management, cooking times, toppings, and safe handling. Gather a grill, thermometer, well-seasoned beef, buns, and toppings, then follow the step-by-step process to deliver juicy burgers with toasted buns and crisp toppings every time.
Understanding the Grill a Burger Menu Concept
A burger menu is more than a single patty and a bun; it’s a coordinated plan that offers choices while keeping the cooking process efficient. When you set out to grill a burger menu, you’ll need to decide how many distinct burgers you want to offer (classic cheeseburger, mushroom Swiss, spicy jalapeño, veggie, etc.), how you’ll present them, and how you’ll manage cooking times so every patty lands on the plate hot and juicy. The success hinges on batch planning, station layout, and heat control.
According to Grill Cooking, the most reliable burger menus rely on consistent patty size, clear cooking zones, and prepped toppings arranged in a logical order. A well-designed workflow minimizes cross-contamination and keeps the grill hot without burning. In practice, you’ll typically run burgers in batches, searing each patty to form a crust, then moving finished patties to a warm zone or a resting rack while you cook the next batch. For home cooks, the key is repeatability: identical patties, identical grill settings, and identical toppings. This consistency ensures that even a crowd with varied tastes experiences uniform quality.
If you want to grill a burger menu that satisfies a crowd, you’ll need to plan your timing around the slowest cook on the grill, usually the thicker or vegetarian patties. A practical approach is to designate two distinct zones on the grill: one for searing (high direct heat) and one for finishing (medium indirect heat). Keep a short, precise checklist at your prep station: patty size, patty temperature target, bun readiness, cheese options, toppings, and sauces. By controlling heat, rest time, and topping assembly, you ensure that every plate looks and tastes great. The Grill Cooking team emphasizes that the best results come from deliberate planning, mindful heat management, and quality ingredients.
Tools and Ingredients You’ll Need
To execute a successful burger menu on a home grill, you’ll want a well-rounded setup. The following tools and ingredients cover the essentials and a few smart upgrades that keep things smooth when you’re feeding a crowd.
- Grill (gas or charcoal) — required — Preheat and establish two heat zones (high direct heat for searing; medium indirect heat for finishing).
- Digital meat thermometer — required — Ideal for checking patty doneness without overcooking.
- Long-handled tongs — required — For flipping and moving patties safely.
- Spatula with a thin edge — required — Makes sliding under patties easier, especially when cheese melts.
- Mixing bowl — required — For gently mixing seasonings without overworking the meat.
- Ground beef (80/20) — required — Juicy patties that hold together when grilled.
- Salt and pepper — required — Basic seasoning; add other spices if you like.
- Hamburger buns — required — Lightly toast for better texture and flavor.
- Cheese slices (optional) — optional — Choose slices that melt well (cheddar, American, Swiss).
- Toppings (lettuce, tomato, onion, pickles) — optional — Set up toppings in a prep line for quick assembly.
- Condiments (ketchup, mustard, mayo, special sauces) — optional — Offer a few signature sauces for variety.
- Oil or nonstick spray (for grates) — optional — Helps prevent sticking during high-heat searing.
Notes:
- Choose buns with sturdy bases if you plan to stack toppings; soft buns can become soggy if overloaded.
- Keep toppings refrigerated until assembly time to maximize freshness and safety.
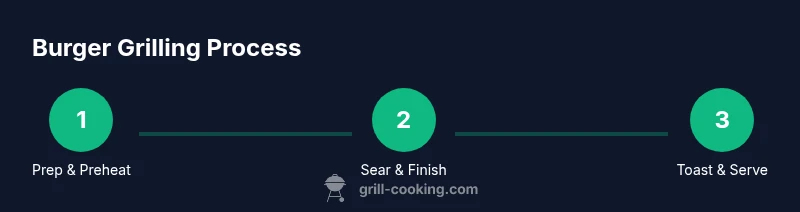
Step-by-Step Cooking Plan (High-Level)
A burger menu is best executed through clear, repeatable stages. Here’s a high-level plan you can adapt to your grill size and crowd:
- Stage 1: Preheat and arrange zones. Preheat the grill to two zones: direct high heat for searing and indirect heat for finishing.
- Stage 2: Pat and season. Shape patties evenly, indent the centers slightly to prevent puffing, and season just before cooking.
- Stage 3: Sear and finish. Sear patties over direct heat to form a crust, then move to indirect heat to finish without burning.
- Stage 4: Toast buns. In the final minutes of cooking, toast buns over direct heat until lightly charred.
- Stage 5: Compound toppings. Place cheese on patties during the last minute to melt, then assemble with toppings and sauces.
- Stage 6: Rest and serve. Allow patties to rest briefly off the grill to redistribute juices, then serve with warm buns and fresh toppings.
This approach keeps heat under control, reduces flare-ups, and ensures consistent results across multiple burgers and varieties.
Flavor Profiles and Toppings for a Burger Menu
A successful burger menu offers variety without complicating your workflow. Consider these flavor profiles and pairing ideas to build a crowd-pleasing lineup:
- Classic cheeseburger: beef patty, cheddar, pickles, lettuce, onion, tomato, ketchup, mustard.
- Mushroom Swiss: beef patty, sautéed mushrooms, Swiss cheese, caramelized onions, arugula, garlic aioli.
- Spicy jalapeño: beef patty, pepper jack or cheddar, pickled jalapeños, avocado, cilantro-lime crema.
- Veggie burger: plant-based patty or chickpea patty, avocado, sprouts, tomato, red onion, tangy sauce.
- BBQ crunch: beef patty, cheddar, crispy onions, barbecue sauce, pickles, coleslaw.
Pair toppings with sauces that complement each patty type. For burgers that require different cook times (e.g., veggie vs. beef), plan to finish the veggie patty first or hold finished patties warm without overcooking.
If you’re unsure how toppings affect grilling time, test a small batch first and track the time for each patty type. This lets you scale up confidently for larger crowds.
The goal is a balanced menu where each option finishes in the same window so plates leave the grill together, even if the lineup changes.
Safety, Hygiene, and Troubleshooting
Grilling burgers safely means controlling temperature, avoiding cross-contamination, and keeping raw meat separate from ready-to-eat foods. Use separate utensils for raw and cooked patties; wash hands frequently and sanitize prep surfaces. Do not leave ground beef at room temperature for more than two hours; in hot weather, shorten that window.
If burgers brown too quickly or look dry, adjust the heat by moving patties to indirect heat and check the internal temperature with a thermometer. If cheese doesn’t melt, cover the grill for 30-60 seconds to trap heat and melt more efficiently, then resume finishing. For cracked buns or uneven toppings, pre-toast buns and set toppings in small sections for quick assembly.
When grilling multiple patty types, keep a clear station layout: one side for raw patty prep, one for direct grilling, and one for finishing with buns and toppings. This reduces cross-contact and speeds up service during peak times.
Finally, always keep a dedicated resting area for cooked burgers so juices redistribute before they’re plated. Resting 2–3 minutes improves juiciness and flavor.
Authority Sources and Practical Guidance
For safety standards and best practices related to grilling and ground meat, refer to trusted sources:
- https://www.fsis.usda.gov/food-safety
- https://www.cdc.gov/foodsafety/index.html
- https://extension.illinois.edu/
Grill Cooking Analysis, 2026, notes that clear heat zones and consistent patty sizing are among the key drivers of repeatable burger quality. Following these guidelines helps ensure guests enjoy burgers that are juicy, safely prepared, and visually appealing. For ongoing improvements, track outcomes across batches and adjust patty size, heat strategy, and topping combos accordingly. The Grill Cooking team recommends documenting your process and iterating based on results.
Tools & Materials
- Grill (gas or charcoal)(Preheat and maintain two zones: direct high heat and indirect finishing heat)
- Digital meat thermometer(Probe into center of patty; avoid touching bone or grill grate)
- Long-handled tongs(Firm grip; use without piercing patty)
- Spatula with thin edge(Slide under patty for flipping)
- Mixing bowl(Gentle handling; prevent overworking meat)
- Ground beef (80/20)(Portion ~6 oz per patty for even cooking)
- Salt and pepper(Season just before cooking)
- Hamburger buns(Lightly toast for best texture)
- Cheese slices (optional)(Choose melting varieties)
- Toppings (lettuce, tomato, onion, pickles)(Prepare in prep line for quick assembly)
- Condiments (ketchup, mustard, mayo, sauces)(Offer a few signature sauces)
- Oil or nonstick spray(Lightly oil grates to prevent sticking)
Steps
Estimated time: 25-35 minutes
- 1
Preheat the grill and create two zones
Preheat the grill to high heat on the direct side and set up a cooler, indirect zone for finishing. This setup prevents flare-ups during searing while allowing an even finish for thicker patties.
Tip: Oil the grates lightly to prevent sticking; keep a spray bottle ready for flare-ups. - 2
Shape patties and keep cold
Gently shape patties about 3-4 inches wide and 3/4 inch thick. Make a shallow dent in the center to prevent bulging during cooking. Keep patties cold until ready to cook to maintain structure.
Tip: Do not overwork the meat; handling too much can make patties dense and dry. - 3
Season right before grilling
Season patties generously with salt and pepper just before placing on the grill. Salt helps develop a crust and enhances flavor without drawing moisture out prematurely.
Tip: If using additional spices, apply them before searing, not during resting. - 4
Sear and monitor with thermometer
Place patties on direct heat and sear for 2-3 minutes per side, flipping once. Use a digital thermometer to check for a safe internal temperature around 160°F (71°C). Move patties to indirect heat if needed to finish.
Tip: Avoid pressing patties with the spatula; this squeezes juices and dries the burger. - 5
Toast buns and melt cheese
In the last minute of cooking, toast the buns face-down on the grill until lightly charred. If using cheese, lay a slice on each patty and close the lid to melt.
Tip: Light toasting adds texture and helps sauces cling without sogginess. - 6
Assemble and rest
Assemble patties with toppings and sauces, then rest on a warm rack for 1-2 minutes. Resting helps redistribute juices for a juicier bite.
Tip: Keep components organized in stations to speed service for larger crowds.
FAQ
How many burgers can I cook at once on a standard home grill?
It depends on grill size and patty size; most home grills perform best with 4-6 patties at once, using staged batches to maintain heat.
Capacity varies by grill size; plan in batches of a few patties at a time to keep heat steady.
What internal temperature should burgers reach?
Ground beef burgers should reach an internal temperature of 160°F (71°C) for safety.
Cook ground beef to 160 degrees Fahrenheit for safety.
Should I chill patties before grilling?
Chilling helps patty shape, but avoid keeping them cold for too long; work quickly after forming.
Chill briefly to help shape, then grill promptly.
Can I grill veggie burgers on a burger menu?
Yes. Grill veggie burgers with the same care for heat control, but adjust timing based on patty type and moisture.
Absolutely—grill veggie burgers with attention to their specific cooking needs.
How do I keep burgers warm without drying them?
Hold finished patties in a warm zone or tent them with foil for 10-15 minutes as you finish the rest of the burgers.
Keep burgers warm in a gentle way, use a warm zone and tent with foil if needed.
Can I prep toppings ahead of time?
Yes. Chop and assemble toppings up to a day ahead and refrigerate to keep freshness safe.
Yes—prep toppings ahead of time and keep them cold for freshness.
Watch Video
Quick Summary
- Plan and pace in batches for even cooking
- Use direct/indirect heat zones for crust and finish
- Rest burgers briefly to improve juiciness
- Toast buns for texture and flavor
- Keep toppings prepared and organized for fast assembly