How to Install Grill Lights: A Complete DIY Guide
Learn how to install grill lights safely with a step-by-step approach, covering layout, mounting, wiring, weatherproofing, and testing for safer nighttime grilling.

This guide will show you how to install grill lights in a safe, structured way. You'll plan your setup, choose the right lighting kit, mount fixtures, run weatherproof wiring, and test the system. Follow the steps and safety tips to improve nighttime grilling without compromising grill operation or outdoor electrical safety. This steps-by-step approach emphasizes proper clearance from heat, weatherproof connections, and testing at low power before full use.
How to install grill lights: foundations and safety
Lighting your grill area properly makes nighttime grilling safer and more enjoyable. According to Grill Cooking, the first step is to define the exact area around the grill that needs illumination and to map heat sources. The Grill Cooking team found that proper layout reduces shadows and avoids glare on food. This guide walks you through planning, choosing a kit, mounting, wiring, and testing, with safety as the top priority. We will cover both low-voltage LED solutions and mains-powered setups, explain weatherproofing, and show how to verify performance before cooking. After setting expectations, you’ll understand what tools you need, common mounting positions, and how to avoid common mistakes that can lead to electrical hazards or heat damage. By the end, you’ll have a clear plan and confidence to install grill lights that last for seasons.
Planning your layout: zones, heat, and power sources
The placement of grill lights should account for the grill's heat zones, cookware positioning, and the line-of-sight you want for the cook area. Start by sketching the grill, prep table, and nearby seating, then map where light will hit without causing glare on reflective metal or food surfaces. Decide between mounted fixtures on the hood, edge brackets along the countertop, or overhead bars. Consider power source proximity and whether outdoor outlets are weatherproof and wired through a GFCI. The goal is even coverage that minimizes shadows behind the chef and reduces hot spots that can bake sauces unevenly. This planning phase saves time during actual installation and helps you choose the best kit type and mounting method.
Lighting options: LEDs, color temperature, and brightness
LED technology offers long life, low heat, and flexible mounting. For grills, choose low-profile LED puck lights or flexible LED strips rated for outdoor use. Color temperature in the 3000K-4000K range provides warm, food-friendly tones; higher brightness levels improve visibility, but you should avoid glare that makes it hard to see the food's surface. If ambiance is important, consider dimmable drivers or smart lighting that can be controlled from your phone. Be mindful of IP ratings; outdoor fixtures should be rated at least IP65 to resist rain and splashes. Finally, plan for future upgrades, such as adding under-rail LEDs or extra fixtures on windy nights when visibility matters.
Mounting strategies for durability and accessibility
Choose mounting points that stay clear of heat sources like the grill hood and exhaust; non-metallic mounting brackets can resist heat and corrosion. If you mount under a hood or on a nearby wall, ensure oxygen clearance and access for maintenance. Use weatherproof screws and silicone sealant to prevent water intrusion. Consider quick-disconnect fittings for easy removal during cleaning or winter storage. For overhead installations, use a weatherproof channel or conduit to protect wires from rain and physical damage. Finally, test reach and adjustability to ensure you can alter aim and brightness without removing fixtures.
Wiring options: low-voltage vs mains, and routing outdoors
When wiring outdoor lights, you must balance safety, ease of installation, and cost. Low-voltage LED systems (12V) are generally easier to install and safer for DIY use, but may require a transformer and weatherproof junctions. Mains-powered setups provide strong brightness but require more careful routing and a weatherproof outlet. Run cables along exterior surfaces using grommets and conduit to prevent chafing. Keep wires away from heat sources and ensure all connections are inside waterproof enclosures. If you’re uncertain about electrical codes, consult the local authority or a licensed electrician.
Weatherproofing and safety accessories
Weatherproofing is key to outdoor grill lights. Use IP-rated fixtures, weatherproof connectors, and silicone sealant around all entry points. Install a cover plate or enclosure for any junction box and seal gaps with non-corrosive sealant. Use cable clamps to secure wires and avoid loose runs that can snag or whip in wind. A smart safety habit is to unplug or switch off the power before cleaning the grill area, and never work on live circuits. Keep a ground fault circuit interrupter (GFCI) outlet accessible for outdoor use.
Testing, calibration, and performance checks
Once wiring is complete, slowly apply power and check for even illumination across the cooking zone. Look for hotspots or dark corners and adjust fixture aim as needed. Check that heat from the grill does not cause fixtures to overheat, and confirm that all connections stay dry during a light rain test. Use a screwdriver to adjust mounting if necessary and verify that dimming controls function smoothly. Document final settings for future reference.
Maintenance, seasonal care, and upgrades
Inspect connections at least twice a year and after heavy weather; look for cracked housings, corroded fasteners, or loose wires. Clean fixtures with a soft cloth to remove grease or dust, and replace any LEDs showing reduced brightness. If you upgrade the lighting, test compatibility with existing wiring and dimmers. In winter months, consider removing easily accessible fixtures to prevent freeze damage or cover them with weatherproof covers.
Troubleshooting and common mistakes
Common issues include flickering lights, uneven brightness, or fixtures overheating. Start by verifying power and grounding, then inspect conduit for cracks or moisture intrusion. Ensure you used the correct waterproof connectors and that seals are intact. A frequent mistake is mounting lights too close to heat or flame, which reduces lifespan and performance. Systematically checking each component reduces troubleshooting time and improves reliability.
Tools & Materials
- Outdoor-rated LED grill light kit (low-voltage or 120V depending on kit)(Choose kits with heat-resistant housings and dimming options)
- Weatherproof transformer or power supply(If using 12V system, ensure compatibility with kit)
- Exterior-grade wiring and conduits(Use weatherproof conduits for outdoor routing)
- Weatherproof junction box and grommets(Seal all entry points to prevent moisture ingress)
- Silicone sealant (heat-resistant)(Waterproofs seams and junctions)
- Conduit clamps and cable ties(Secure wiring along surfaces)
- Drill with appropriate bits(Pilot holes for mounting hardware)
- Screwdriver set and wire strippers(Essential for mounting and wiring)
- Voltage tester or multimeter(Verify power is off before touching wiring)
- GFCI outdoor outlet or weatherproof power strip(Optional but recommended for safety)
- Heat-resistant mounting brackets or clamps(Keep fixtures away from direct flame)
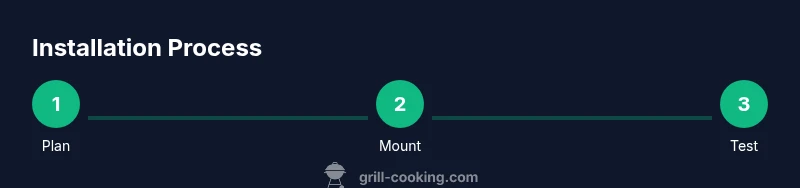
Steps
Estimated time: 60-120 minutes
- 1
Plan your lighting layout
Create a simple map of the grill, prep area, and seating. Mark mounting points on the hood, walls, or overhead structures, considering heat sources and sightlines. This plan guides fixture count, type, and wiring routes.
Tip: Draft a quick sketch with measurements to prevent rework. - 2
Choose a lighting kit
Evaluate LED types (puck, strip, or bar), IP rating, and voltage. Prefer kits with dimming options and warm color temperature for food visibility. Ensure compatibility with your power source.
Tip: Prioritize low-profile fixtures to minimize heat exposure and obstruction. - 3
Check power requirements
Decide between low-voltage (12V) or mains-powered lighting. Plan transformer location, routing, and weatherproofing. Verify that your outdoor circuit can handle the added load.
Tip: If in doubt, consult a licensed electrician before connecting to an outdoor circuit. - 4
Mount fixtures at planned points
Install brackets or mounting plates away from direct flame, heat vents, and grease splatter. Use stainless steel screws and apply sealant where needed. Leave some adjustability for aiming lights later.
Tip: Check clearances with a dry run before drilling final holes. - 5
Route wiring safely
Run cables along exterior surfaces using conduits or weatherproof channels. Avoid crossing grill covers or hinges and keep wires away from moving parts. Use grommets to protect wires as they pass through any holes.
Tip: Keep power runs elevated off ground level to prevent water exposure. - 6
Make safe electrical connections
Power down all circuits. Use waterproof connectors or junction boxes, and secure connections with clamps. Double-check that all splices stay dry and dust-free.
Tip: Test with a voltage tester before restoring full power. - 7
Seal and weatherproof
Apply silicone sealant around junctions and entry points. Seal any gaps in mounting plates. Enclose exposed wiring in weatherproof housings to prevent moisture ingress.
Tip: Re-check seals after the first rain to confirm durability. - 8
Test light output and adjust
Power up at a low setting and inspect illumination across the cooking zone. Adjust angles to minimize shadows and avoid glare on shiny surfaces. Verify that dimming controls function smoothly.
Tip: Document final aiming angles for future maintenance. - 9
Finalize and document
Do a final safety inspection, label circuits, and store tools for future maintenance. Create a quick maintenance routine to check fixtures seasonally.
Tip: Keep a small diagram of your wiring path for future upgrades.
FAQ
Do I need an electrician to install grill lights?
For most outdoor lighting installs, a DIY approach is feasible if you follow safety guidelines and use weatherproof components. If you’re unsure about wiring to the mains or outdoor GFCI requirements, consult a licensed electrician.
For many homeowners, you can DIY grill lights, but consult an electrician if you’re unsure about mains wiring.
Can I install grill lights without hard-wiring?
Yes. Battery-powered or solar options exist, and some low-voltage kits can be run from a battery-backed transformer. Keep in mind brightness and reliability may be lower than mains-powered solutions.
Yes, you can use battery or solar options, but brightness might be lower than wired systems.
Are grill lights safe near heat?
LED lights generate minimal heat and are generally safe near grills, provided you maintain heat clearance and use heat-rated fixtures. Avoid direct exposure to flame and grease splash.
LEDs stay cool, but keep them away from direct flame and grease.
What power source should I use for outdoor grill lights?
Choose between a low-voltage transformer (12V) for easier DIY and a weatherproof main outlet for brighter light. Always follow local electrical codes and use outdoor-rated equipment.
Pick either 12-volt kits or weatherproof mains outlets, and follow local codes.
How do I test the lights after installation?
Power the system at low brightness, check evenly lit zones, inspect seals for leaks, and verify that all connections stay dry during a light rain test.
Turn on briefly at low power and inspect for even lighting and moisture.
Watch Video
Quick Summary
- Plan layout before mounting to prevent rework.
- Use weatherproof, low-voltage lighting for outdoor setups.
- Secure wiring with conduit and waterproof connectors.
- Test at low power and confirm safety before full use.
- Maintain fixtures seasonally to extend lifespan.