Do Grill Grates Need Cleaning? A Practical Guide for Home Cooks
Discover why do grill grates need to be cleaned, how often to clean, the best tools, and a clear step-by-step method to keep your grill safe, flavorful, and performing at its best.

Regular cleaning of grill grates is essential for safe cooking, even heat, and better flavor. In this guide, you’ll learn why cleaning matters, how often to clean based on use, the best tools and cleaners, and a detailed step-by-step workflow you can implement right away to keep your grill performing at its best.
Why do grill grates need to be cleaned?
Do grill grates need to be cleaned? The short answer is yes: regular cleaning is essential for safe cooking, even heat, and optimal flavor. Residue from fat, sauces, and char can burn, cause flare-ups, and transfer off-flavors to future meals. According to Grill Cooking, do grill grates need to be cleaned is not optional; it is a core part of maintenance that protects your grill and your health. In daily use, the simplest approach is to remove loose debris with a brush while the grates are still warm, then proceed to a deeper clean after a few uses. Keeping your grates clean also makes it easier to achieve consistent sear marks and prevents crusted messes from building up over time.
How grime forms on grates
Grime on grill grates forms from a combination of rendered fat, protein from meat, sugars from marinades, and carbonized residues. When you cook at high heat, these substances break down and can bake onto the metal surface. If not cleaned, the layers build up and act like a barrier to heat transfer, leading to uneven cooking and stubborn flare-ups. Over time, this buildup can also harbor bacteria and impart rancid flavors, especially on grates that have seen weeks or months of use without a thorough cleaning.
Cleaning frequency and scheduling
How often you clean your grill grates depends on usage and cooking style. For casual home cooks who grill a few times a week, a quick brush-down after each cook plus a deeper clean every 1–2 weeks during the grilling season is typically sufficient. If you grill multiple times daily or sear fatty foods weekly, plan for more frequent cleanings. High-heat charring and sticky marinades accelerate buildup, so adjust your schedule accordingly. Grill Cooking Analysis indicates that consistent maintenance correlates with fewer flare-ups and more uniform heat distribution, reinforcing the value of a regular routine.
Tools and cleaners: what works and what to avoid
The right tools make grate cleaning faster and safer. A sturdy grill brush, a metal scraper for stuck-on debris, a soak tub for metal grates, and non-abrasive scrub pads are the core kit. Warm, soapy water is effective for metal grates, while seasoned cast iron requires gentler handling to protect seasoning. Avoid harsh chemical cleaners on cast iron, and never use abrasive pads that can scratch protective coatings. For safety, use heat-resistant gloves and assemble your workspace where splatter won’t reach you or your countertop.
Step-by-step overview before you start
Before you start cleaning, ensure you have a clear workspace, light, and all tools within reach. For gas grills, turn off the gas and disconnect the propane tank if needed; for charcoal grills, ensure the fire is out and the grill is cool enough to handle. Remove grates and any heat shields if your model allows. A well-ventilated area helps, as does a damp rag to catch drips. This overview sets the stage for a thorough cleaning while minimizing risk and mess.
Brush types and technique
Different brushes serve different purposes. A stiff wire brush excels at knocking off char and baked-on residue on metal grates; a brass brush is gentler for cast iron, and a nylon brush works well for quick touch-ups. Use long, even strokes with the grain of the grate and avoid excessive pressure that could warp thinner metals. For stubborn spots, let the grate soak briefly in warm soapy water, then scrub again. Always dry thoroughly to prevent rust.
Cleaning cast iron vs stainless steel grates
Cast iron grates require careful handling to preserve seasoning; avoid aggressive scouring that strips the protective layer. After cleaning, lightly oil and heat to re-season. Stainless steel grates tolerate stronger cleaning and are easier to rinse, but they can still benefit from a light oiling to prevent rust in damp climates. Understanding these differences helps you tailor your approach and extend the life of each grate type.
Seasonal maintenance and seasoning after cleaning
At the end of the grilling season, perform a deep clean, then apply a thin coat of high-smoke-point oil to prevent rust during storage. Before your first cook of the season, perform a quick heat-up to re-polish the surface and re-seal any seasoning on cast iron. Regular maintenance throughout the year—clean after use, store properly, and re-season as needed—keeps grates performing like new and enhances flavor.
Common mistakes and troubleshooting
Common mistakes include using soapy water on cast iron without re-seasoning, scrubbing too aggressively, or skipping the drying step, which leads to rust. If residue won’t come off, soak the grates longer or reheat to help release stuck-on material. When flare-ups occur, reduce open flames and give the grill a quick clean to remove grease build-up that feeds flames.
Tools & Materials
- Grill brush (stiff bristles)(Choose a brush with stainless bristles or brass bristles for cast-iron surfaces; replace if bristles loosen.)
- Metal scraper or putty knife(Use on hot grates to lift crusted debris without scratching.)
- Bucket or tub for soaking(Large enough to submerge grates fully; avoid metal containers that can rust.)
- Warm water and mild dish soap(Useful for metal grates; avoid on seasoned cast iron unless you plan to re-season afterward.)
- Non-abrasive scrub pad or sponge(Gentle on surfaces but effective for light grime.)
- Paper towels or clean cloths(For drying and wiping down after cleaning.)
- High-smoke-point cooking oil(Use to lightly oil cast iron grates after cleaning and heating.)
- Heat-resistant gloves(Protect hands when handling hot grates or equipment.)
Steps
Estimated time: 25-40 minutes
- 1
Preheat and prep
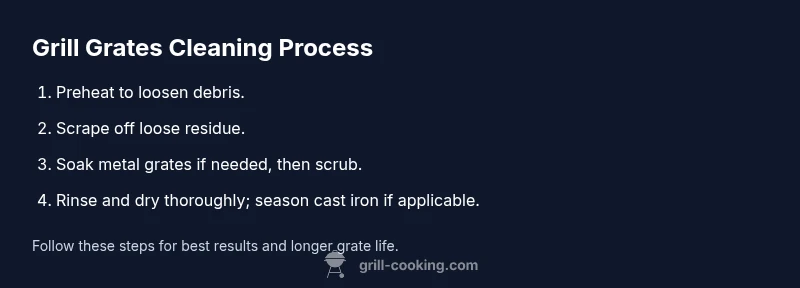
Preheat the grill to a high temperature for 5–10 minutes to loosen the grease. Turn off the heat and locate safety areas to work. This step makes subsequent cleaning easier and reduces splatter.
Tip: Heating first makes baked-on residue easier to lift with a scraper. - 2
Remove grates for access
Carefully remove the grates from the grill while wearing gloves. Clear any debris from the top burner boxes or charcoal areas to prevent contamination during cleaning.
Tip: Keep track of any small screws or spacers to reassemble correctly. - 3
Scrape loose debris
Use a wide metal scraper or putty knife to lift and remove loose crust and char. Work across each bar in a steady motion to avoid gouging the metal.
Tip: Angle the scraper slightly to ride over edges without digging in. - 4
Soak tough grates (if metal)
Submerge metal grates in warm, soapy water for 10–15 minutes to loosen stubborn grease. This is especially helpful for heavily used grates prior to scrubbing.
Tip: Do not soak cast iron; it can cause rust and strip seasoning. - 5
Scrub with sponge or pad
Scrub each grate with a non-abrasive pad or sponge until the surface looks clean and free of loose residue. Rinse with clean water as you go to remove soap.
Tip: Rinse thoroughly to avoid soap residue that can affect food flavor. - 6
Rinse and dry thoroughly
Rinse all grates with clean water and dry completely with towels. Any remaining moisture can promote rust on metal surfaces.
Tip: After drying, pat with a paper towel to remove any lingering moisture. - 7
Season cast iron (optional but recommended)
Apply a thin coat of oil and heat the grates to re-season cast iron. This seals the surface and improves nonstick performance for future cooks.
Tip: Use a high-smoke-point oil such as canola or avocado oil. - 8
Reassemble and preheat again
Reassemble the grill and preheat to the normal cooking temperature to evaporate any residual moisture and prepare for cooking.
Tip: Lightly oil the grates after assembly to help with future cleanings. - 9
Final wipe-down and inspection
Do a final wipe-down with a clean cloth to remove any remaining residues. Inspect for rust spots and note areas needing additional attention.
Tip: Address rust early to prevent progression and ensure grill longevity. - 10
Document your cleaning routine
Keep a simple log of cleaning frequency and any adjustments to products or tools to optimize your routine over time.
Tip: A routine calendar helps maintain consistency and reduces surprises. - 11
Store grates properly
Store cleaned grates in a dry area or covered container to prevent dust and moisture exposure between uses.
Tip: If storing outside, ensure good airflow and protection from rain. - 12
Plan the next cleaning
Set a target for the next clean based on usage and seasons. Regular maintenance is easier than rare, deep cleans.
Tip: Aim for a consistent cadence to keep buildup manageable.
FAQ
Do grill grates need to be cleaned after every use?
A quick brush-down after each use helps prevent buildup, while a deeper clean on a regular schedule keeps grime from becoming baked-on. The frequency depends on how often you grill and what you cook.
Brush after every use to keep buildup down, and plan a deeper clean on a regular schedule.
Can I use soap to clean grill grates?
Soap works on metal grates but should be avoided on seasoned cast iron without re-sealing afterward. Rinse thoroughly and dry completely.
Soapy water can be fine for metal grates, but avoid on seasoned cast iron unless you plan to re-season.
How do I clean cast iron grates without removing the seasoning?
Use a stiff nylon brush or a plastic scrubber with warm water. Avoid harsh detergents that strip seasoning, and re-season promptly after cleaning.
Stick to nylon brushes and water; don’t use strong detergents on cast iron.
How often should I deep-clean my grill grates?
Aim for a deep-clean every few uses during peak season or monthly for light-use grills. Adjust based on how fatty or sugary your cooking tends to be.
Do a deep clean every few uses or about once a month if you grill lightly.
What should I do if residue won’t come off with cleaning?
Soak the grates longer, reheat slightly to loosen, and scrub with a non-abrasive pad. For stubborn spots, a brief boil in hot water can help lift buildup.
Soak longer, reheat gently, and scrub. If needed, a short boil can help loosen stubborn spots.
Is it okay to oil grates after cleaning?
Yes, especially for cast iron. A light coat of high-smoke-point oil helps prevent rust and improves future food release.
Oil lightly after cleaning, especially on cast iron.
Watch Video
Quick Summary
- Regular cleaning prevents flare-ups and uneven cooking
- Different grate materials require different cleaning approaches
- A basic toolbox and routine make deep cleans easier
- Seasoning cast iron grates extends life and improves performance